CLICK+ ANDROID SUPPORT
Product support for the Click+ smart button & accompanying app.
**Please note that the Click+ App must be running in the background to communicate with your Click+ smart button.**
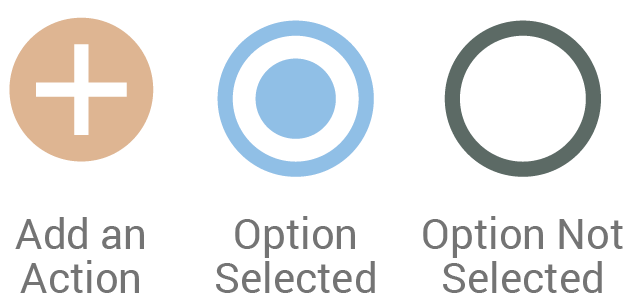
App Button Legend
USING YOUR CLICK+
**Please note that the following Click+ App screens are from a Samsung Galaxy S9+. Functions and screen layouts may differ between Android models.**
Click+ is a small, smart button that connects to your phone or tablet through Bluetooth® wireless technology. Through the free app, you can program the Click+ to perform a variety of actions to simplify interacting with your phone.
Each Click+ can control three different actions. Single-click for your first action, double-click for your second, and click and hold for your third.
Click+ can help you find your missing phone, control music playing from your phone, take better photos, navigate while driving and so much more.
Here are a few important points you should know before getting started with your Click+.
A. The Click+ app MUST be running in the background of your phone to communicate with your Click+.
B. A maximum of 4 Click+ smart buttons can be connected to one mobile device at a time.
C. Click+ smart buttons can only be paired to ONE mobile device at a time.
D. The Bluetooth setting on your device must always be ON.
C. From your phone/tablet, make sure Bluetooth setting is turned ON.
D. Download the “ClickPlus by PowerStick” app from Google Play. If you have an iPhone or iPad, follow the instructions here.
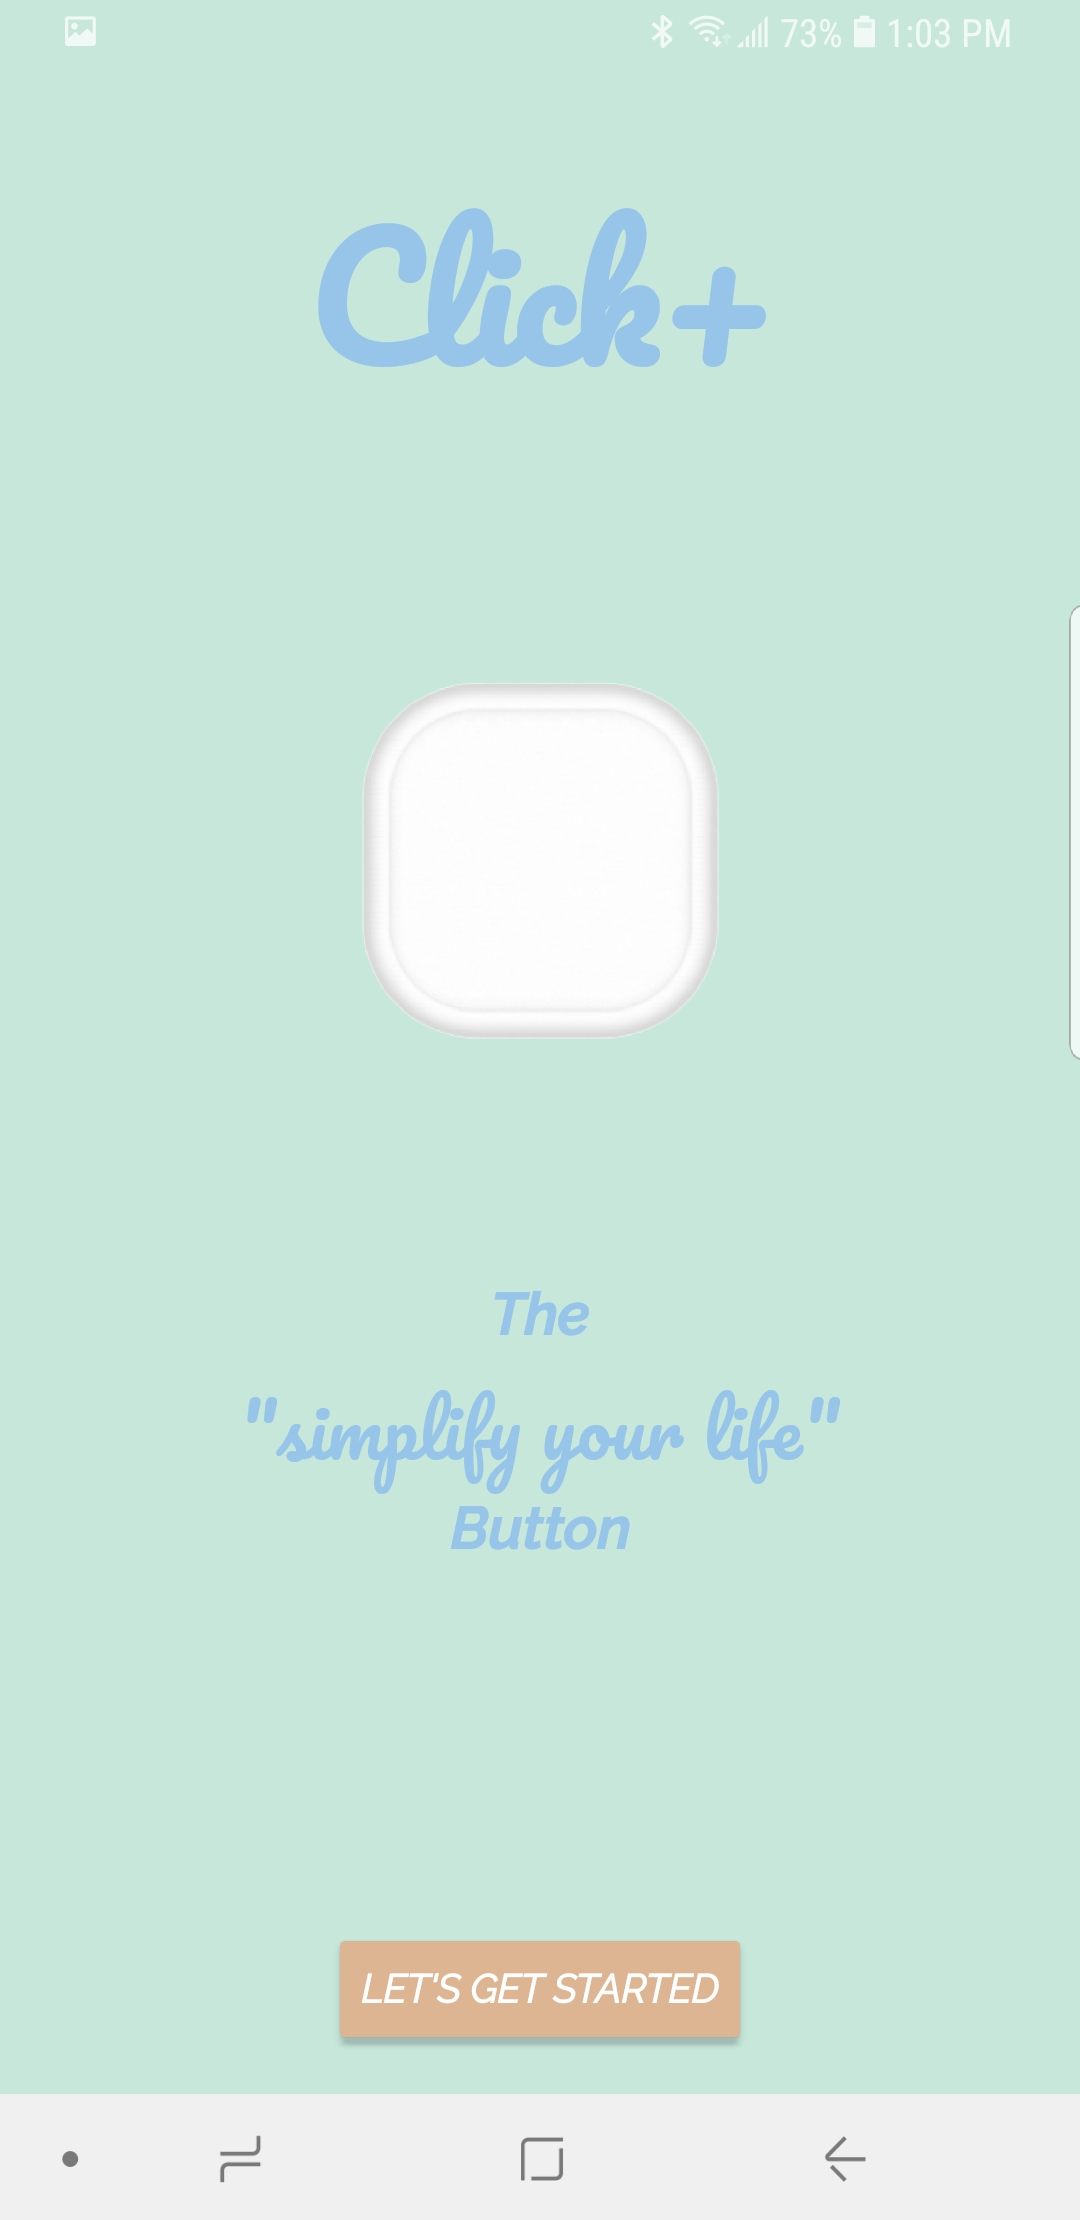
F. Once your app is open, tap LET’S GET STARTED.
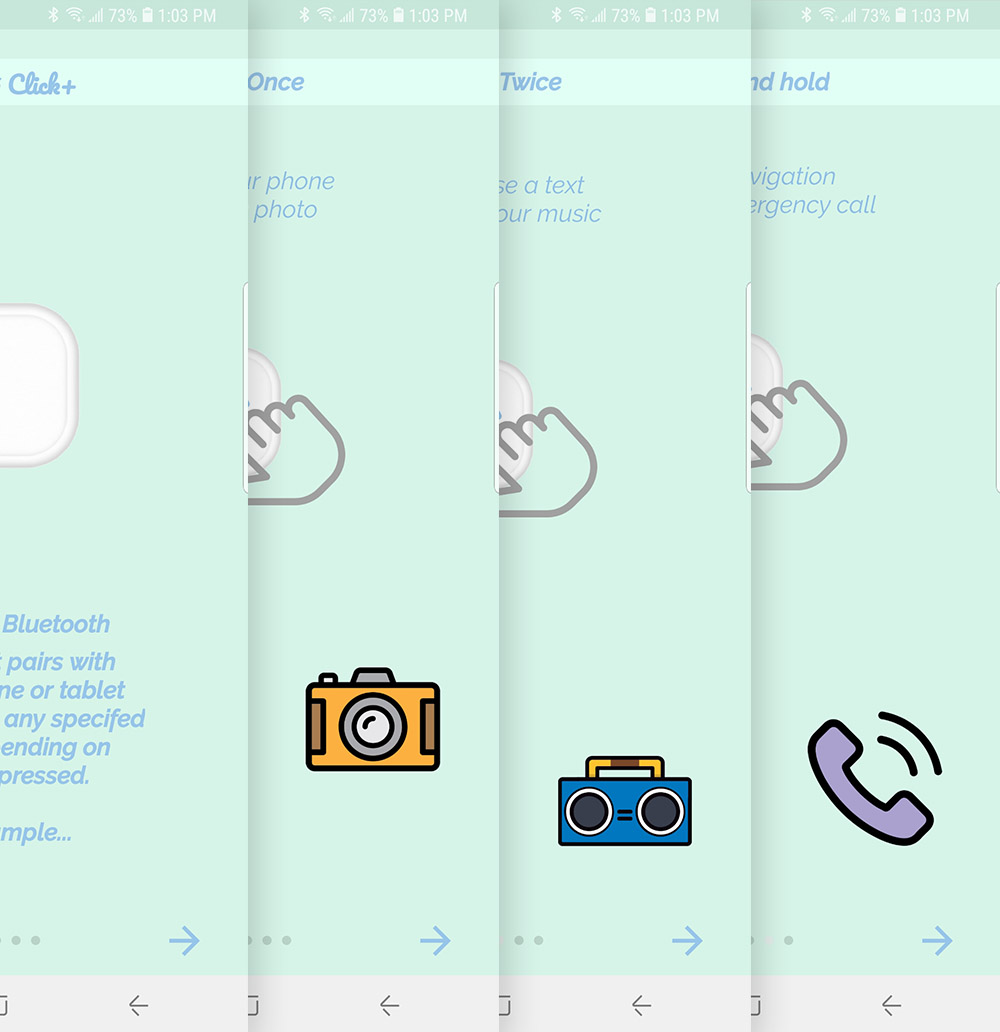
G. Swipe through the introduction screens to get an overview of how the Click+ works.
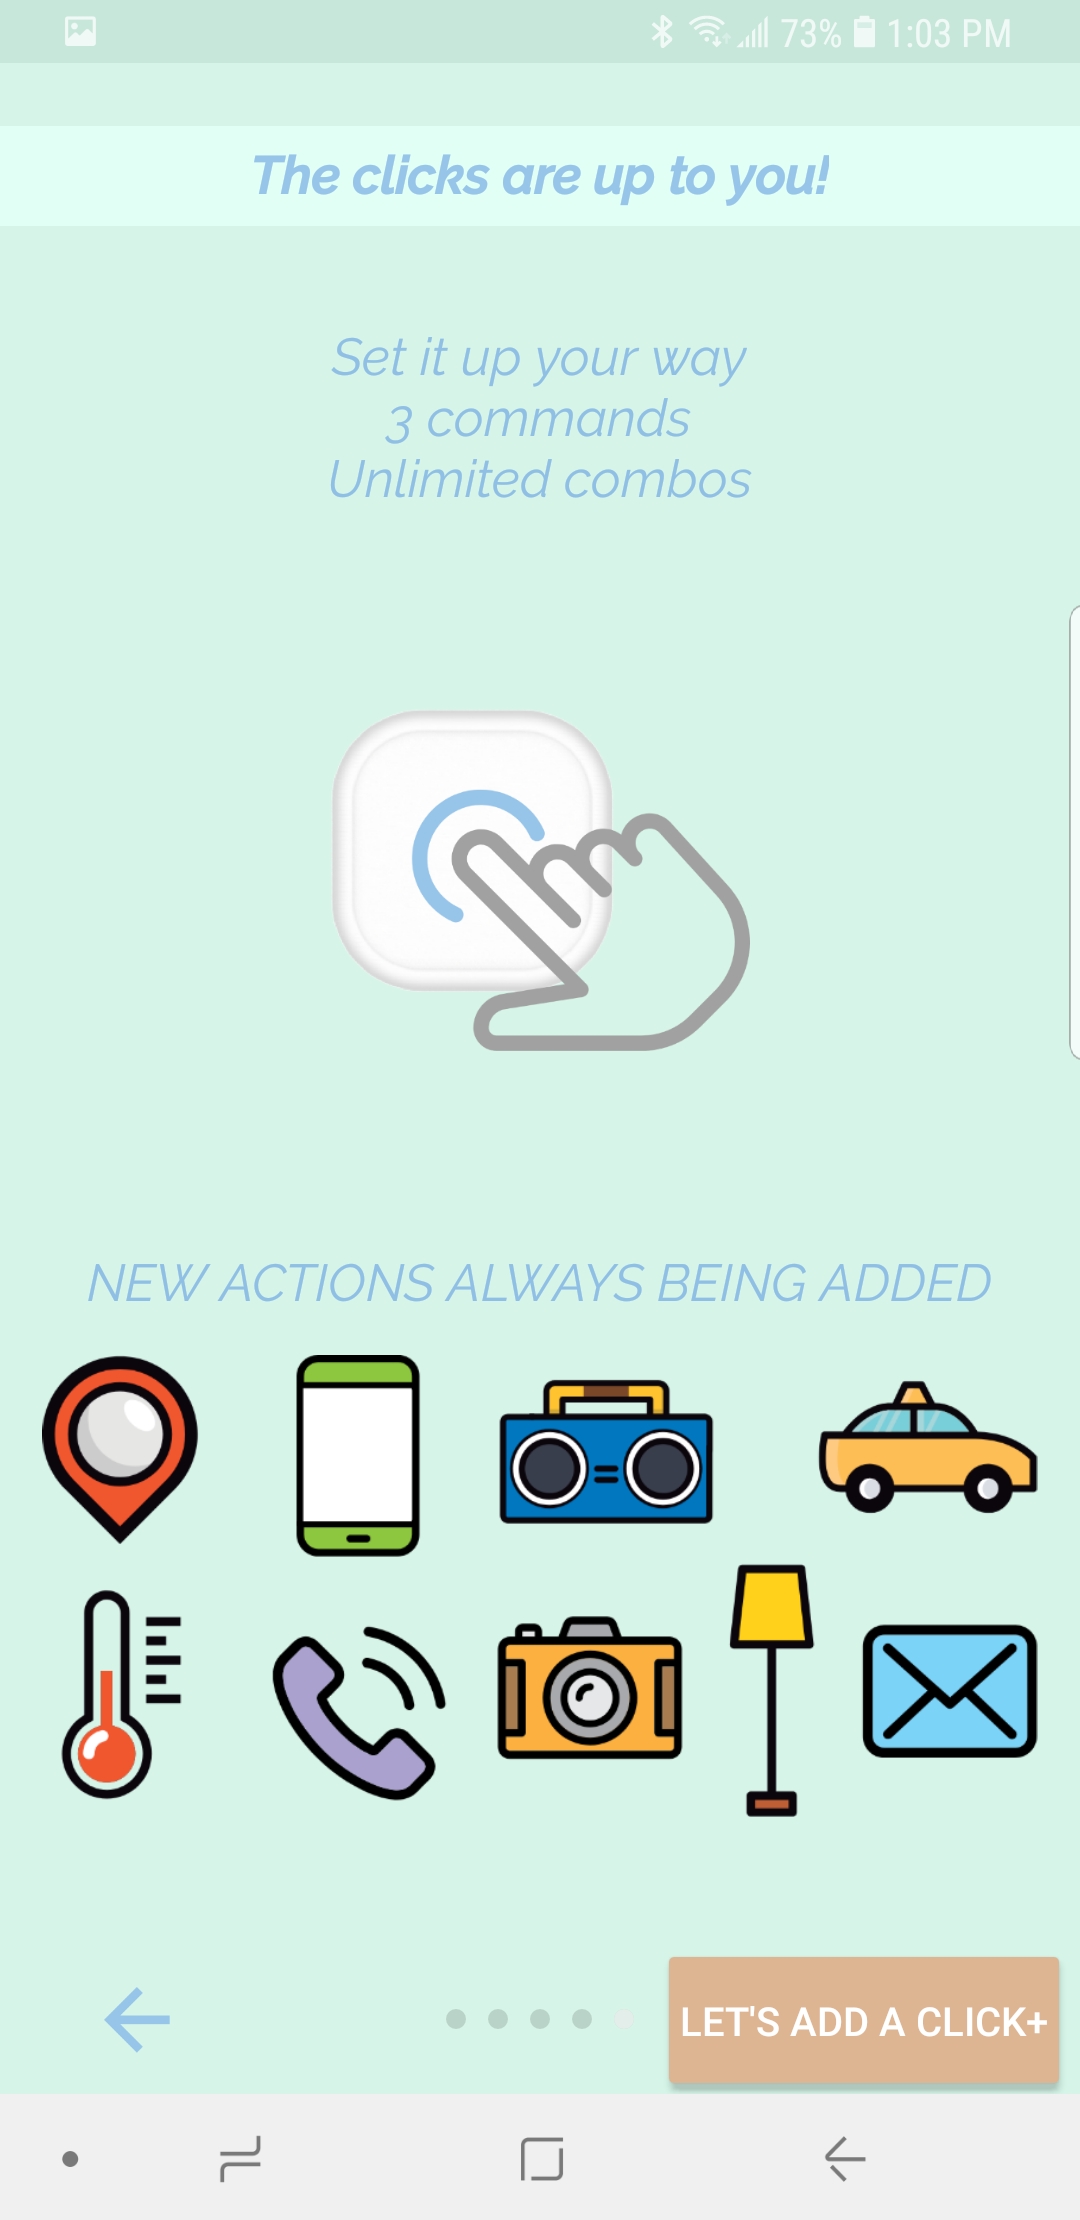
H. On the final introduction screen, tap LET’S ADD A CLICK+.

A. If this is your first time pairing, follow the instructions from the Getting Started section to bring you to this screen. Tap LET’S ADD A CLICK+.
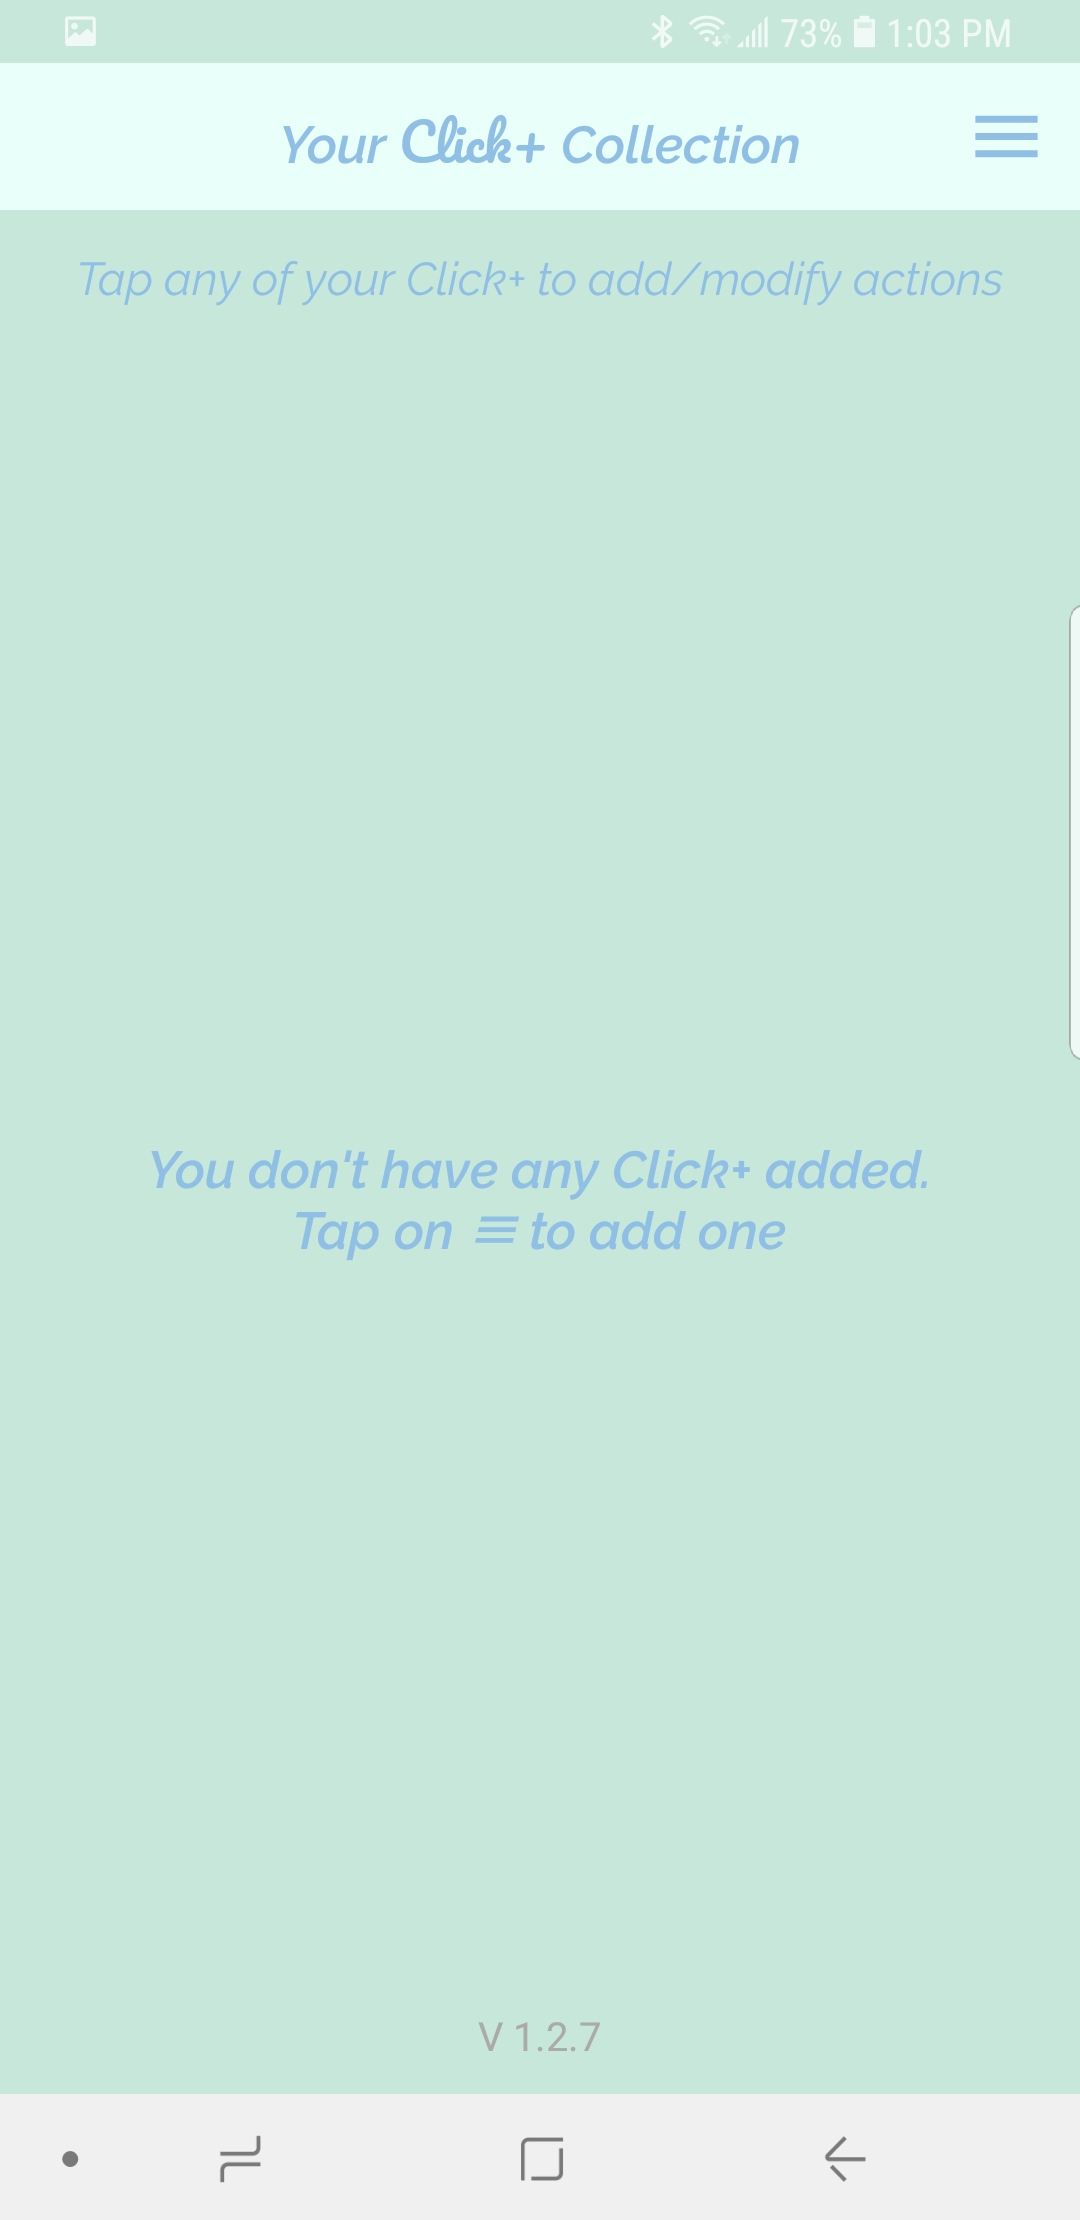
B. This brings you to “Your Click+ Collection”. To pair a Click+, tap the menu button in the top right corner.
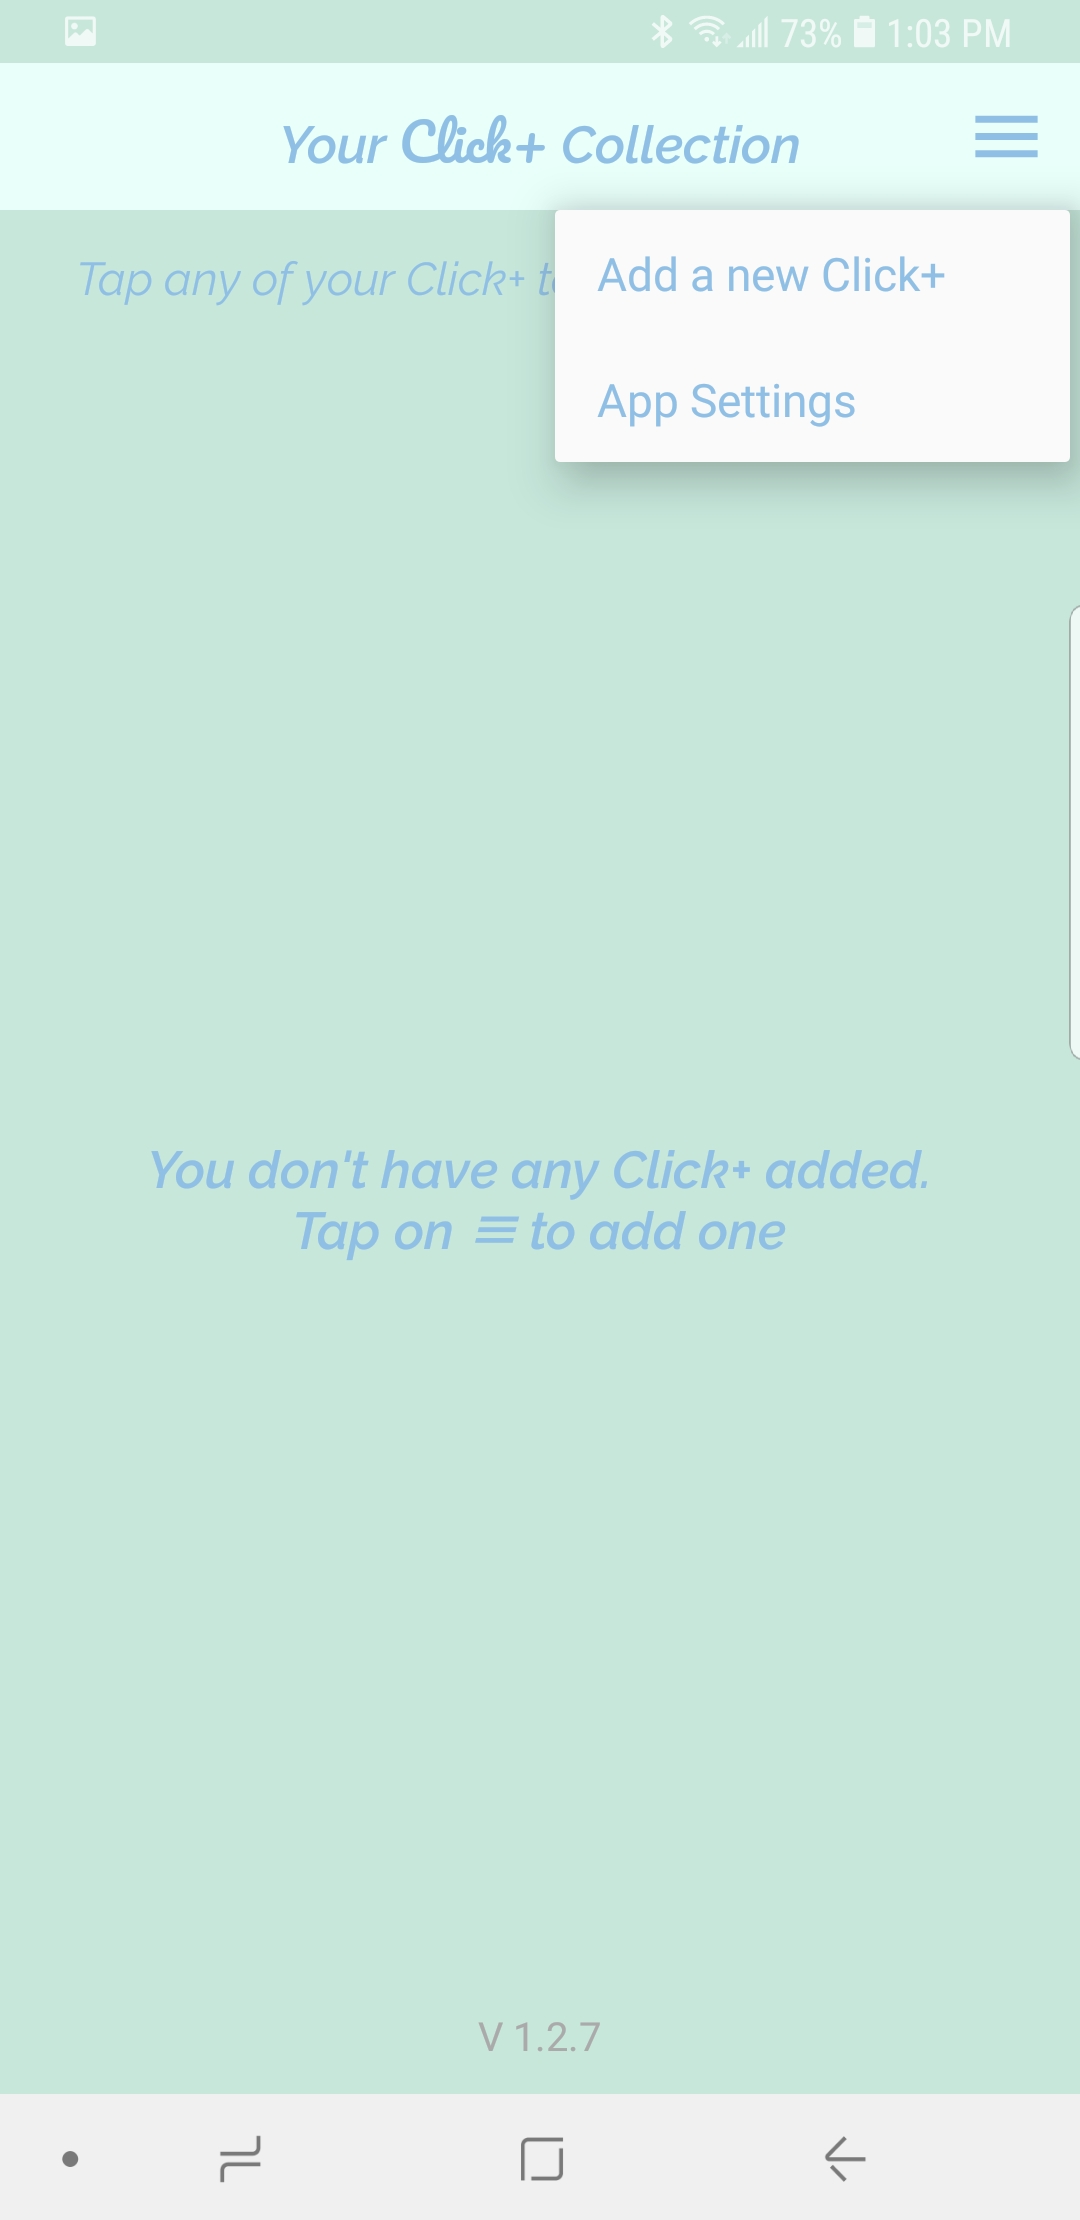
C. Tap ADD A NEW CLICK+ in the dropdown menu.
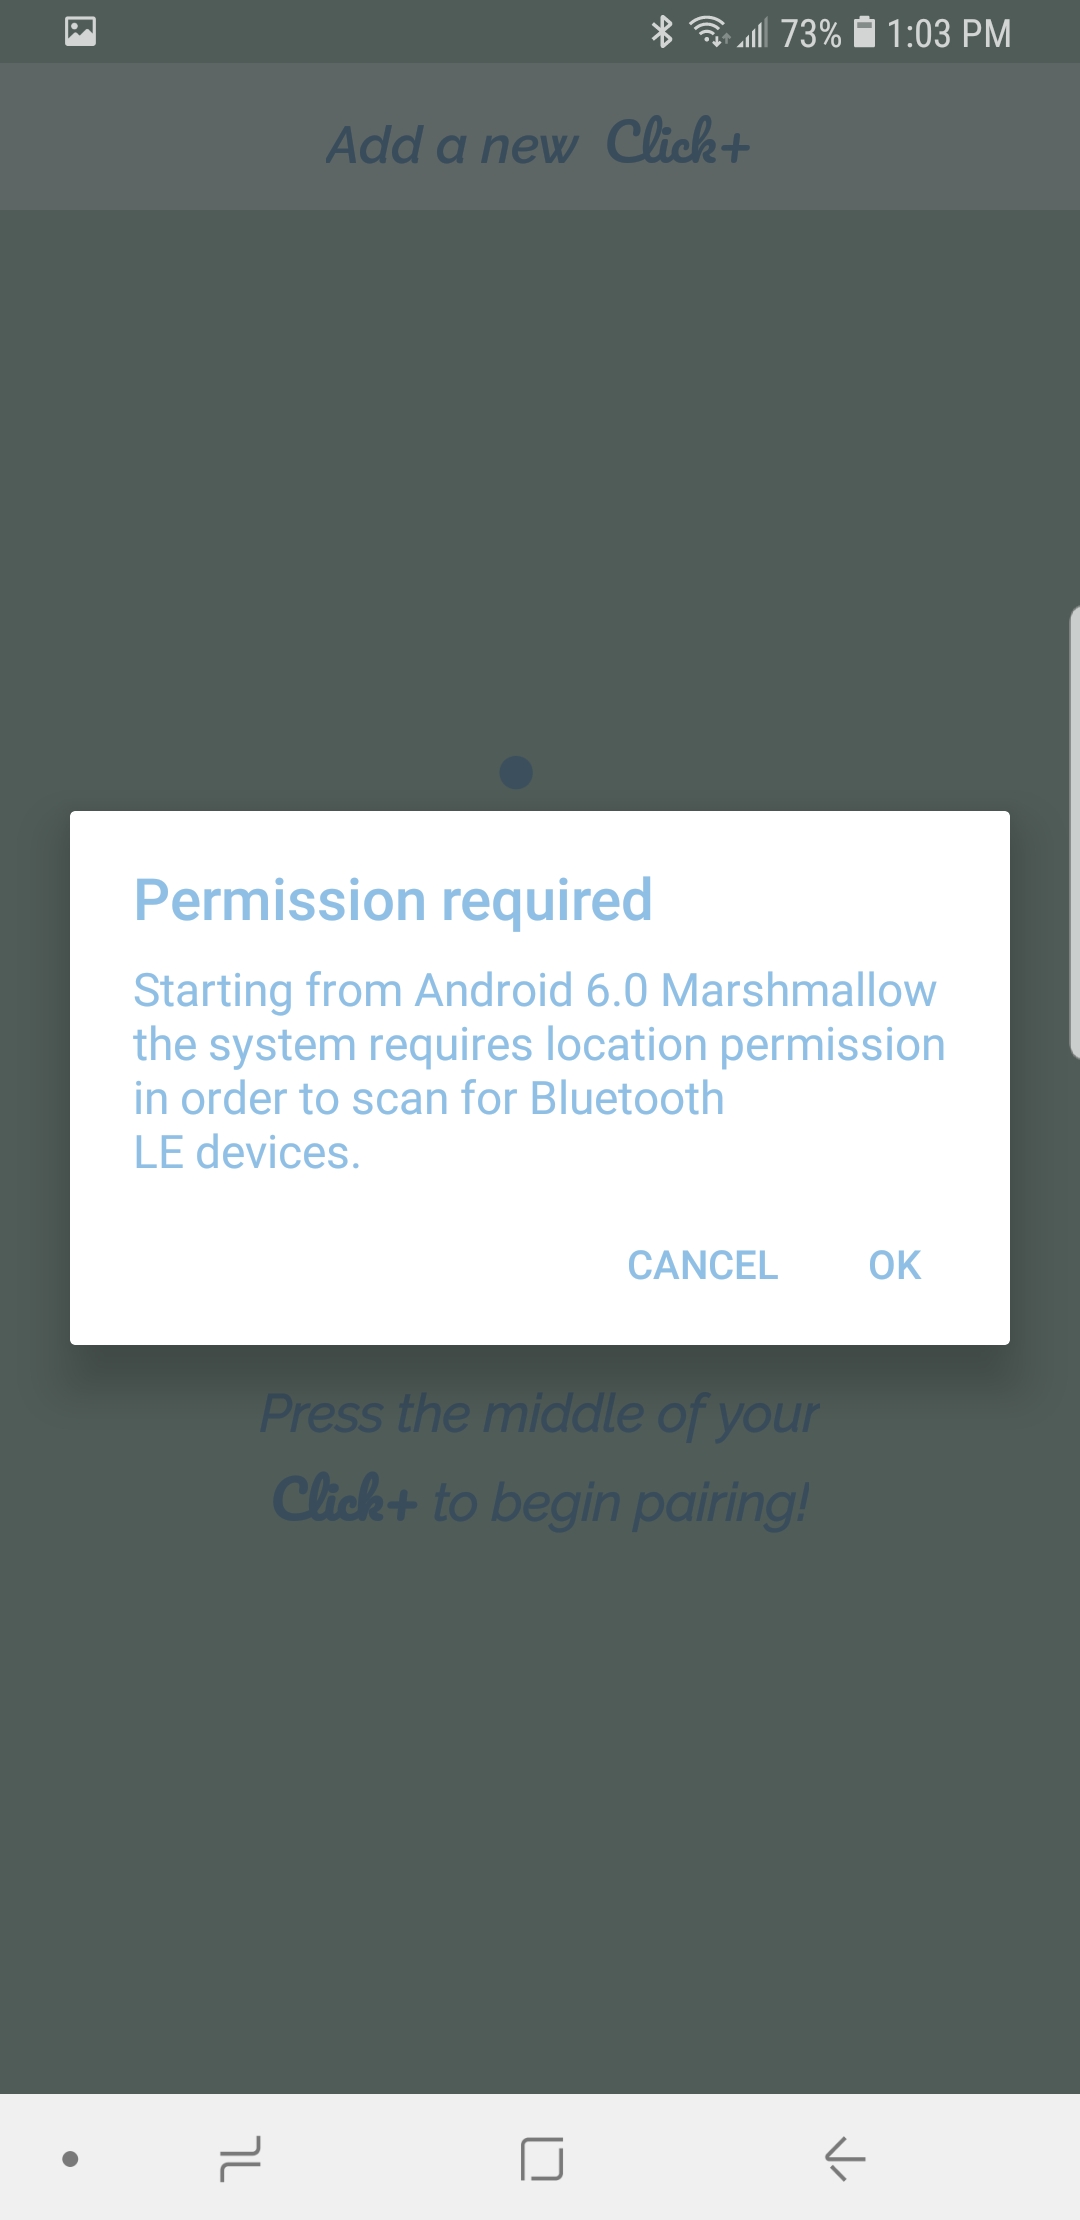
D. A window may pop up asking for permission for your phone’s system to scan for Bluetooth devices. Tap OK.
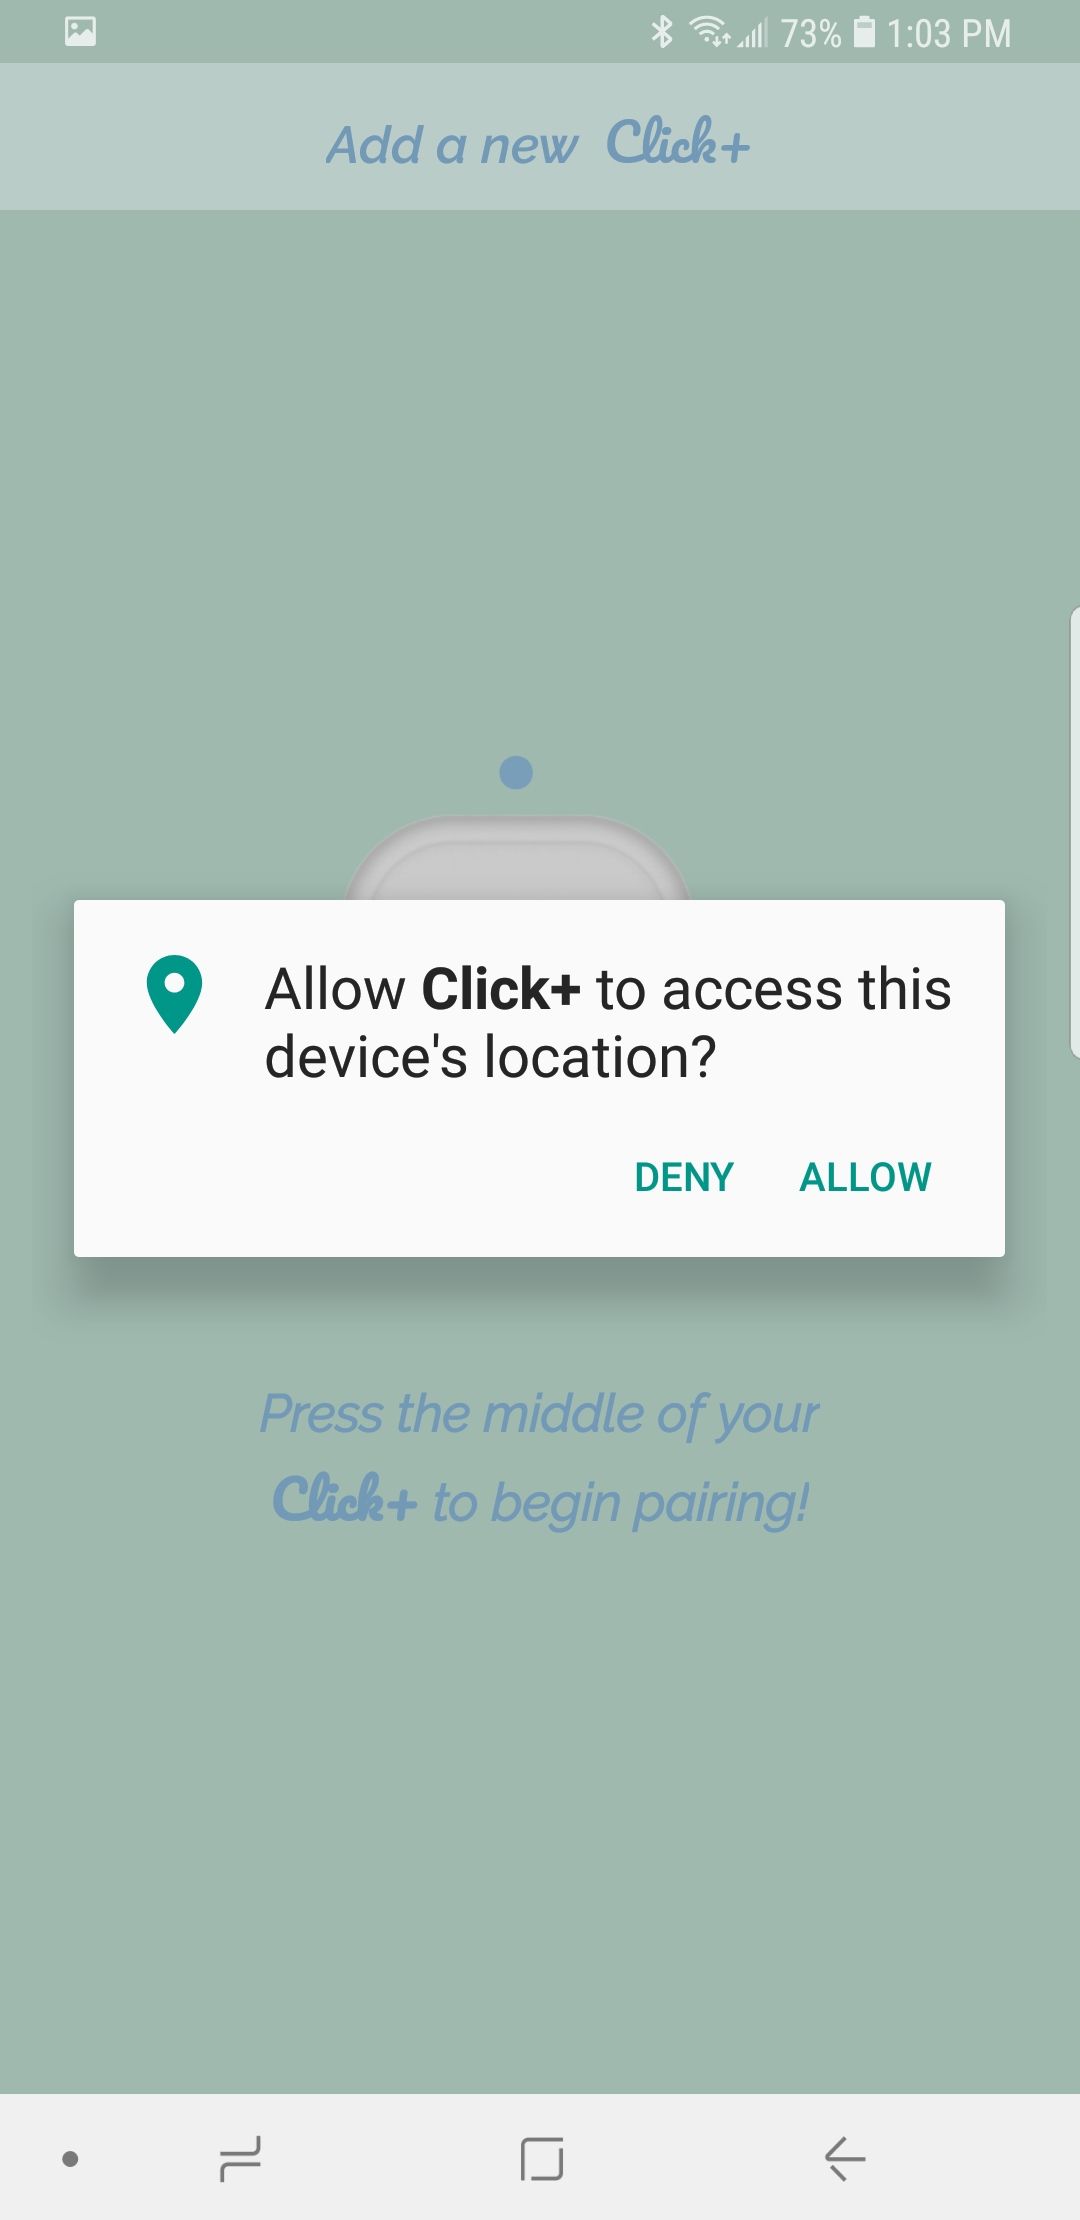
E. A window may pop up asking for permission for the Click+ to access your phone’s location. Tap ALLOW.
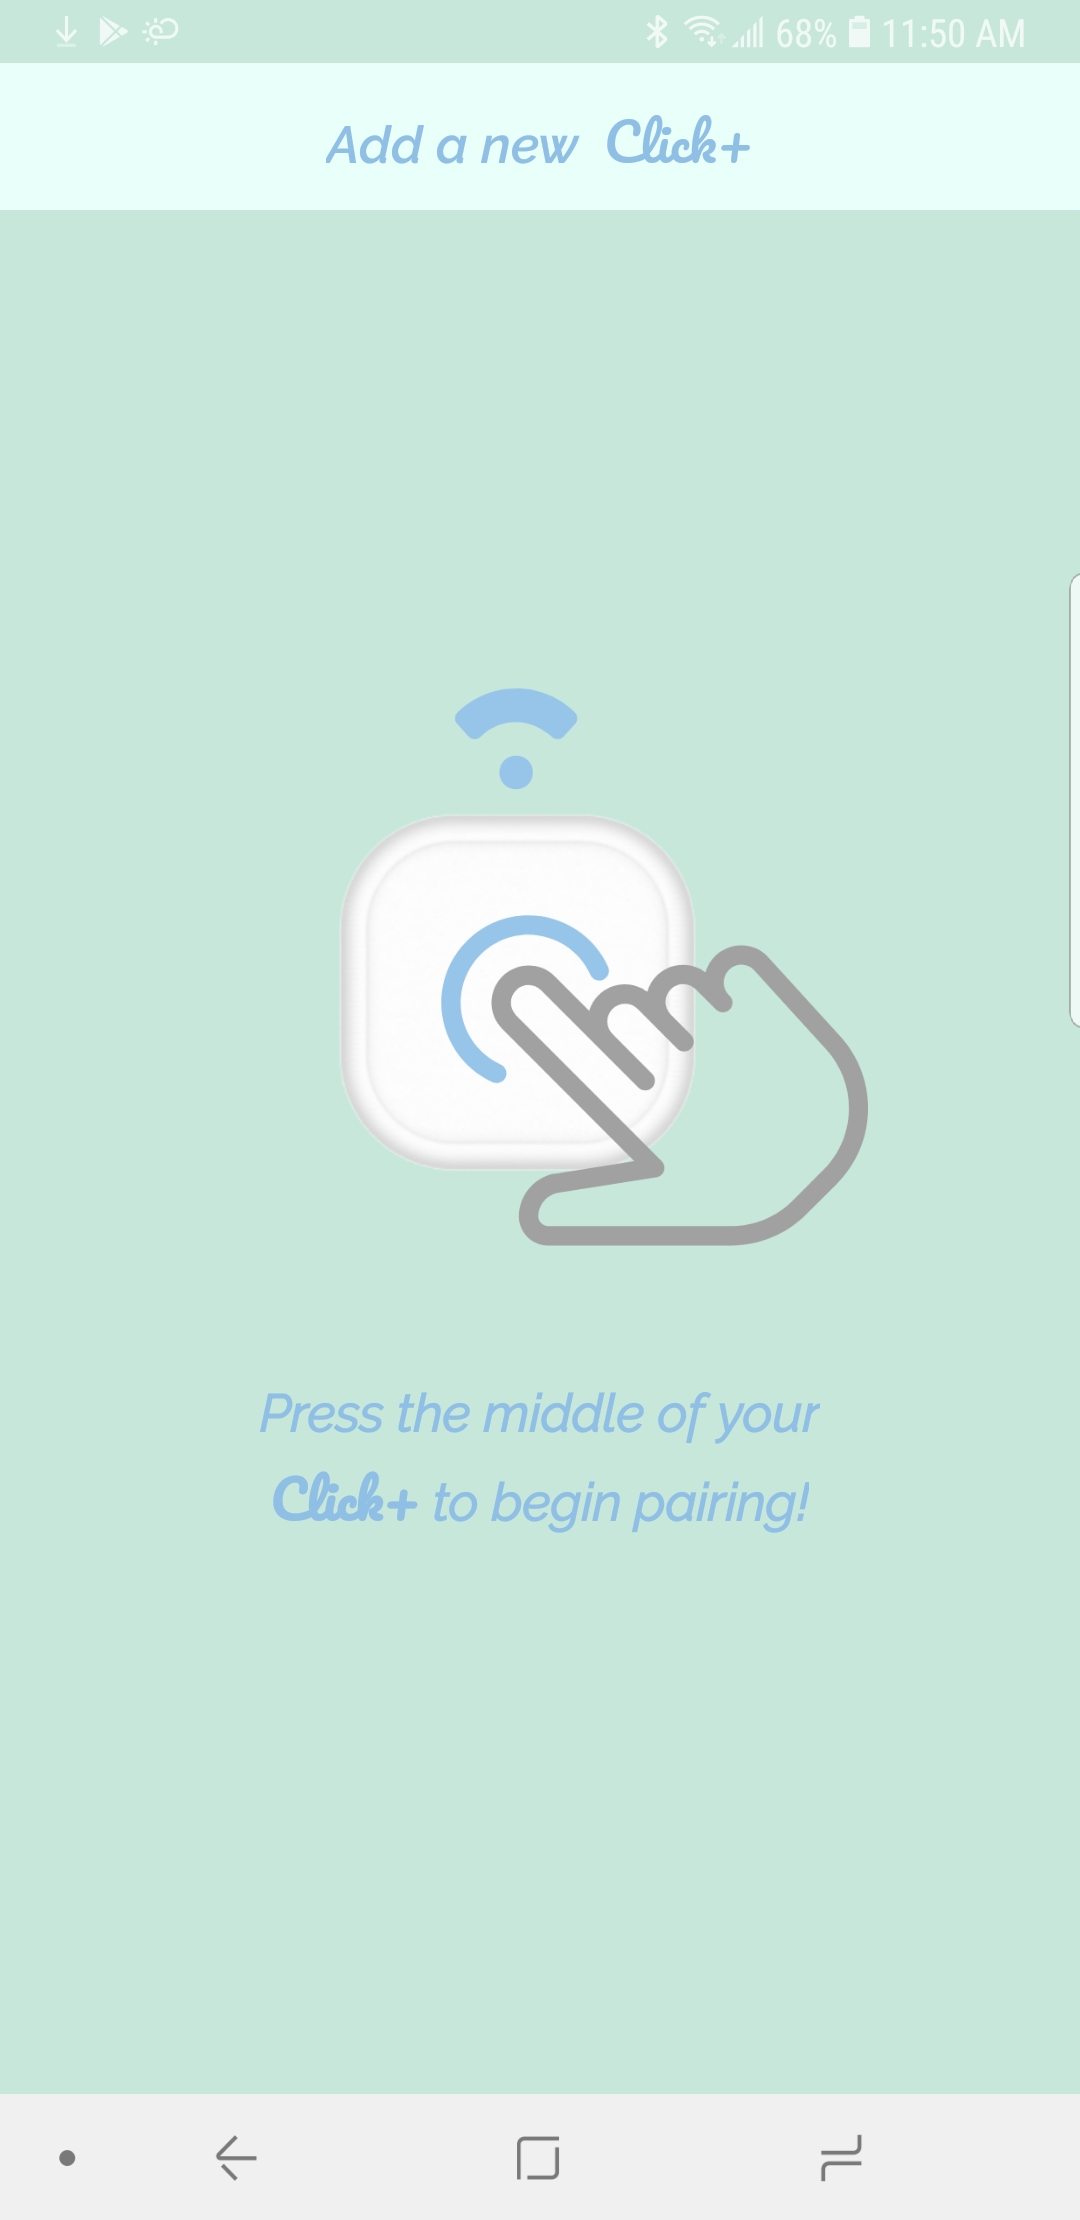
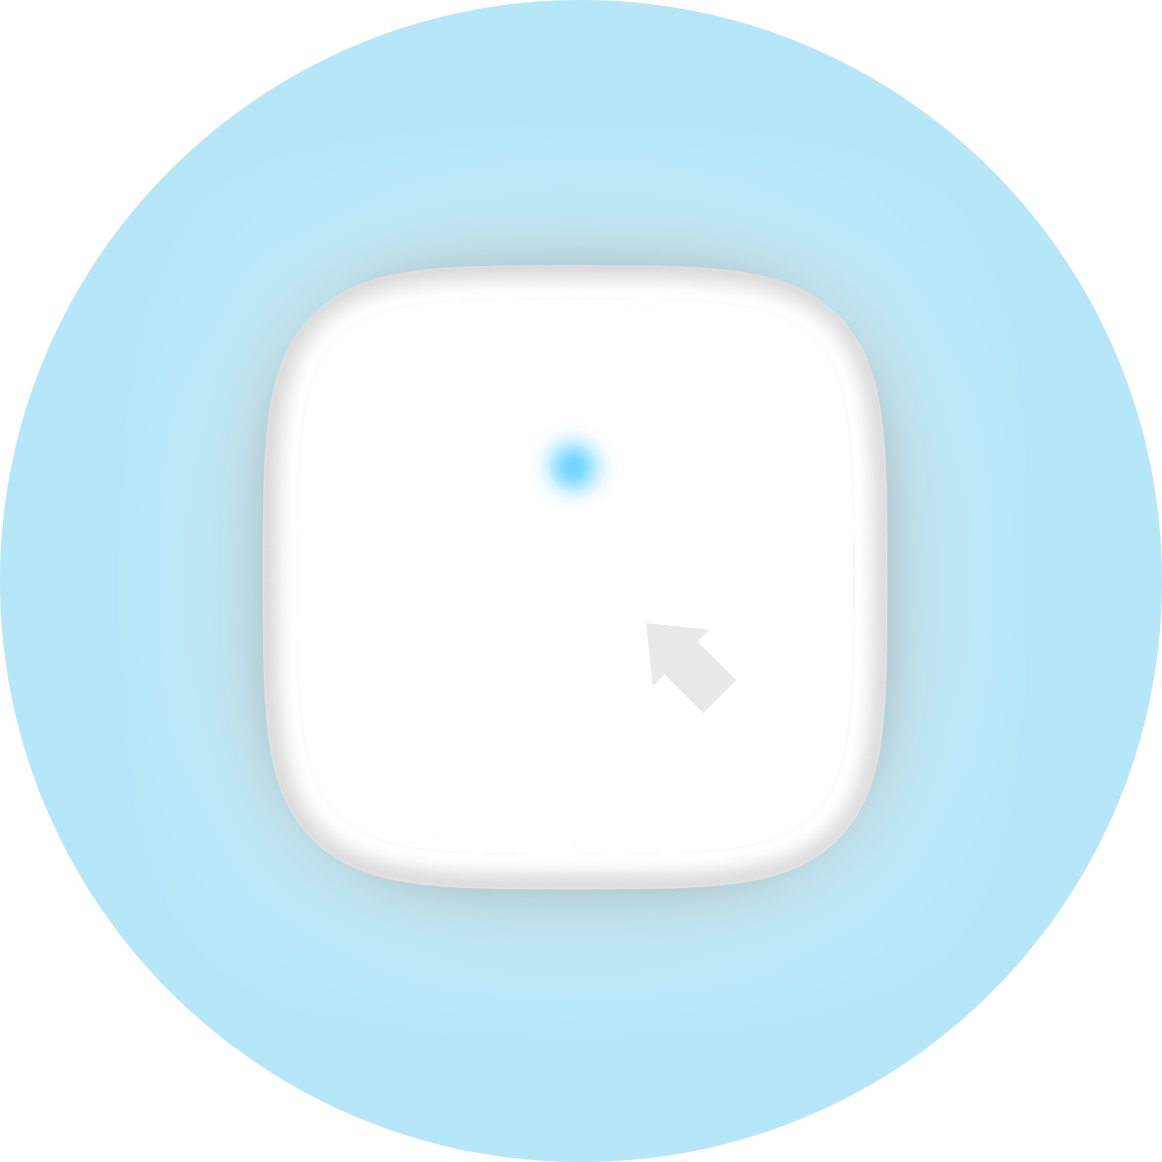
F. As instructed in the app, press the button on your Click+ to pair it to your phone.
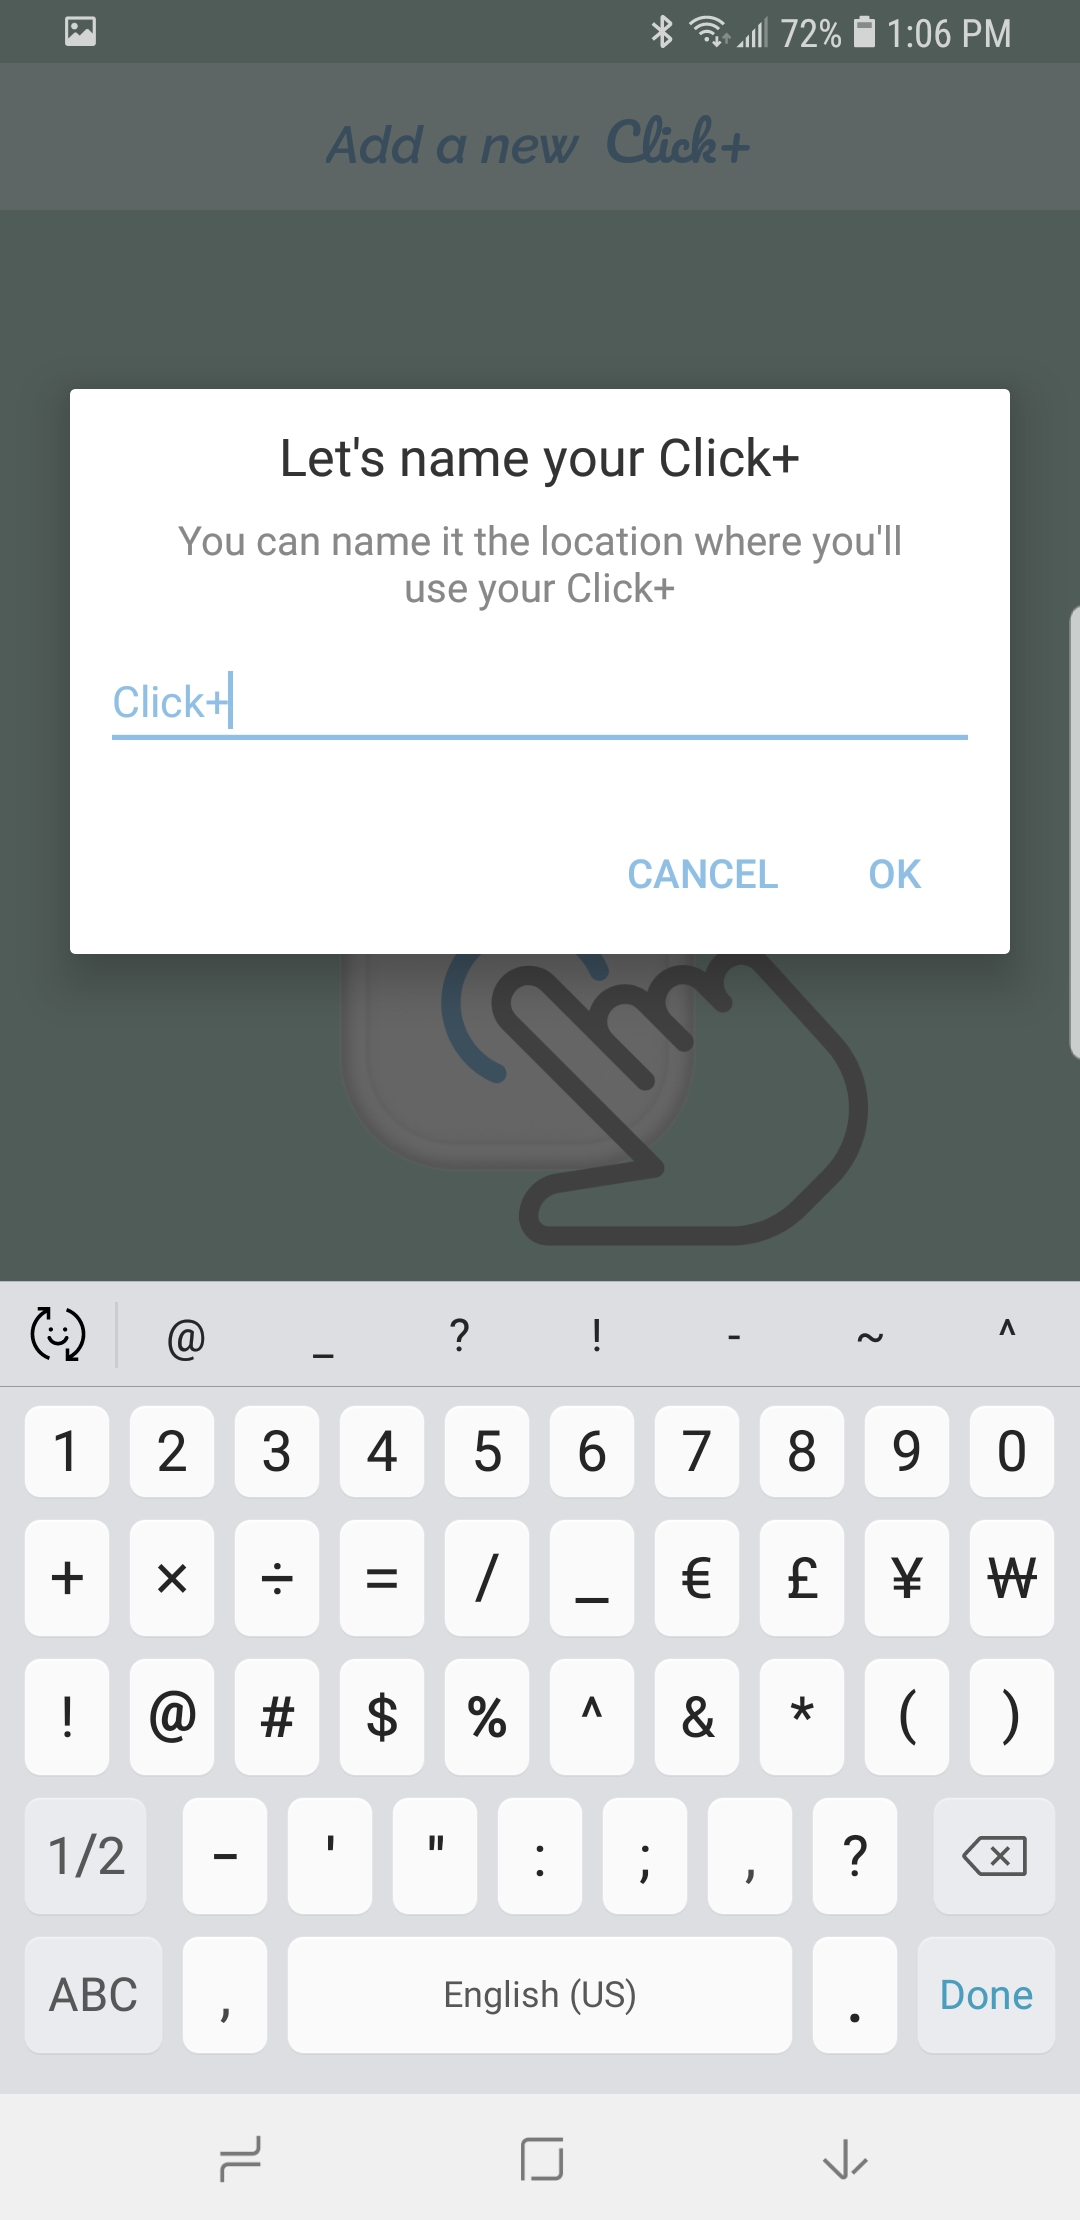
G. Type in the name that you would like this Click+ to have. You can name it after the person who owns the Click+ (ex. Tyler’s Click+), the name of the room it is used in (ex. Living Room), the name of the function it serves (ex. Music Control), etc.
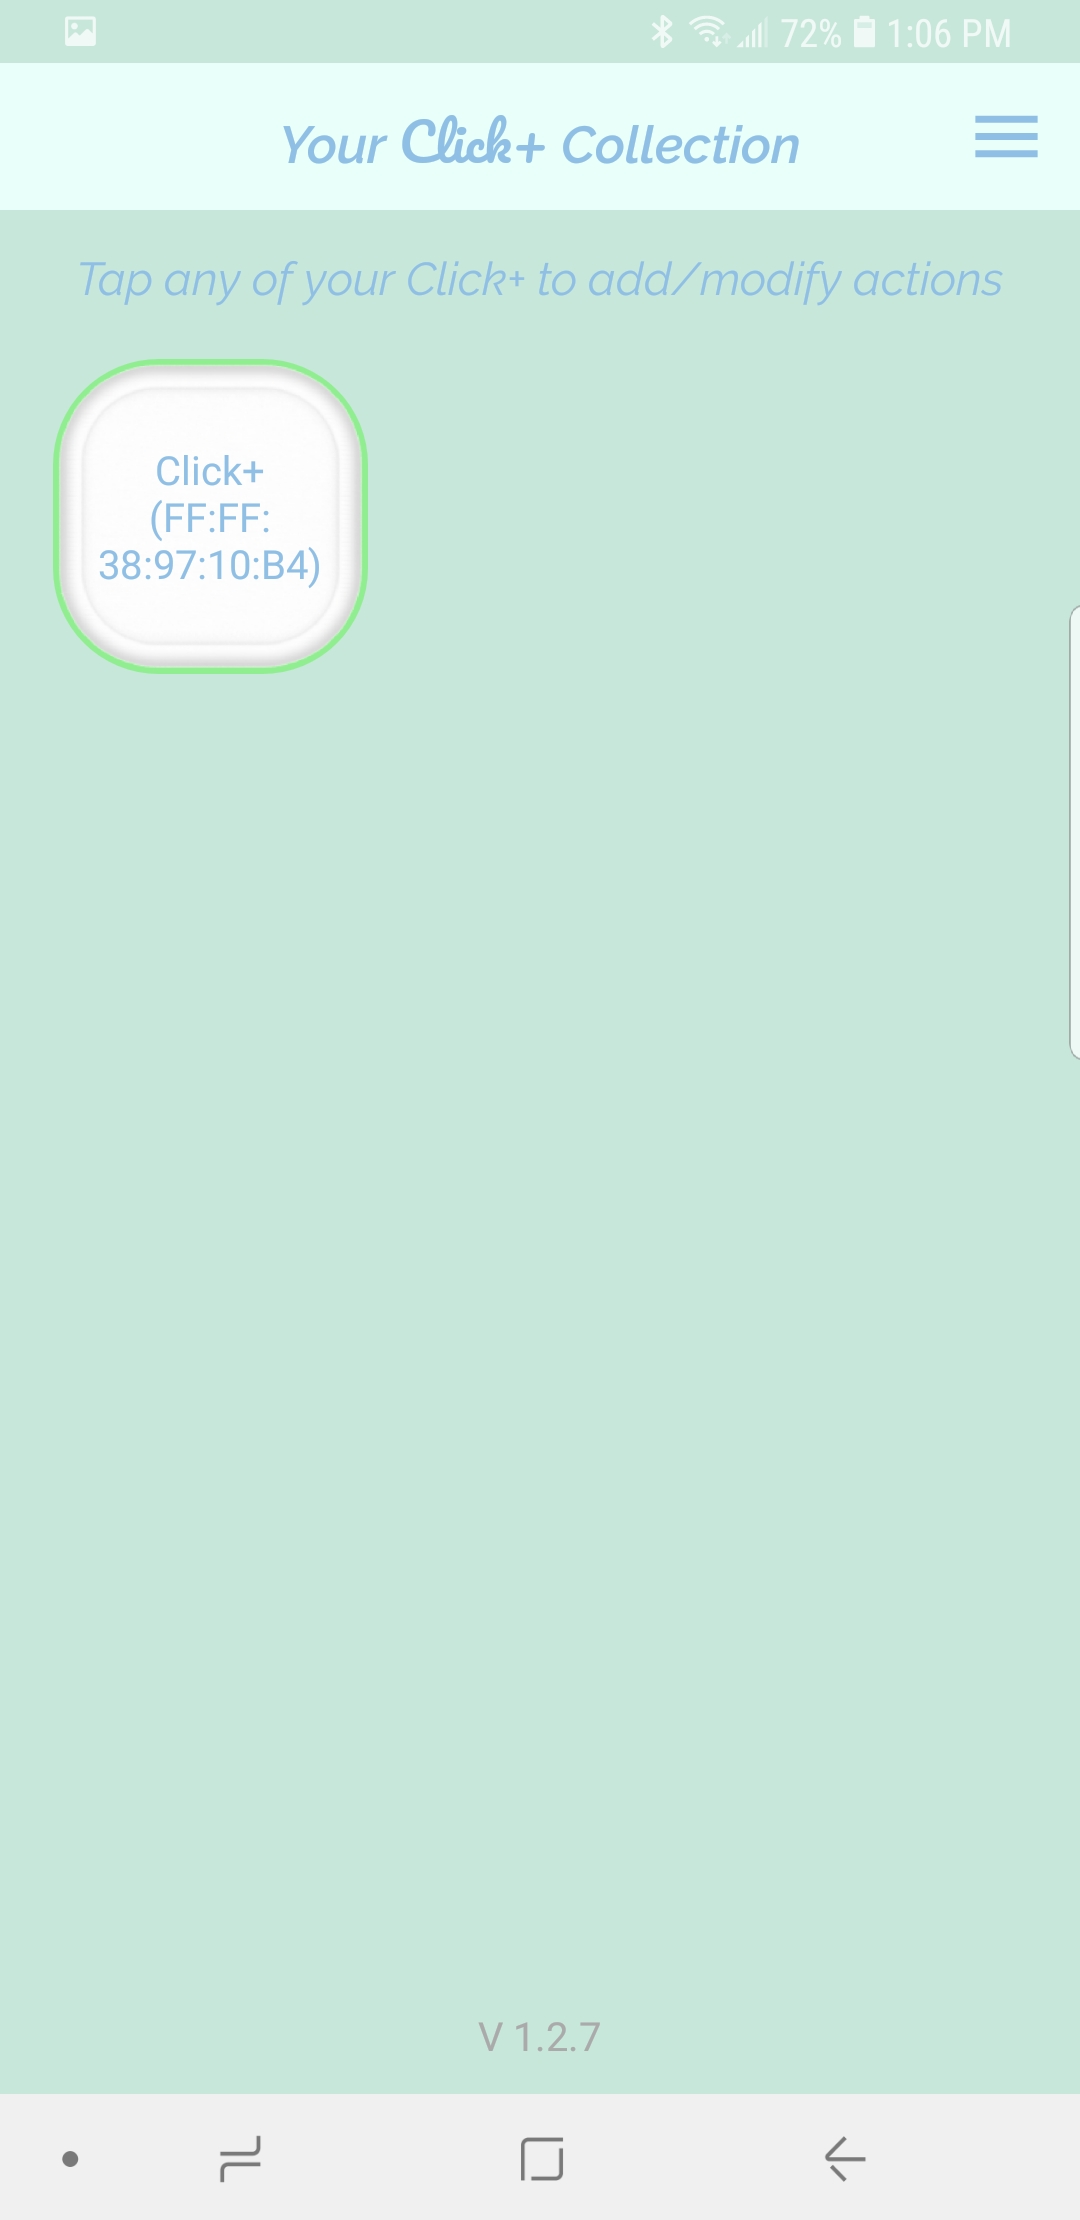
H. Your paired Click+ will be added to “Your Click+ Collection”.
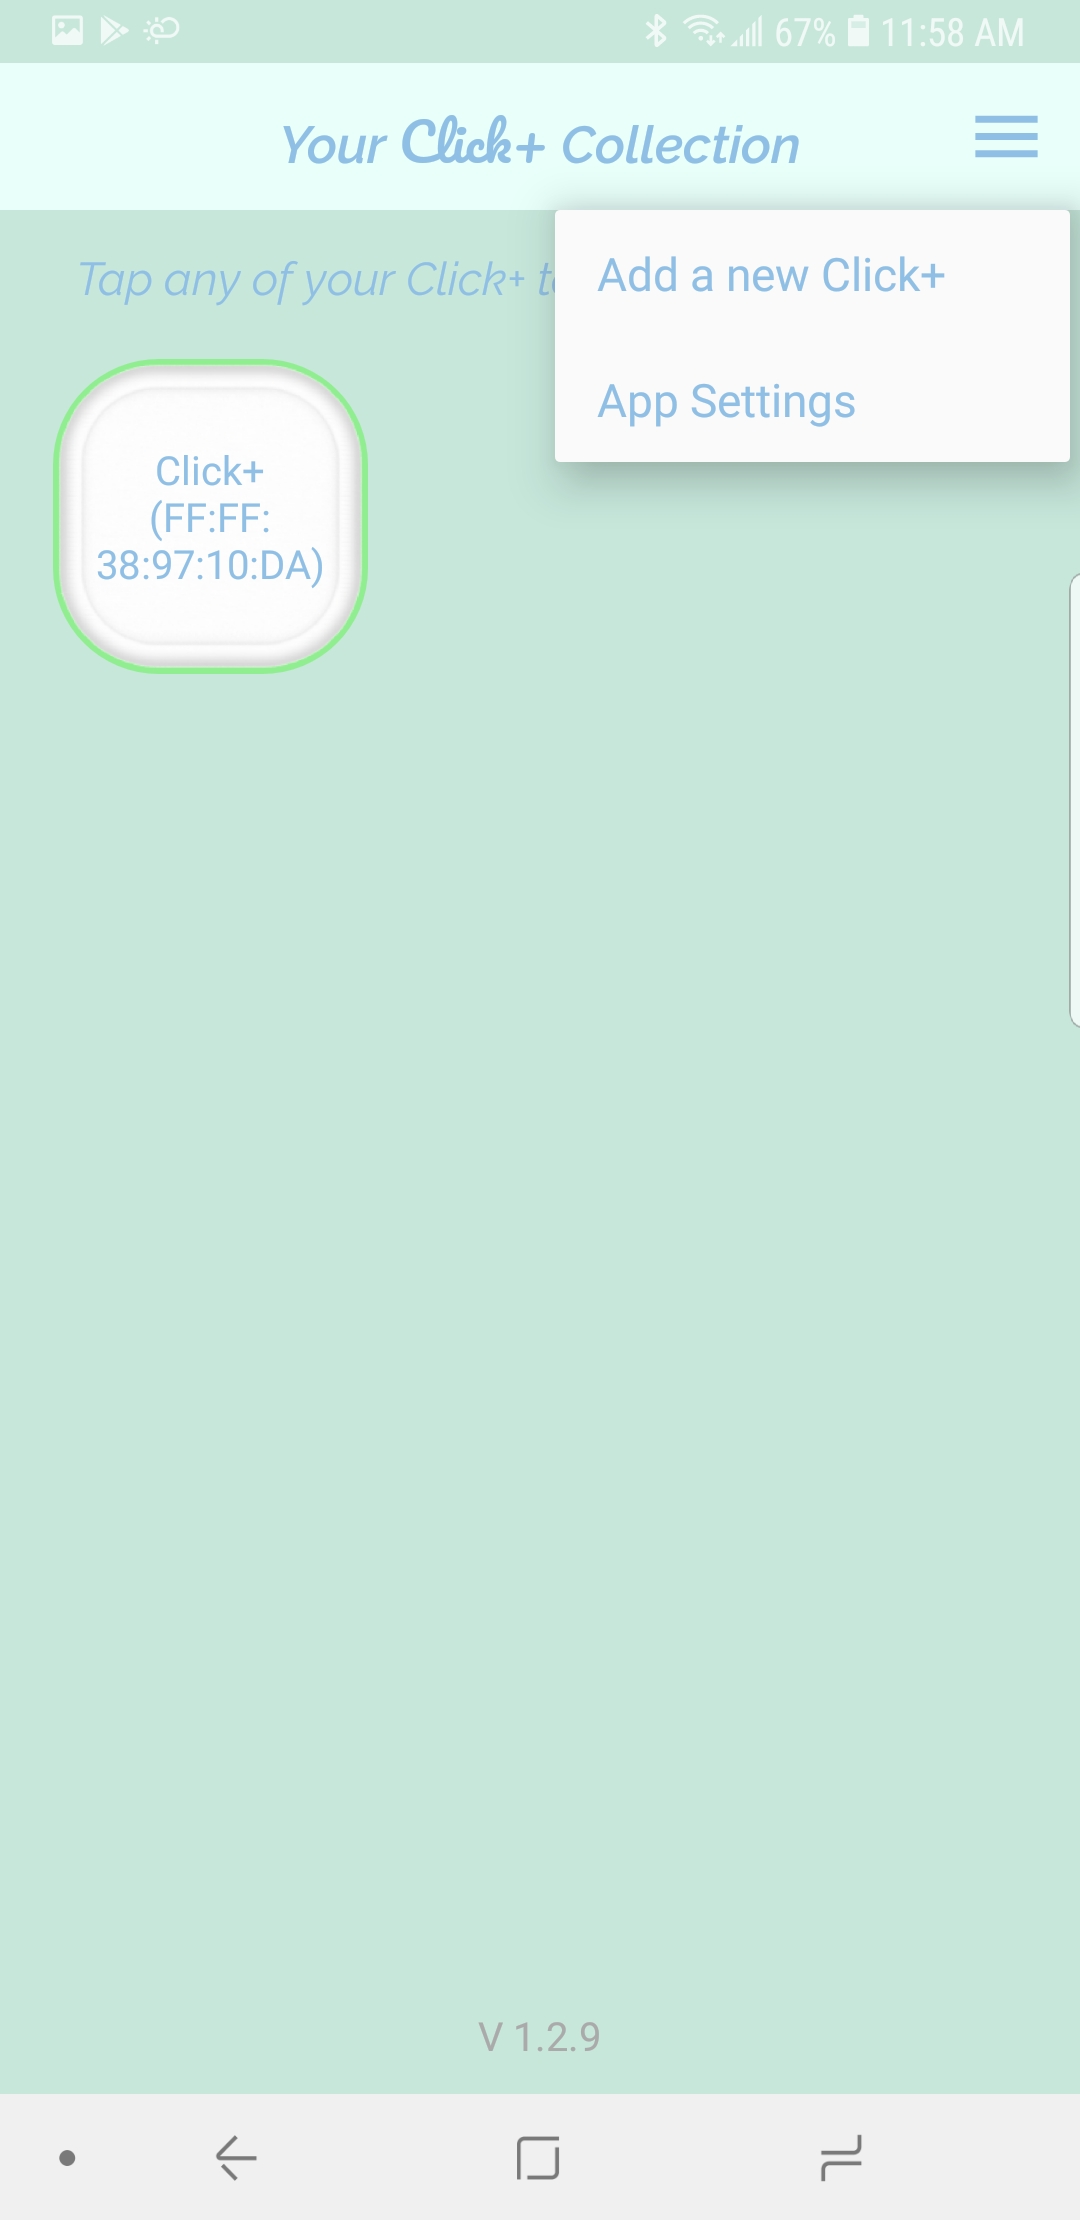
I. To pair additional Click+ smart buttons, tap the menu button in the top right corner and tap ADD A NEW CLICK+.
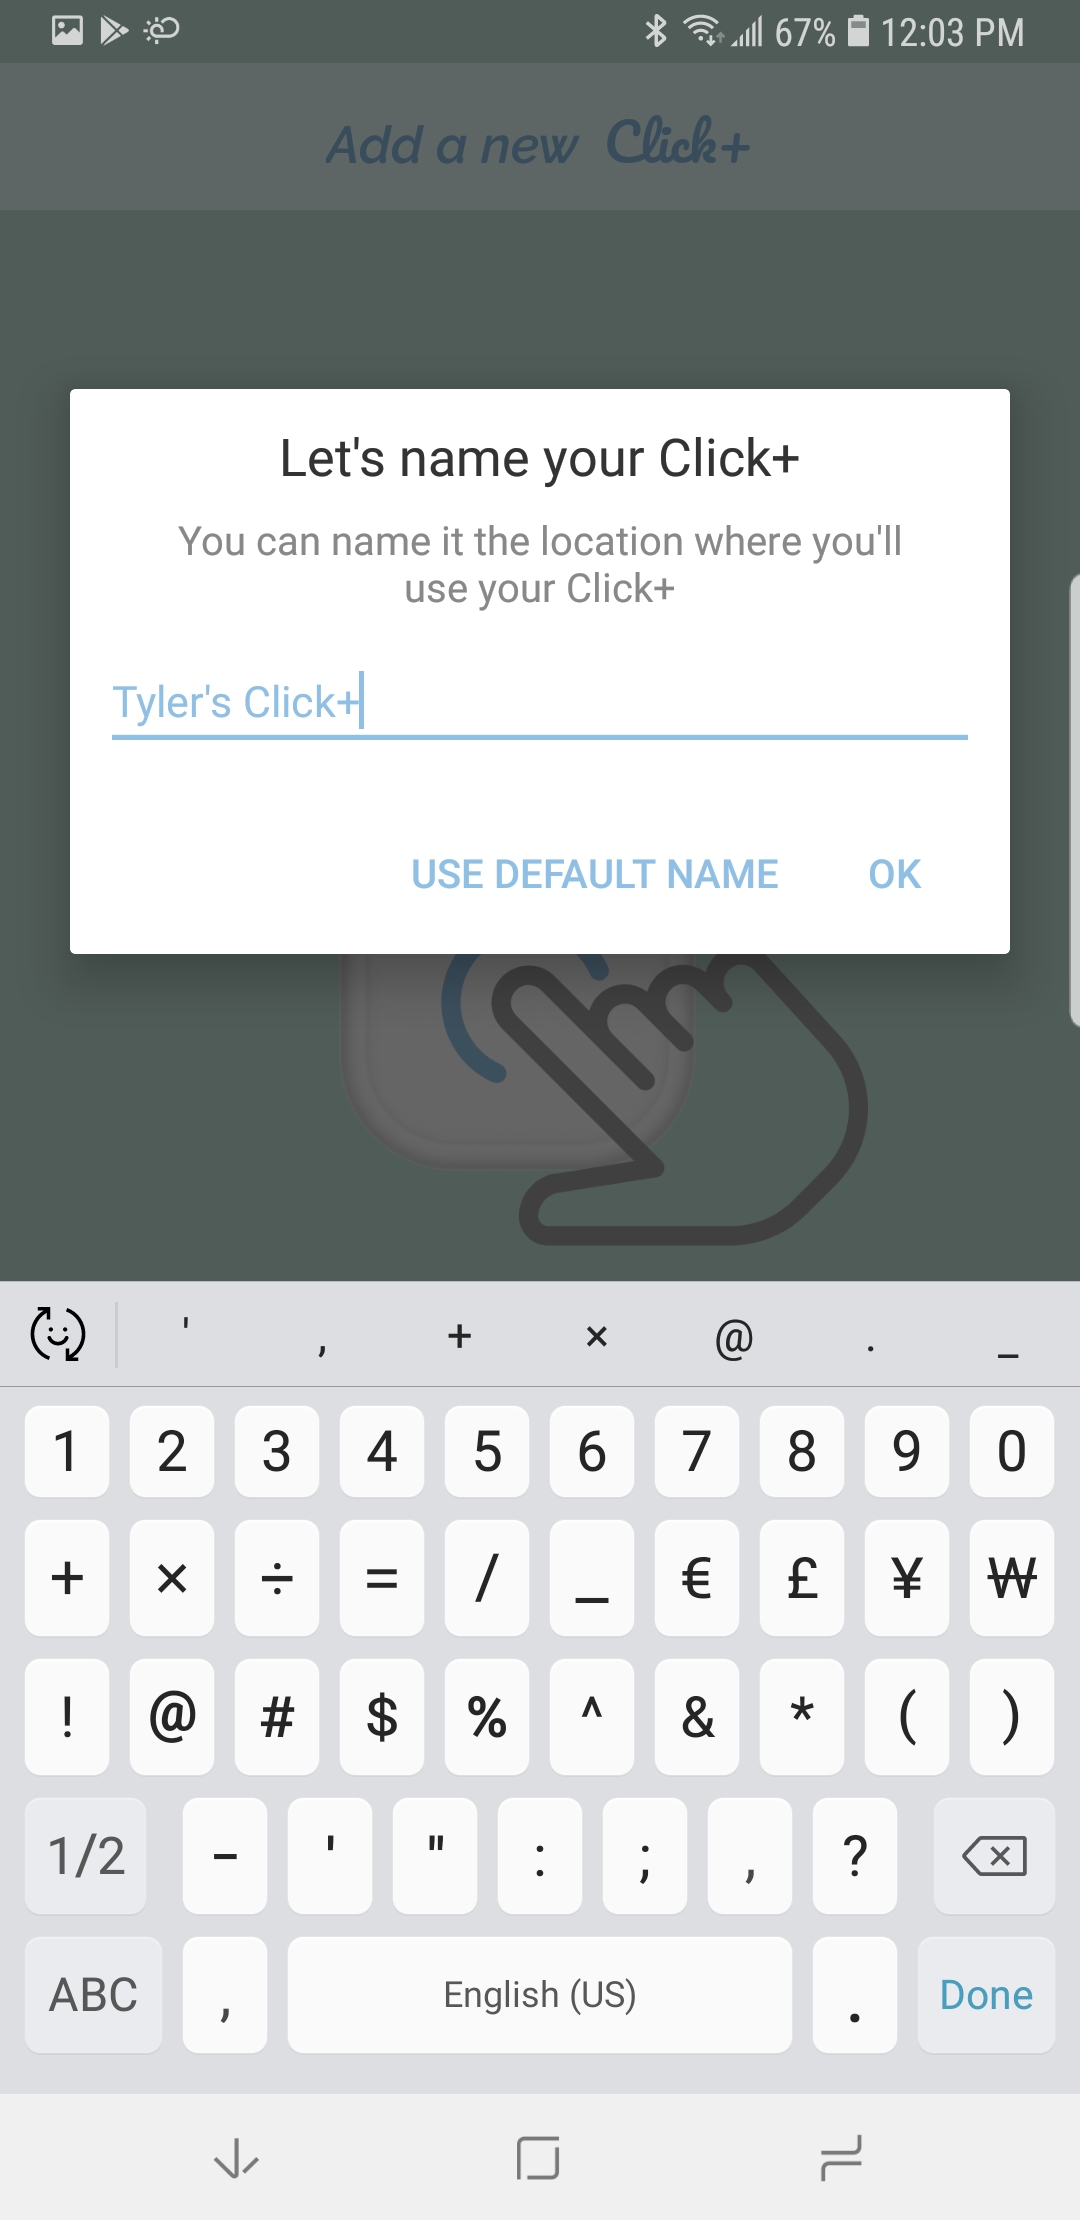
J. Type in the name that you would like this Click+ to have.
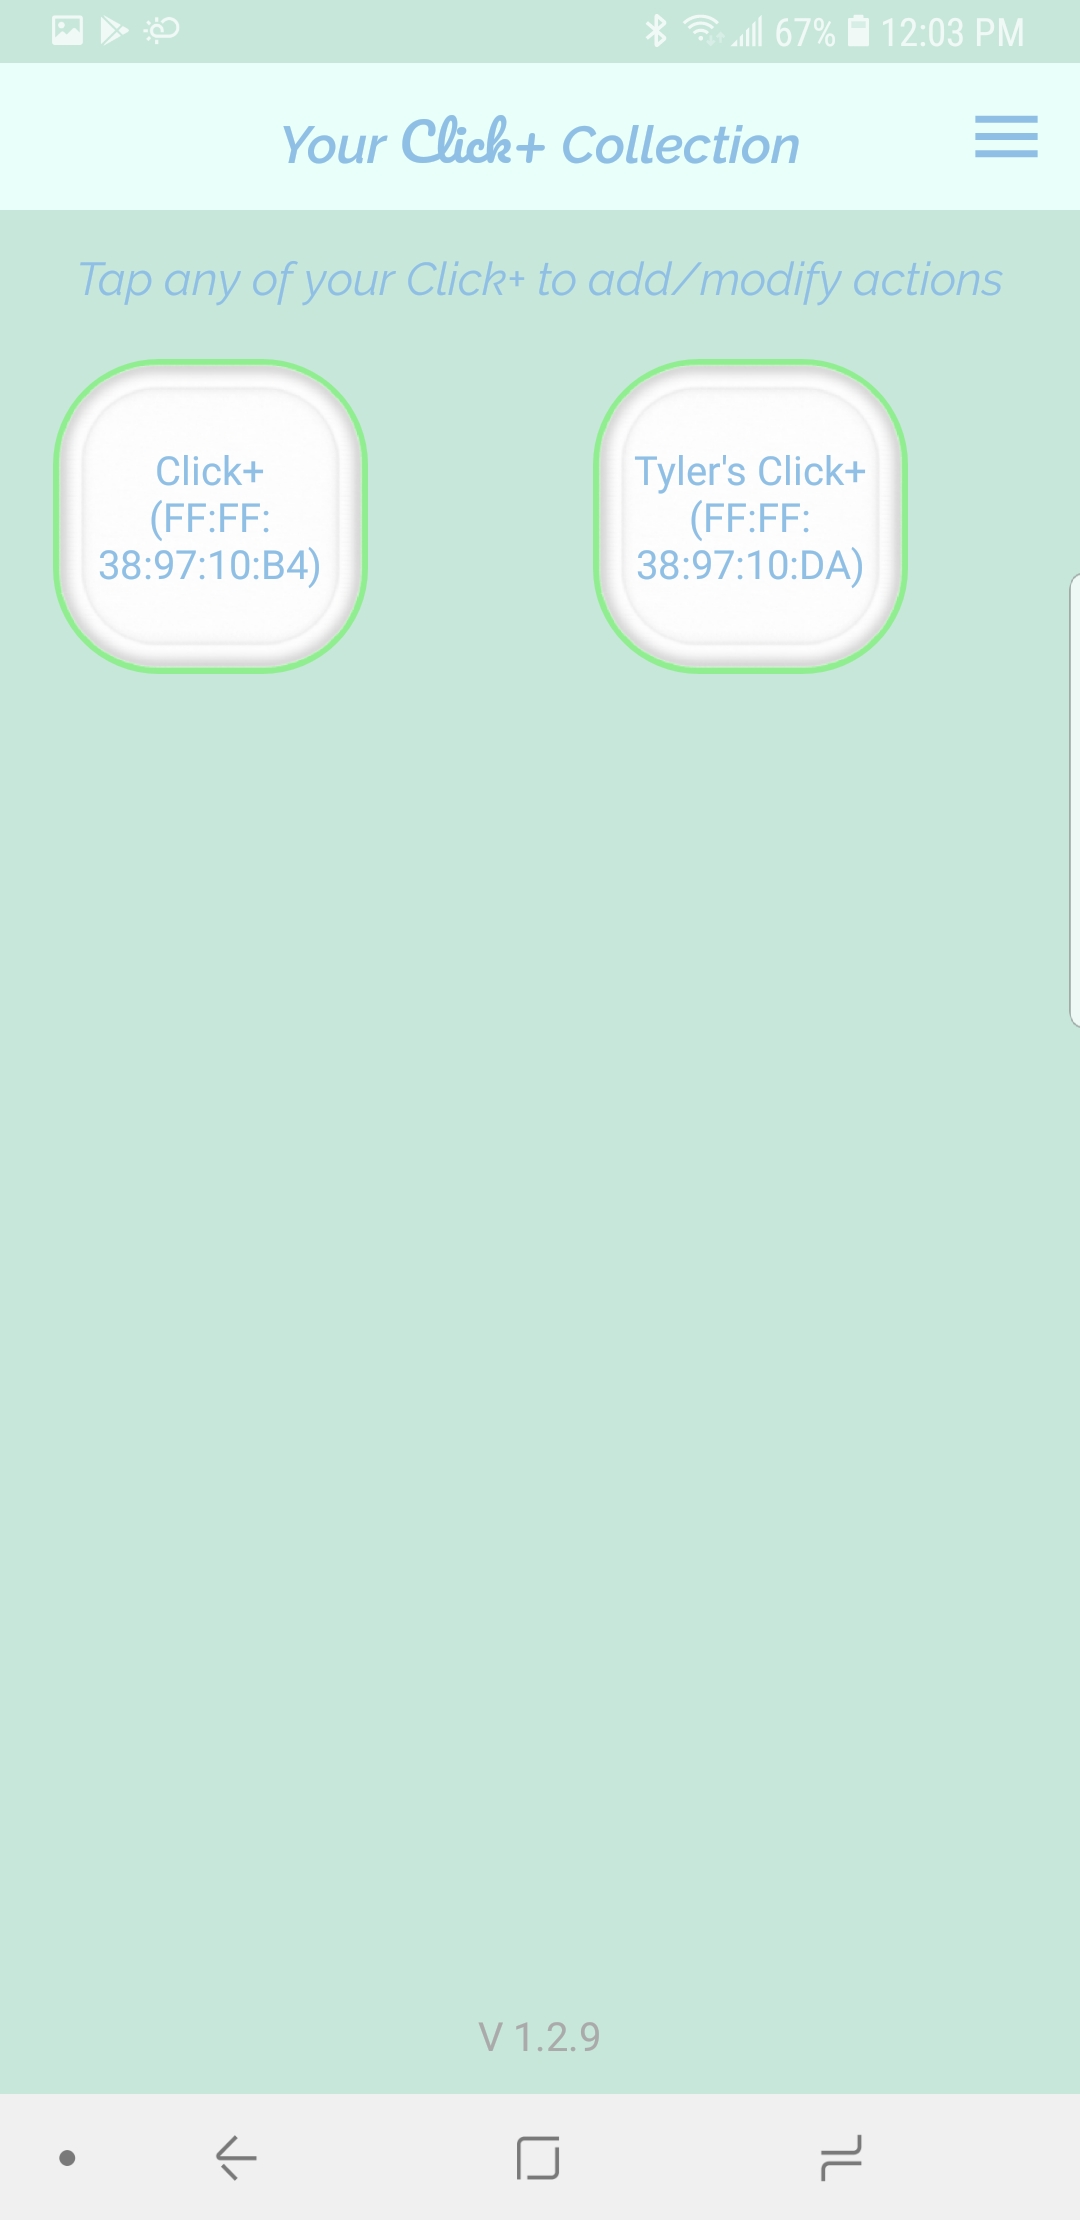
K. “Your Click+ Collection” will now show both of your paired Click+ smart buttons. You can pair up to four Click+ smart buttons to one device at a time.

A. To delete your Click+, open the app and tap the Click+ you would like to delete from “Your Click+ Collection”.
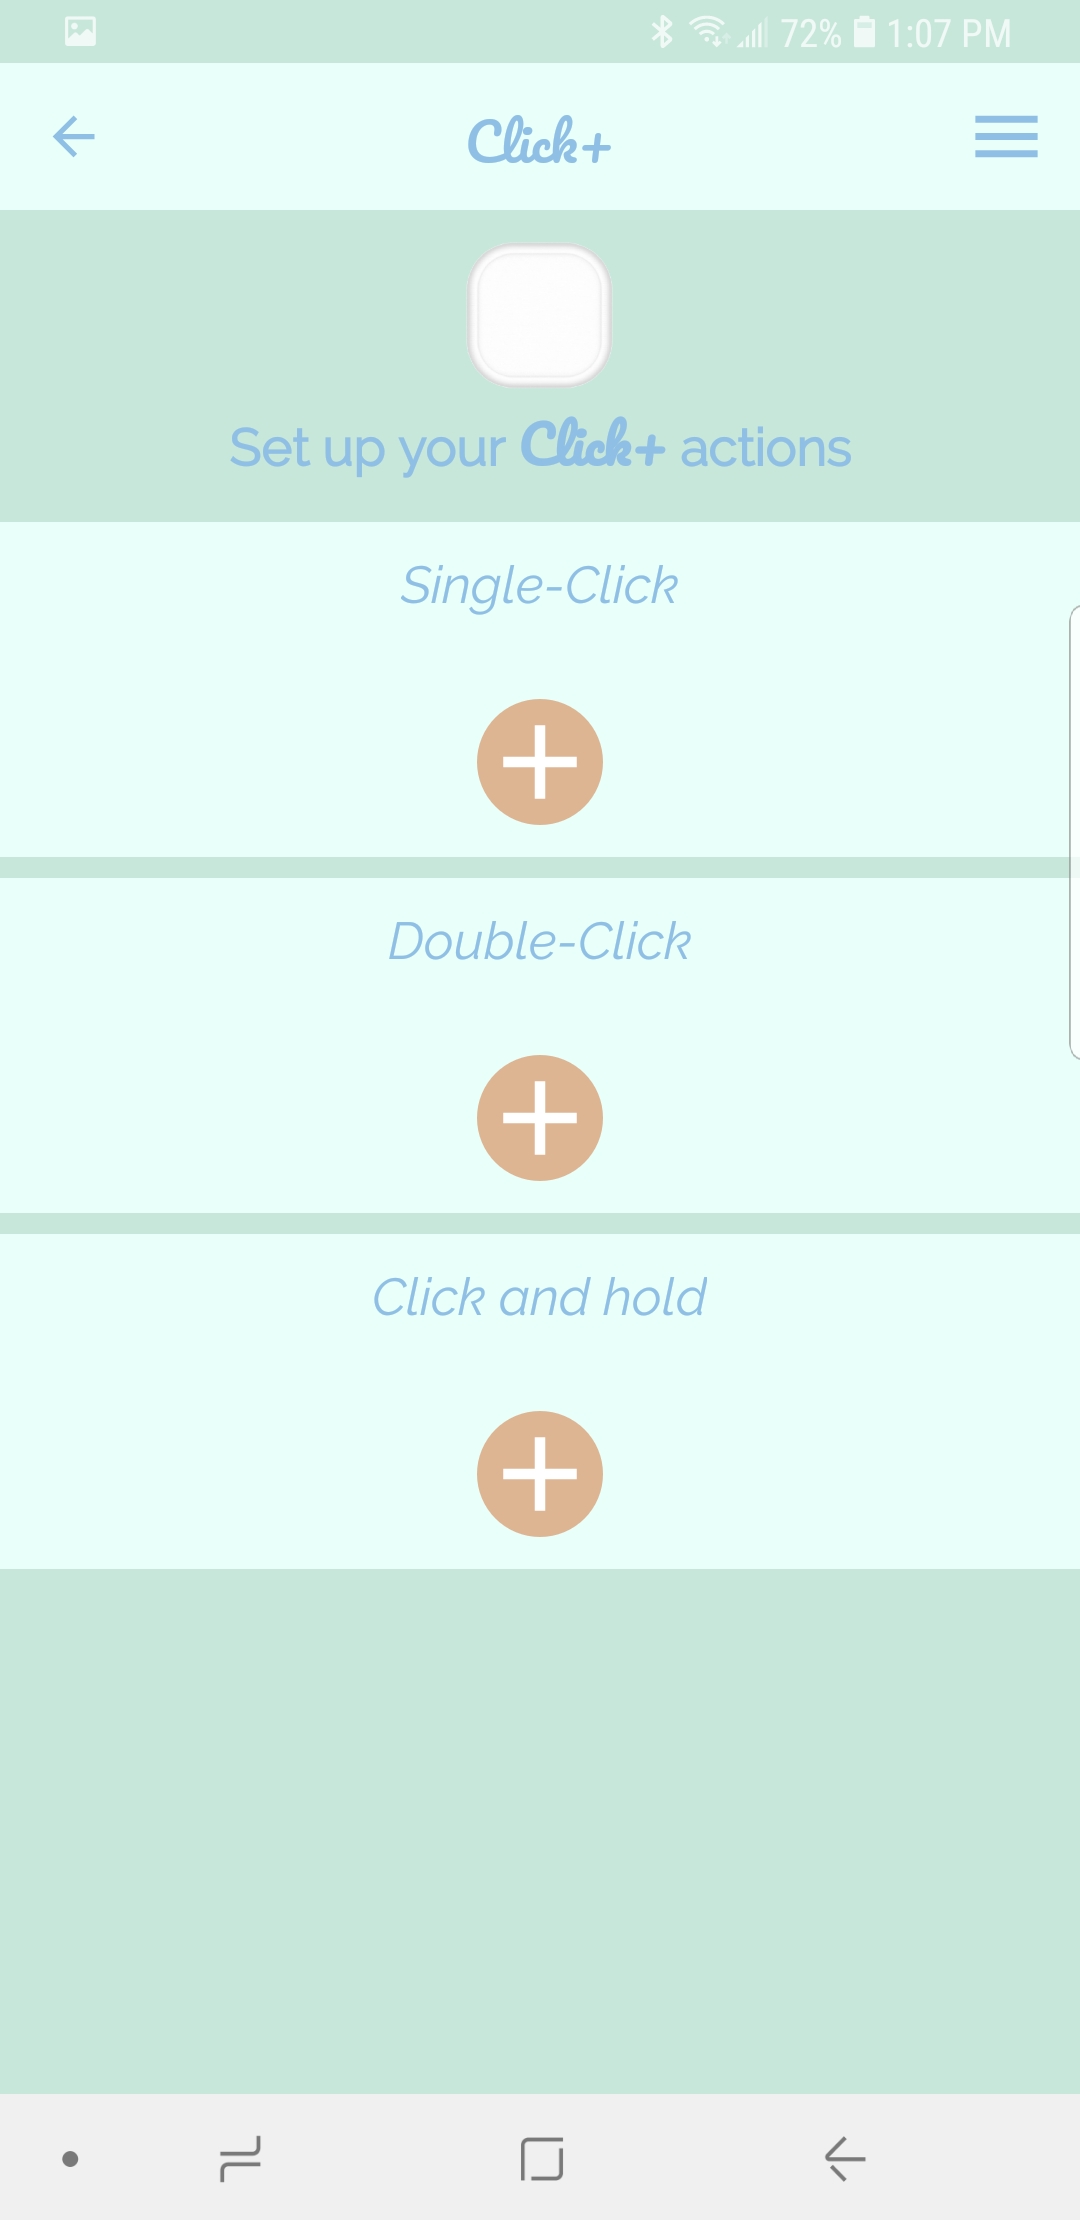
B. This will bring you to the action set-up screen. Tap the menu button in the top right corner.
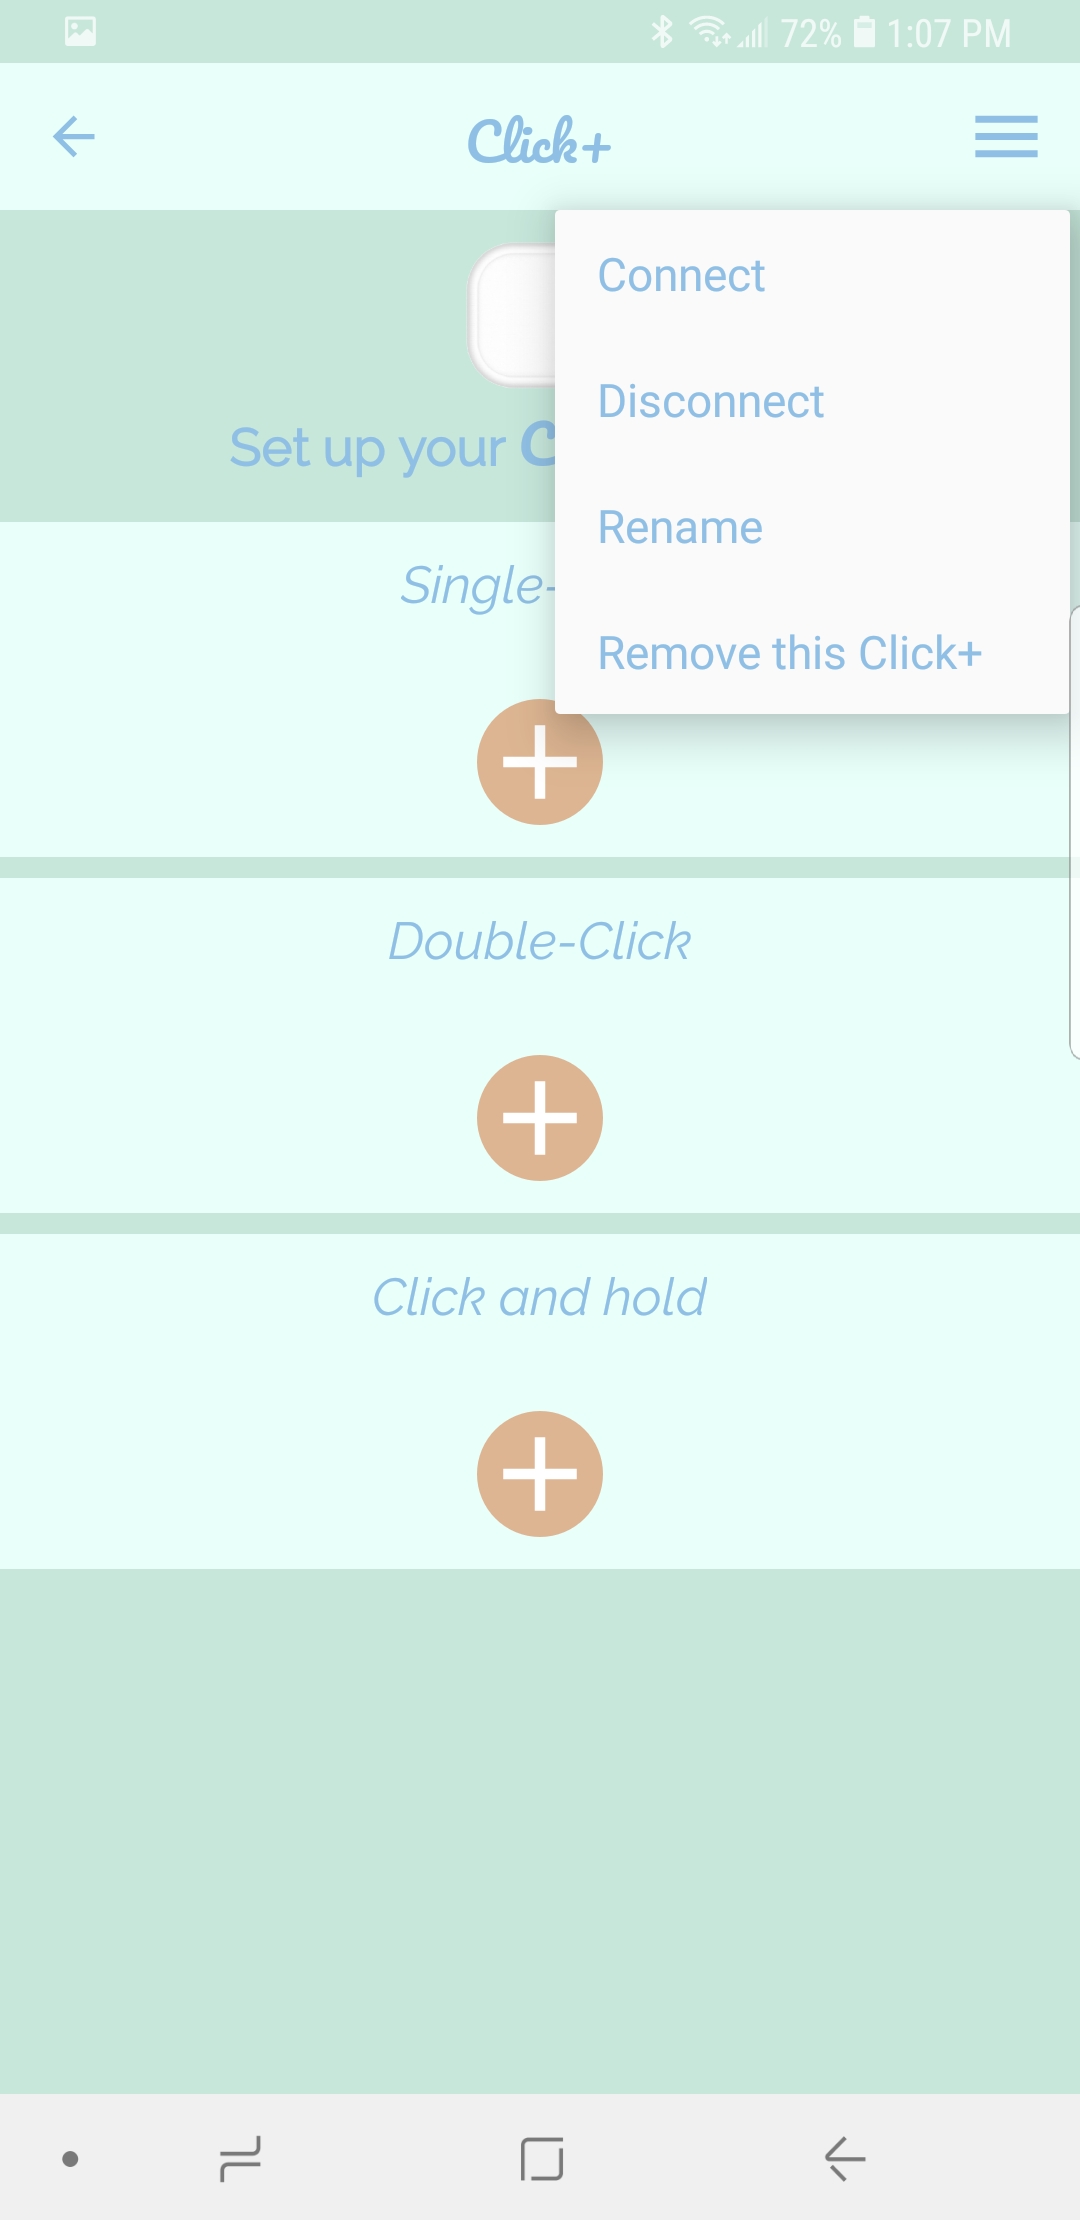
C. The settings menu will drop down. Tap REMOVE THIS CLICK+.
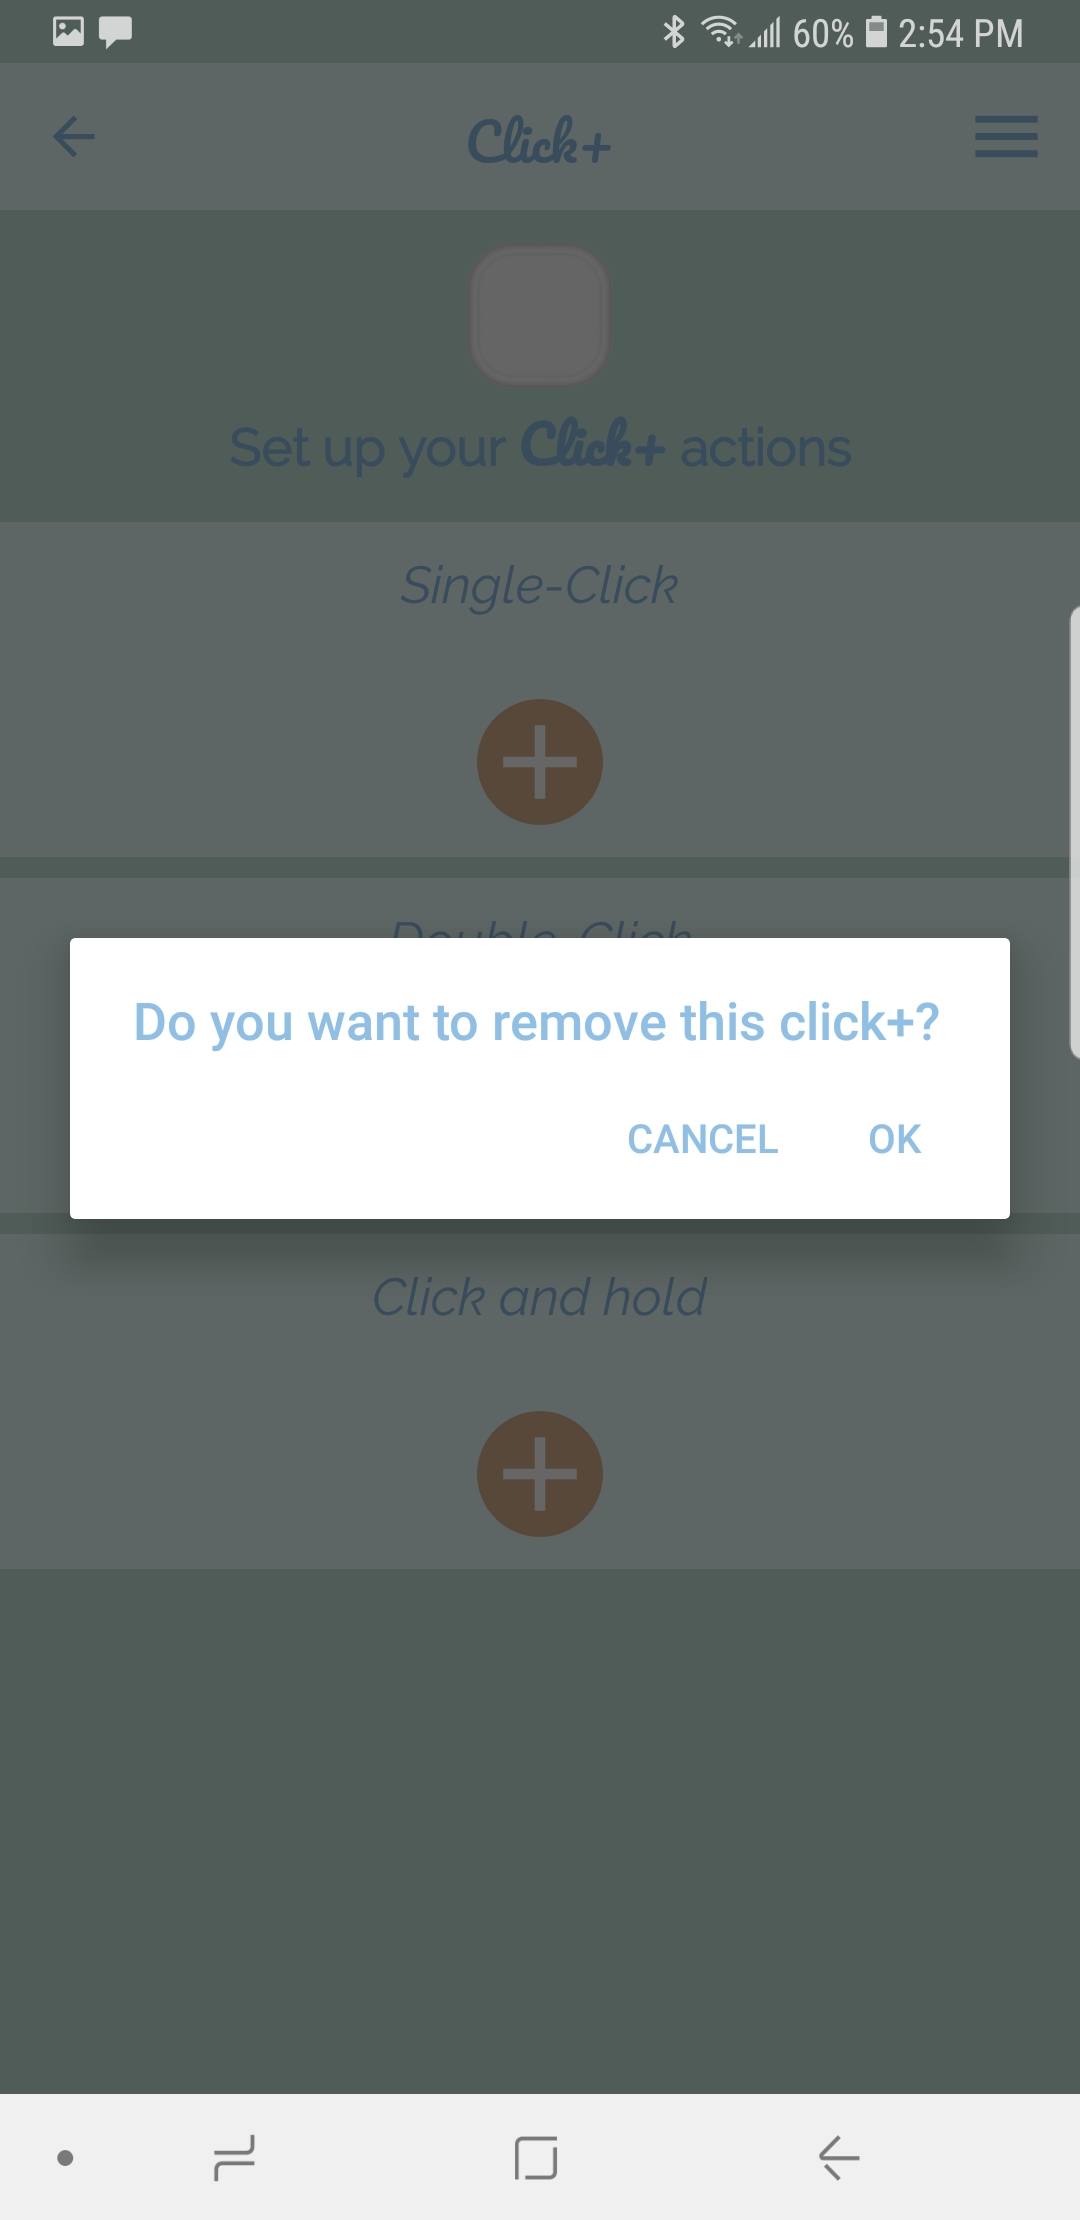
D. You will get a pop-up telling you to make sure to forget your Click+ from your phone’s Bluetooth devices. This ensures that the Click+ is fully deleted from your phone and ready to be paired to a new phone.

E. The Click+ will now be removed from “Your Click+ Collection”.

A. To rename your Click+, open the app and tap the Click+ you would like to rename in “Your Click+ Collection”.

B. This will bring you to the action set-up screen. Tap the menu button in the top right corner.

C. The settings menu will drop down. Tap RENAME.
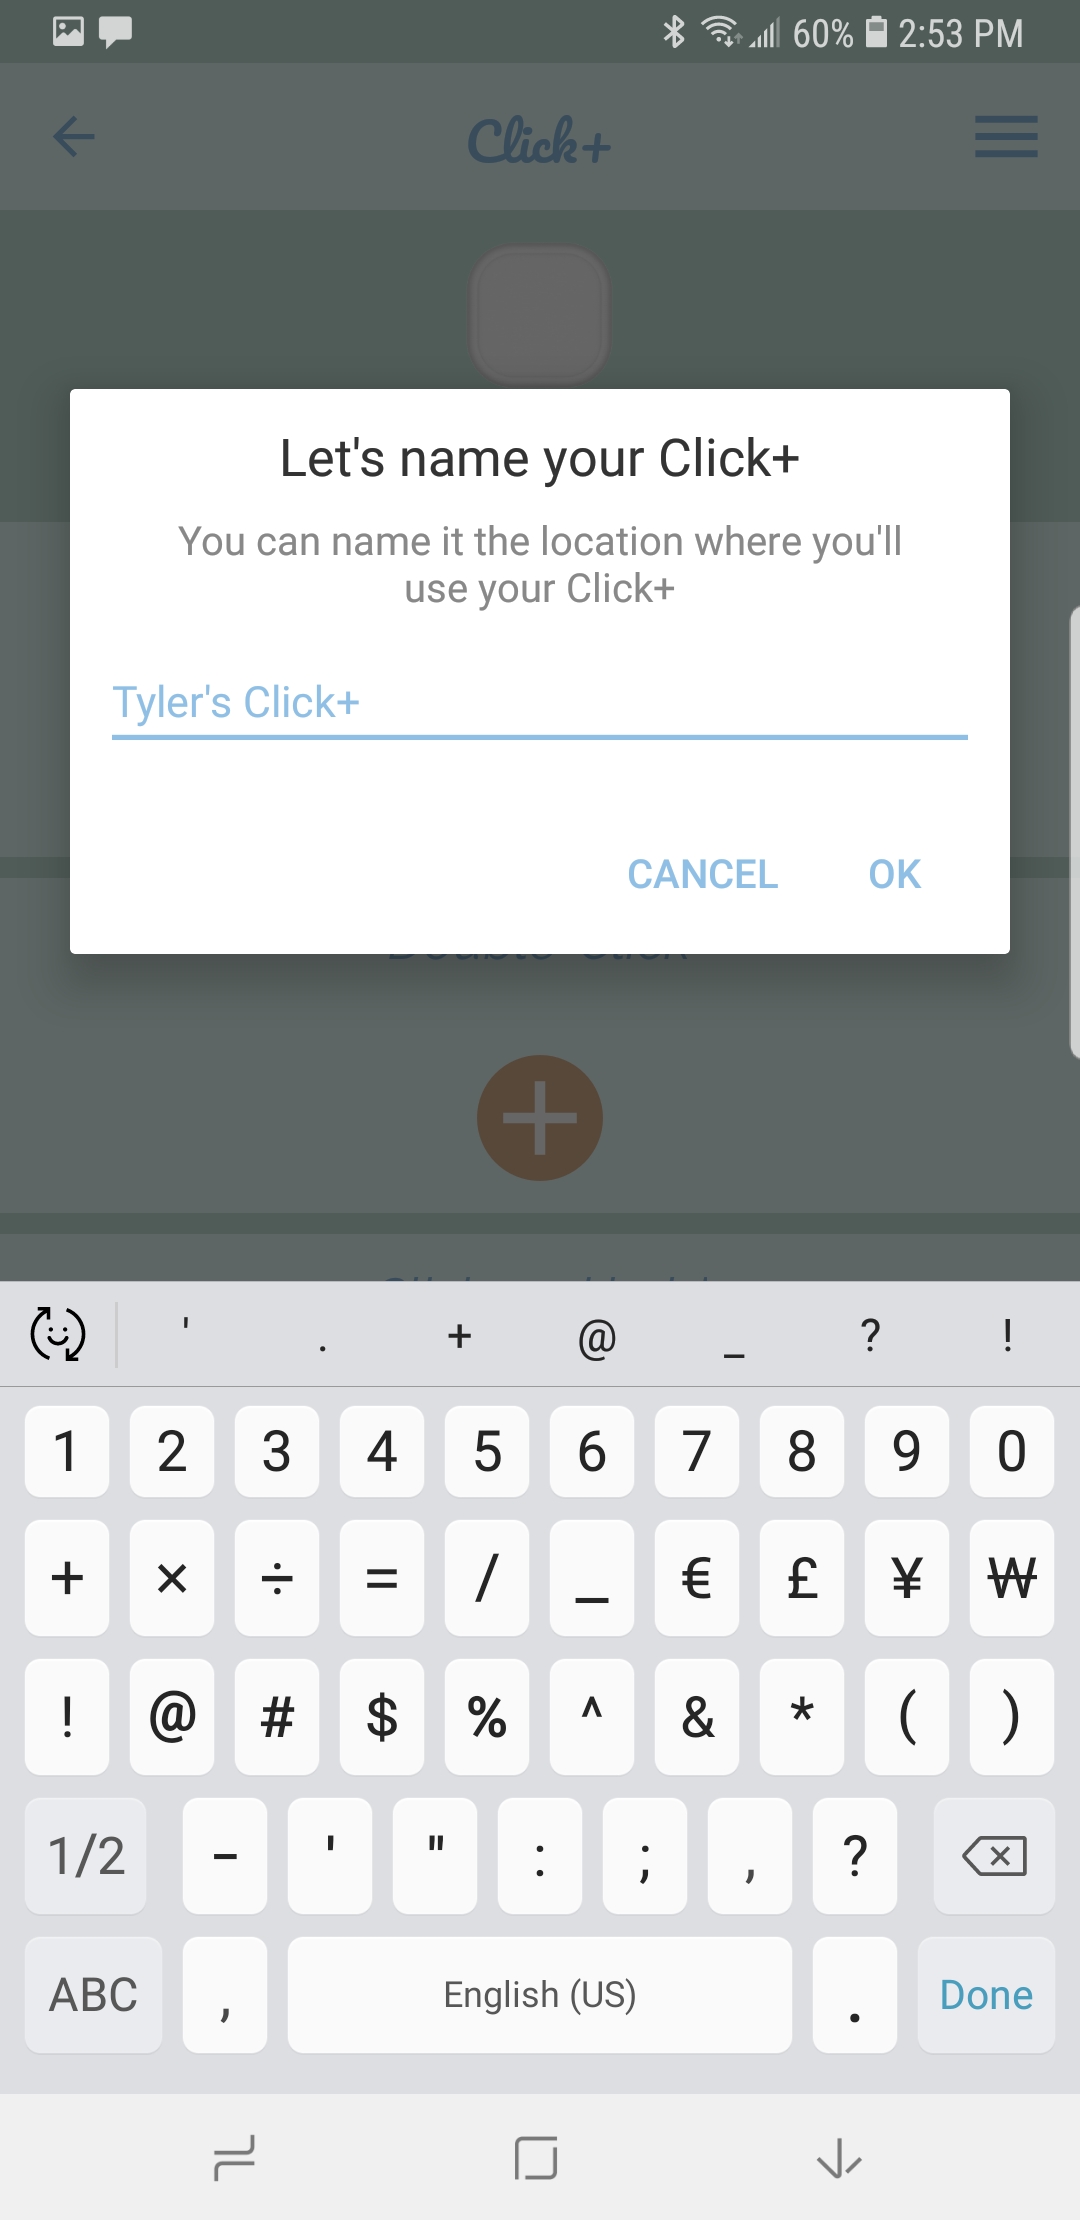
D. Type in the name that you would like this Click+ to have. You can name it after the person who owns the Click+ (ex. Tyler’s Click+), the name of the room it is used in (ex. Living Room), the name of the function it serves (ex. Music Control), etc.
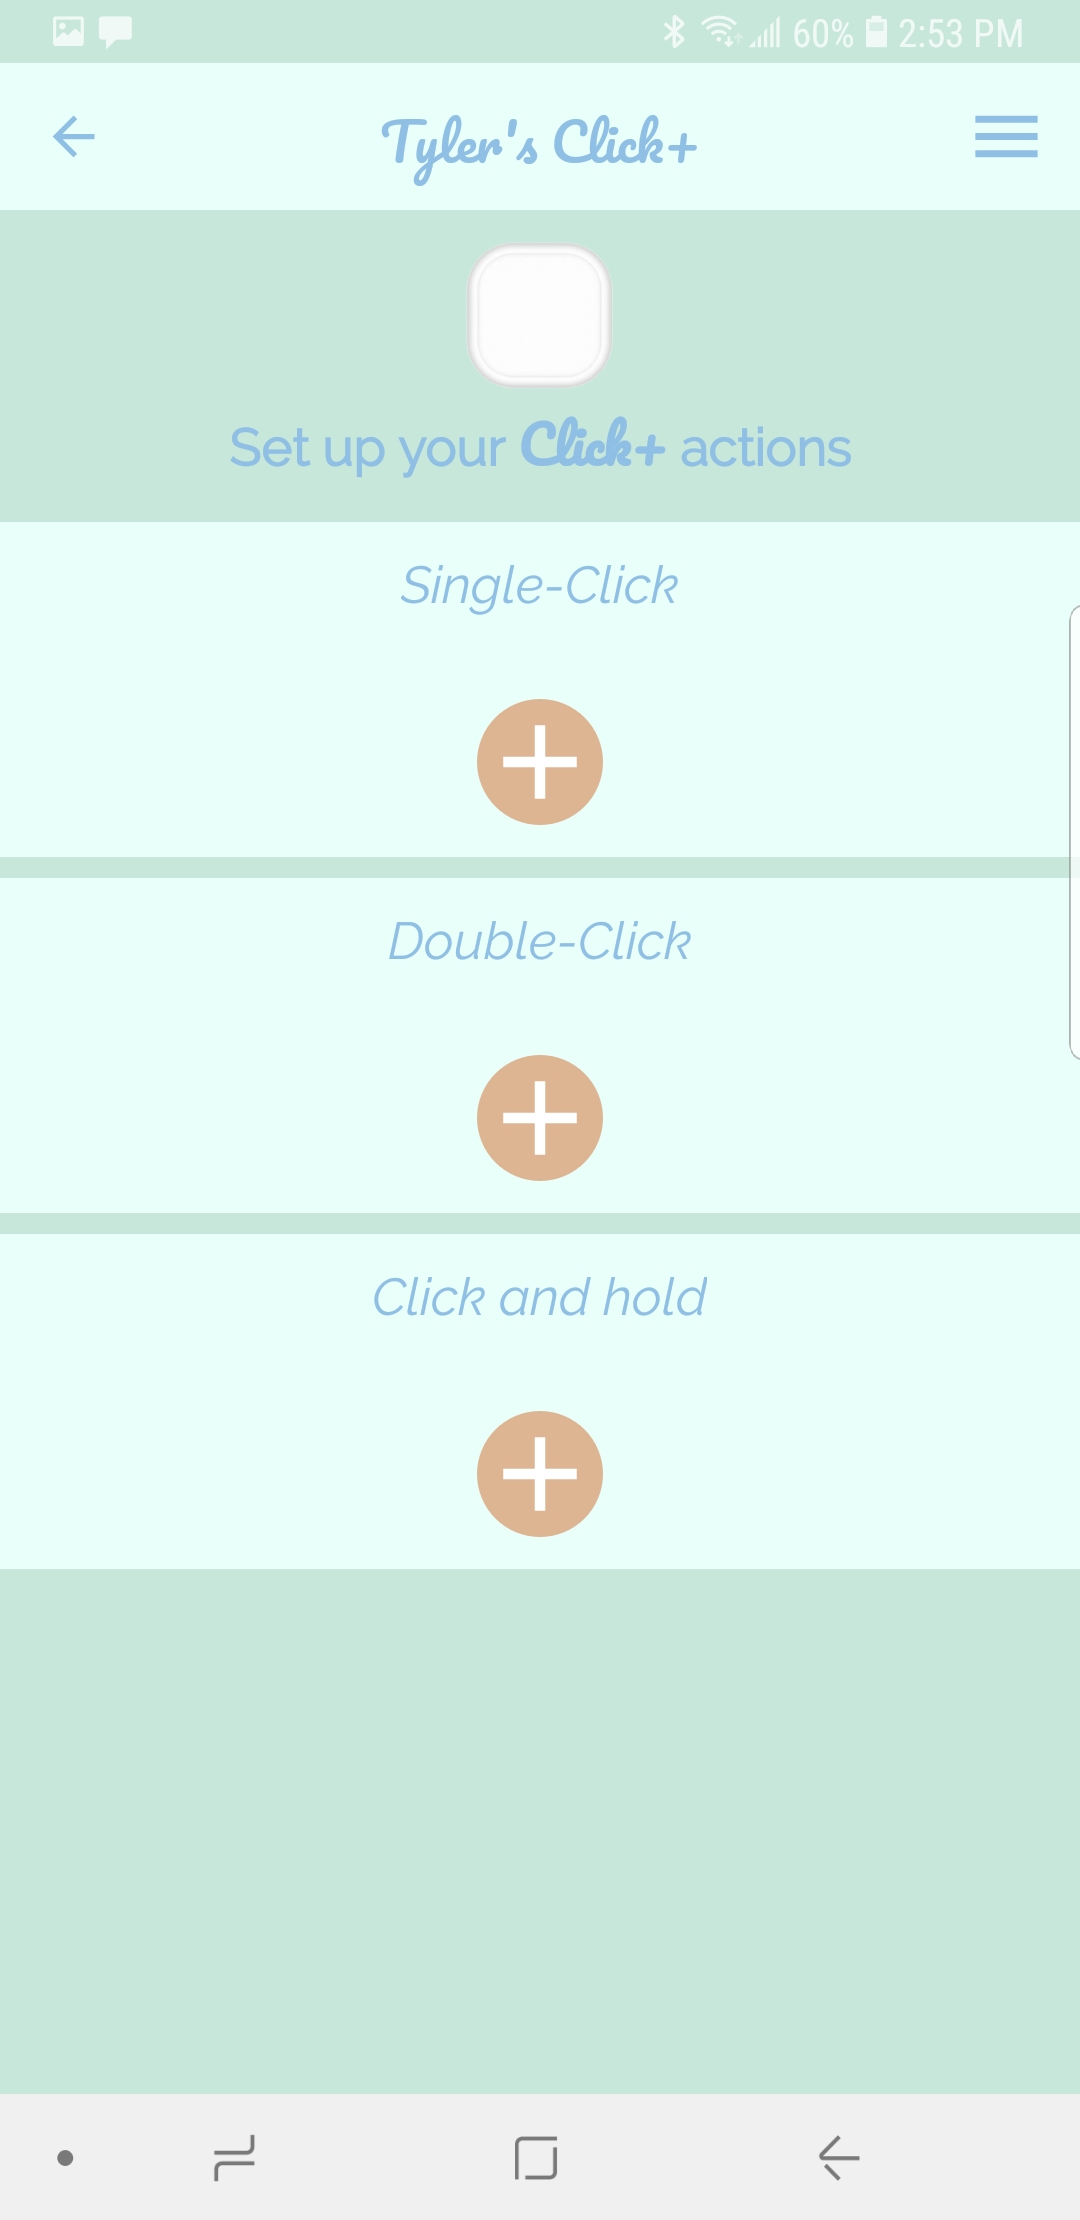
E. Tap DONE. Now your Click+ will be labelled with the new name you have given it.
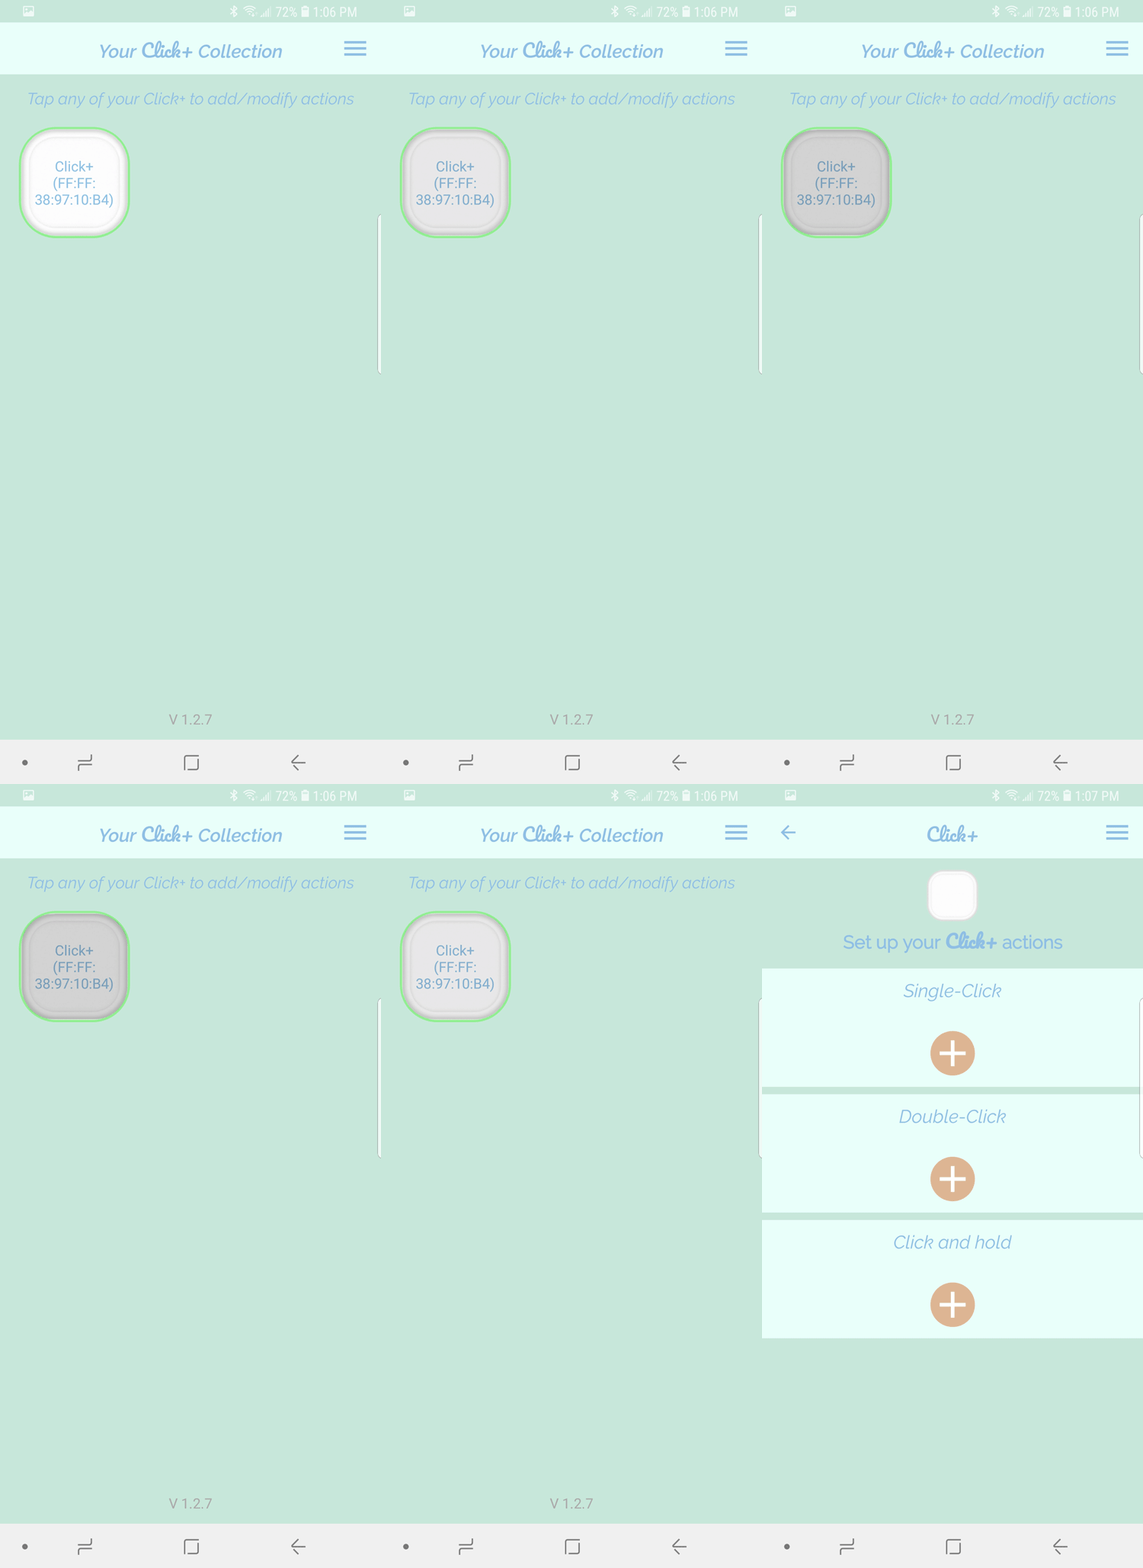
A. This is the screen that shows your Click+ actions. You can reach this screen by opening “Your Click+ Collection” screen and tapping the Click+ whose actions you want to edit.
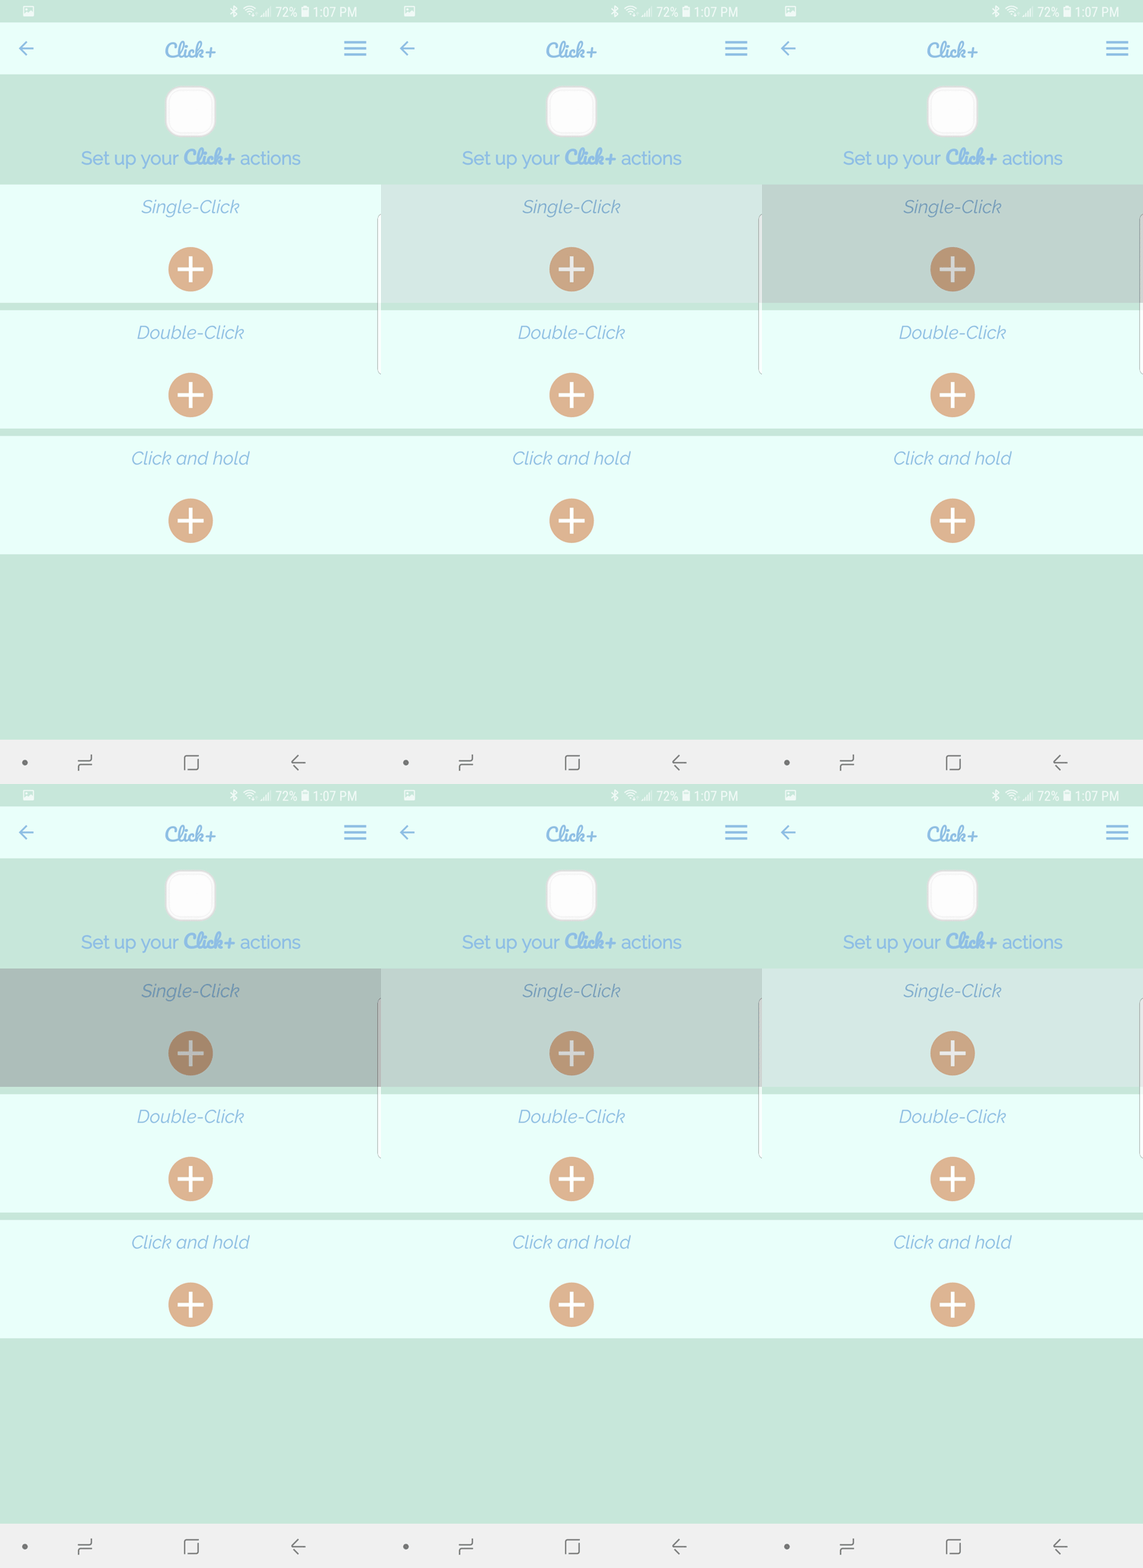
B. Tap SINGLE-CLICK to choose the action you would like to perform with a single click of your Click+ smart button.
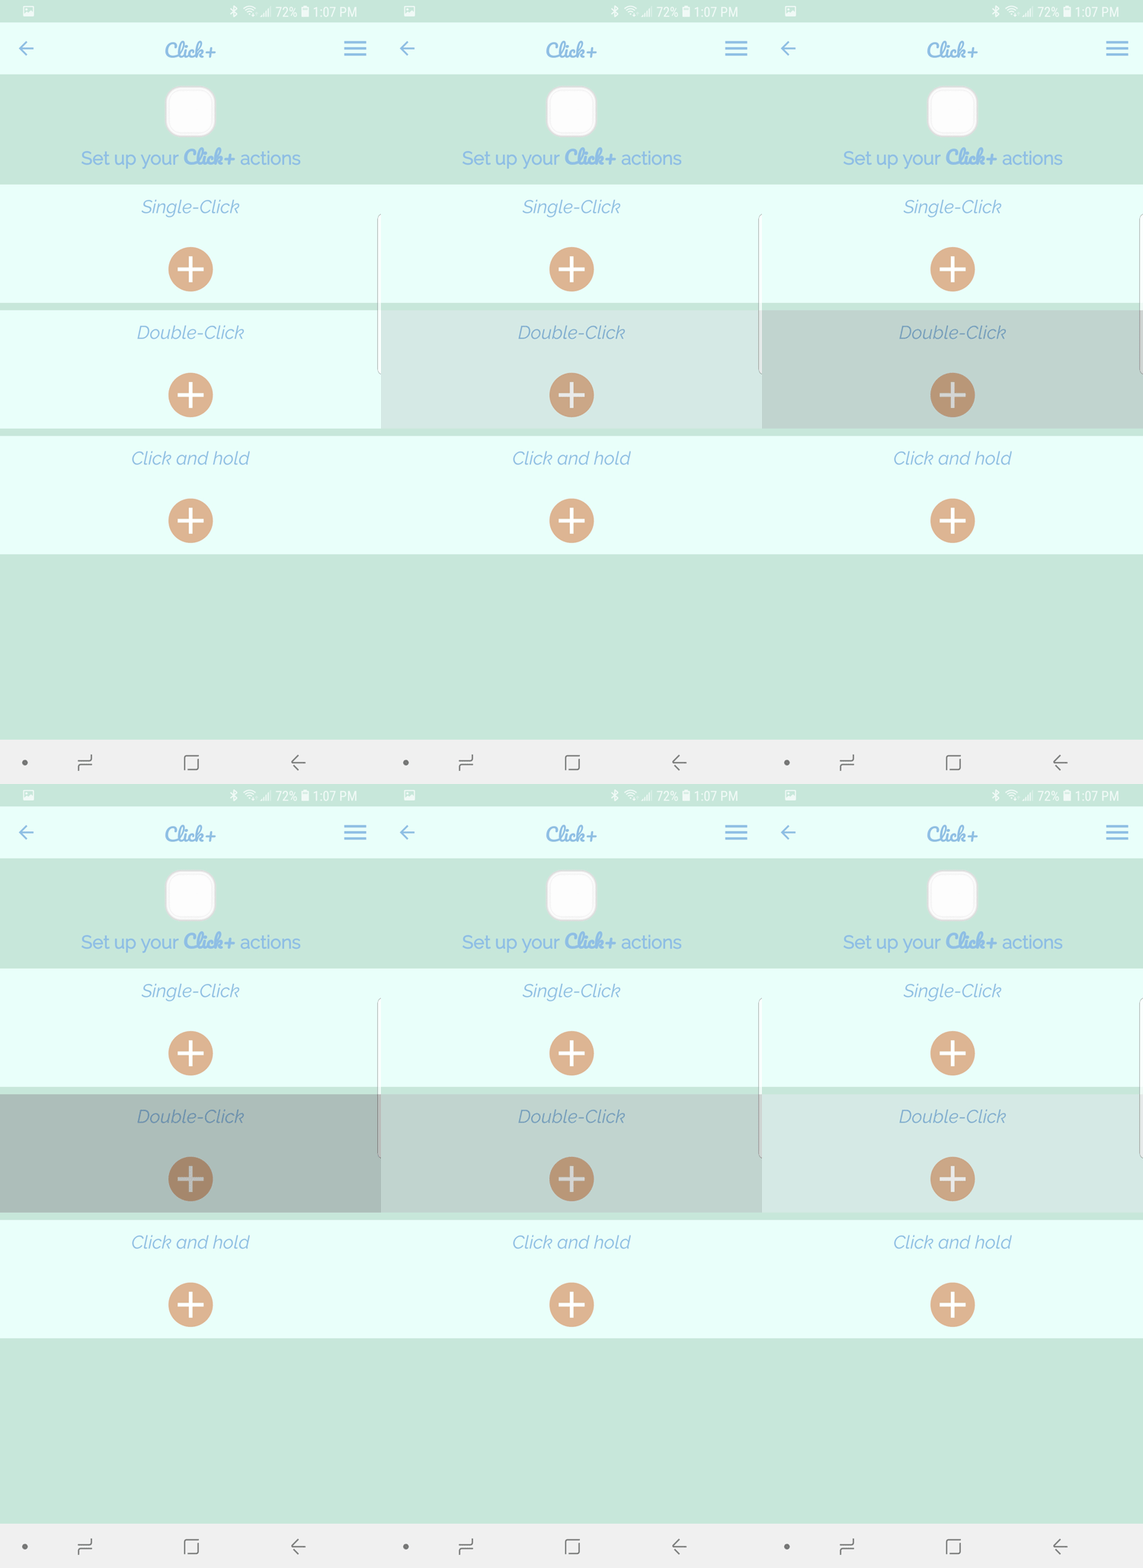
C. Tap DOUBLE-CLICK to choose the action you would like to perform with two quick clicks of your Click+ smart button.
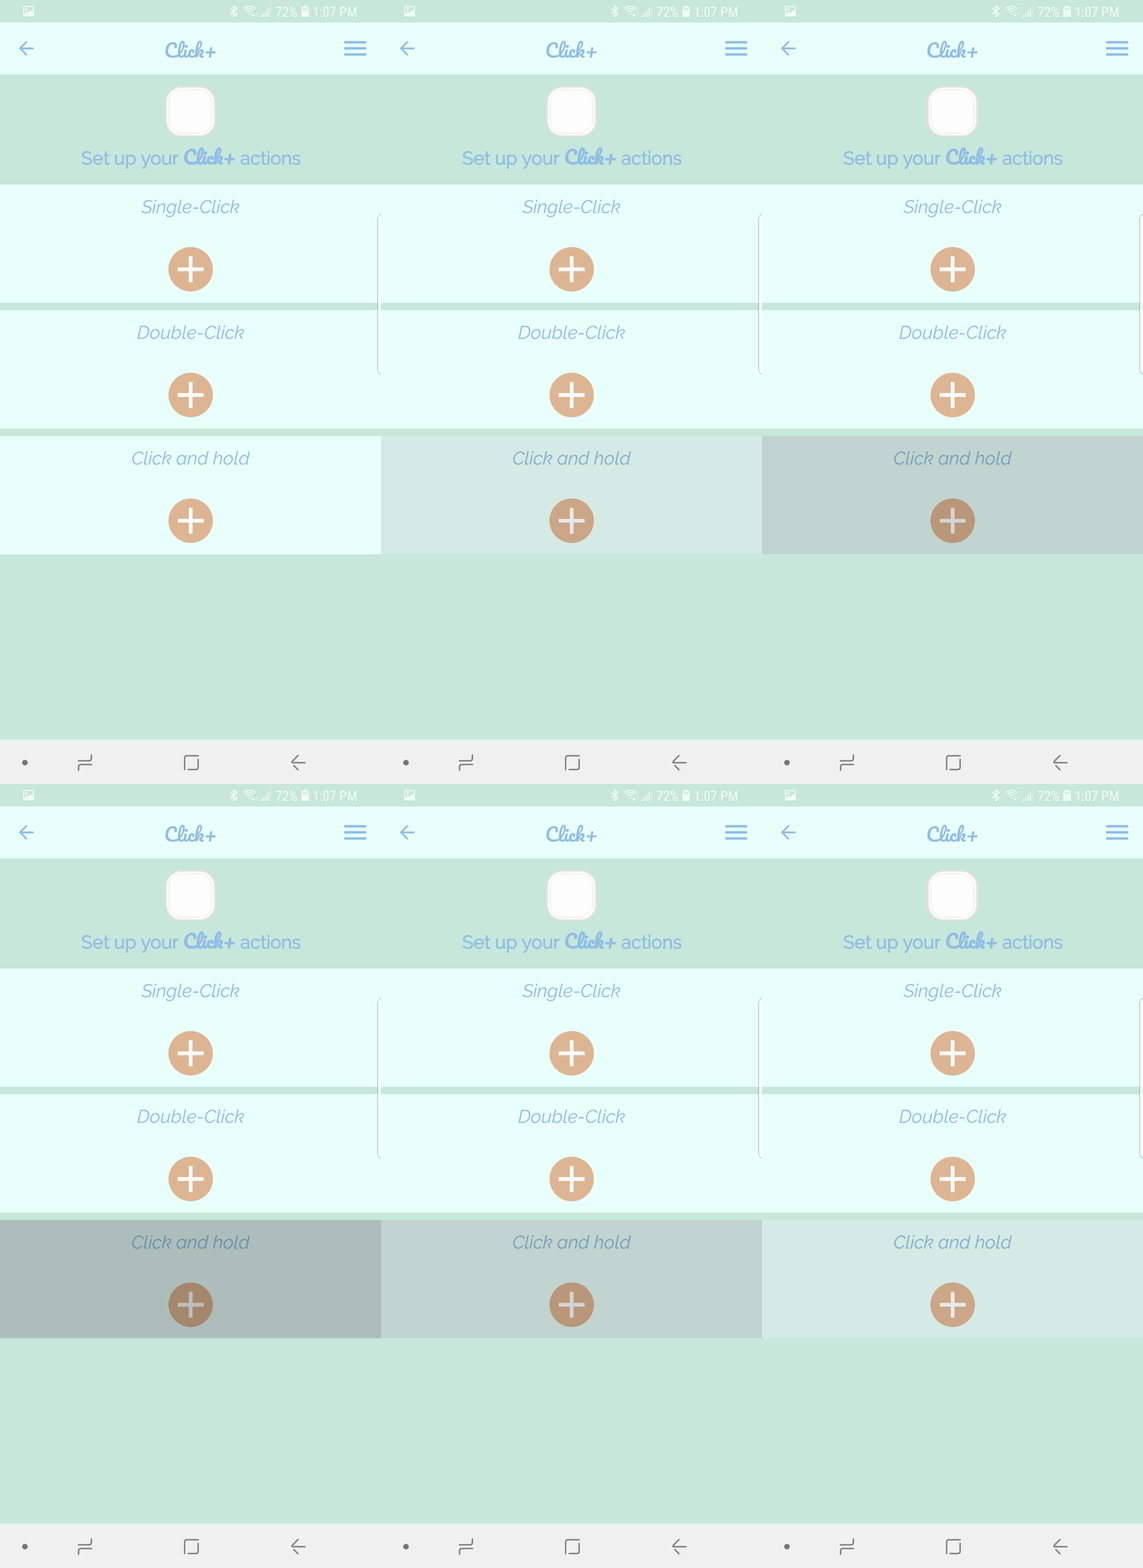
D. Tap CLICK AND HOLD to choose the action you would like to perform with a click and hold (for a minimum of 3 seconds) of your Click+ smart button. From this point, setting up actions is the same for Single-Click, Double-Click and Click and Hold.

E. Here is an example of how to set up a Single-Click action. (This example uses the “Find My Phone” action. To see how to set up all of the actions, see the All Actions section of this support page.) Tap SINGLE-CLICK.
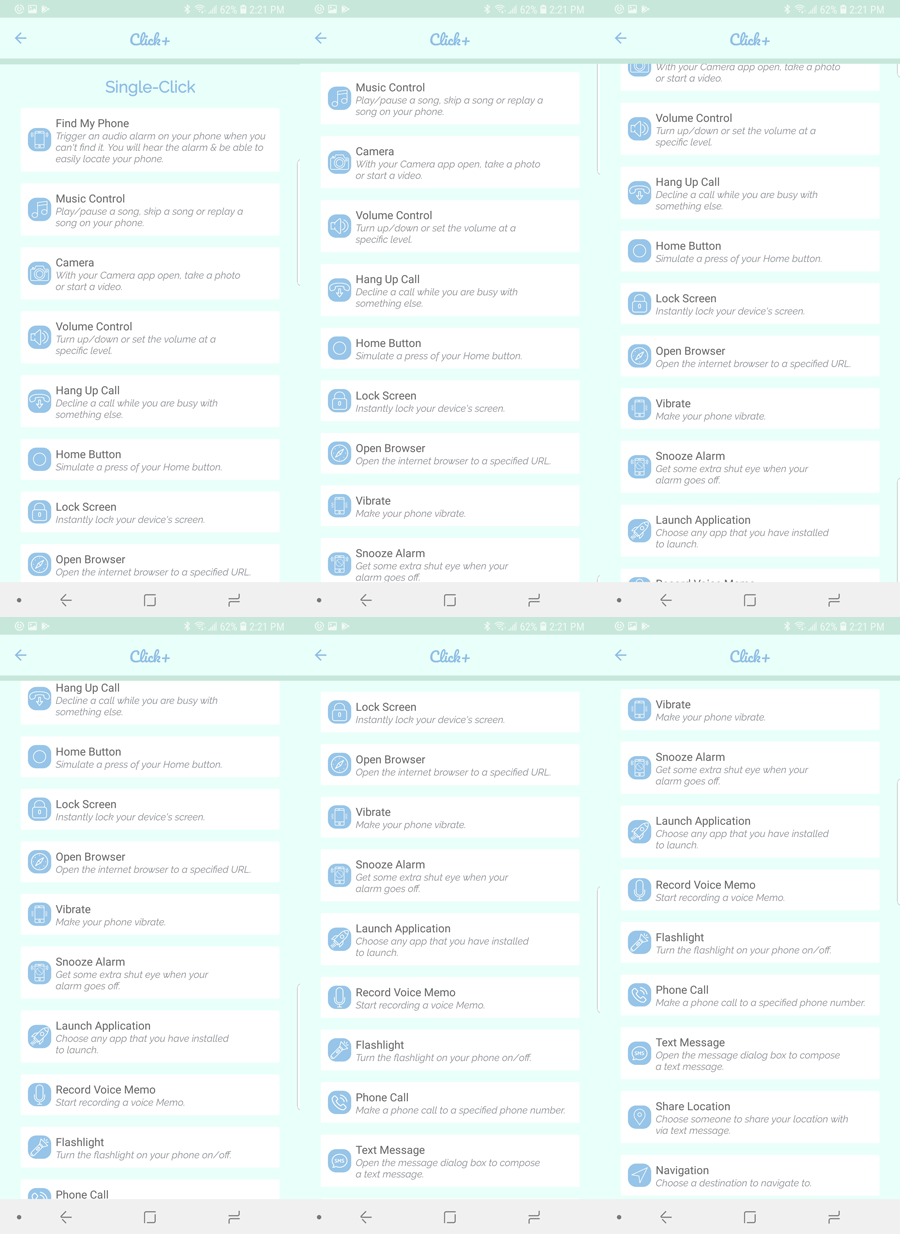
F. This brings you to the list of all the available actions that can be added to your Click+. Simply tap the action you would like to set up. For this example, tap FIND MY PHONE.
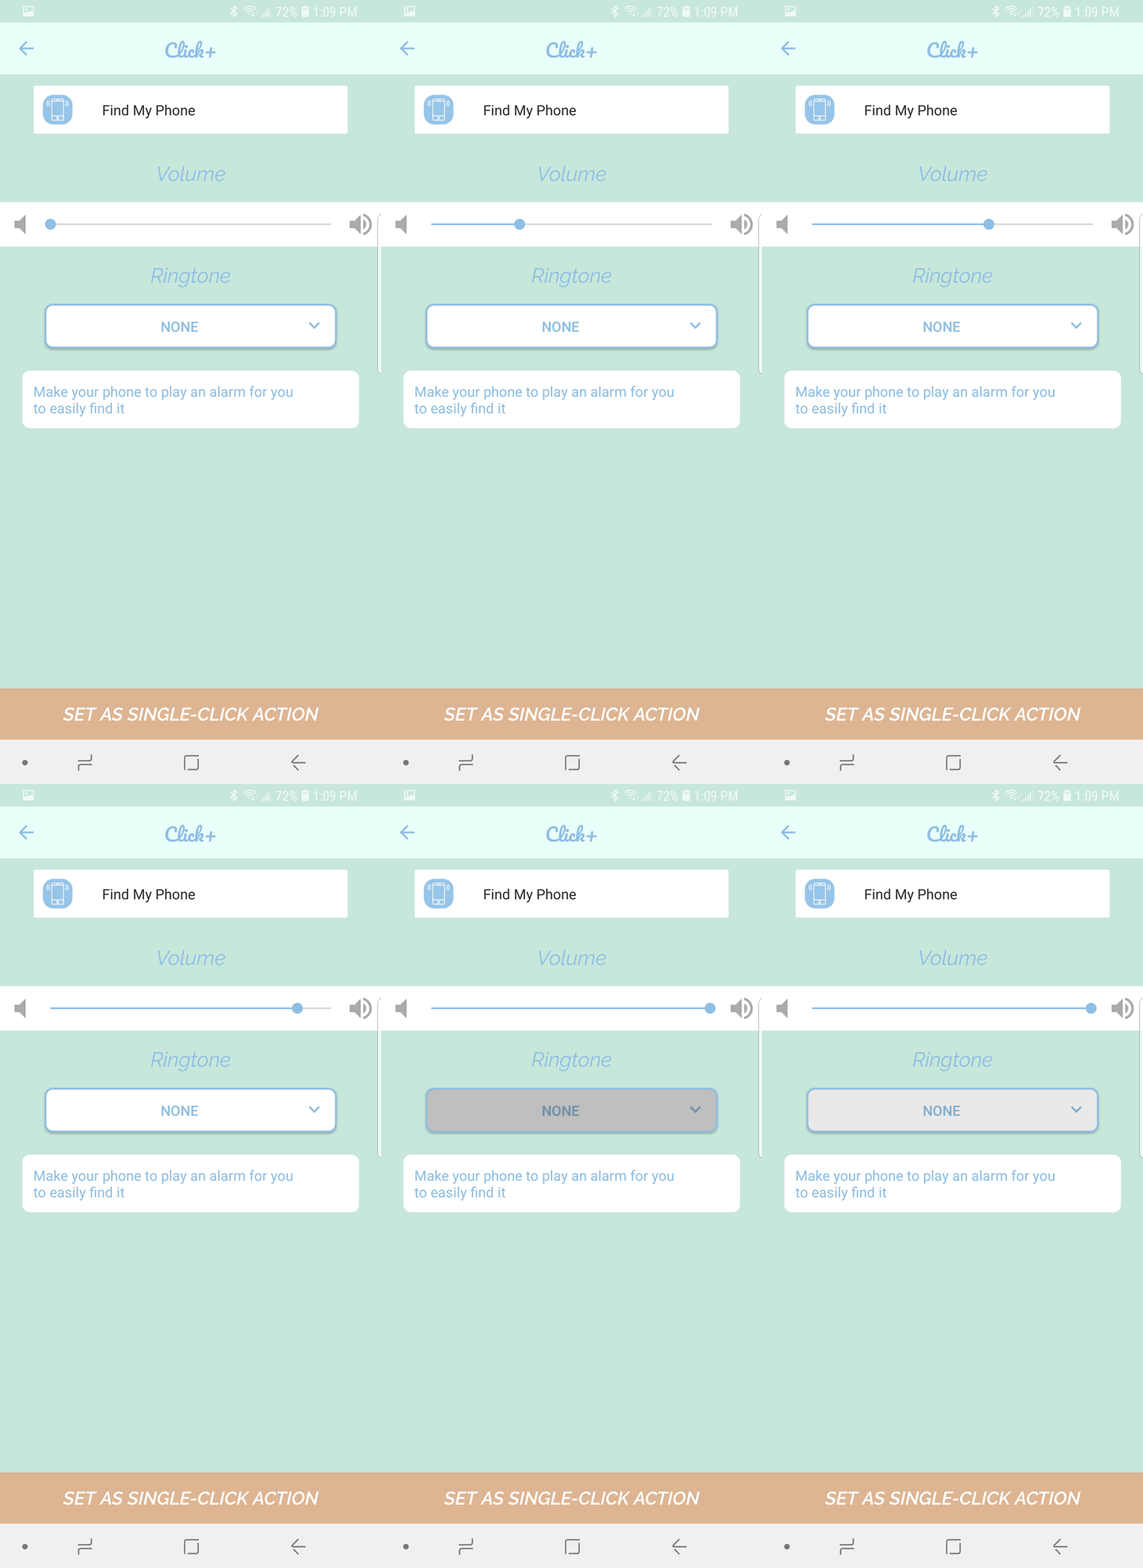
G. This is the information screen for the “Find My Phone” action. All actions have an information screen, some including different settings for you to edit. For this example, you can select the alarm that will sound from your phone when the Click+ button is pressed and what volume it will sound at.
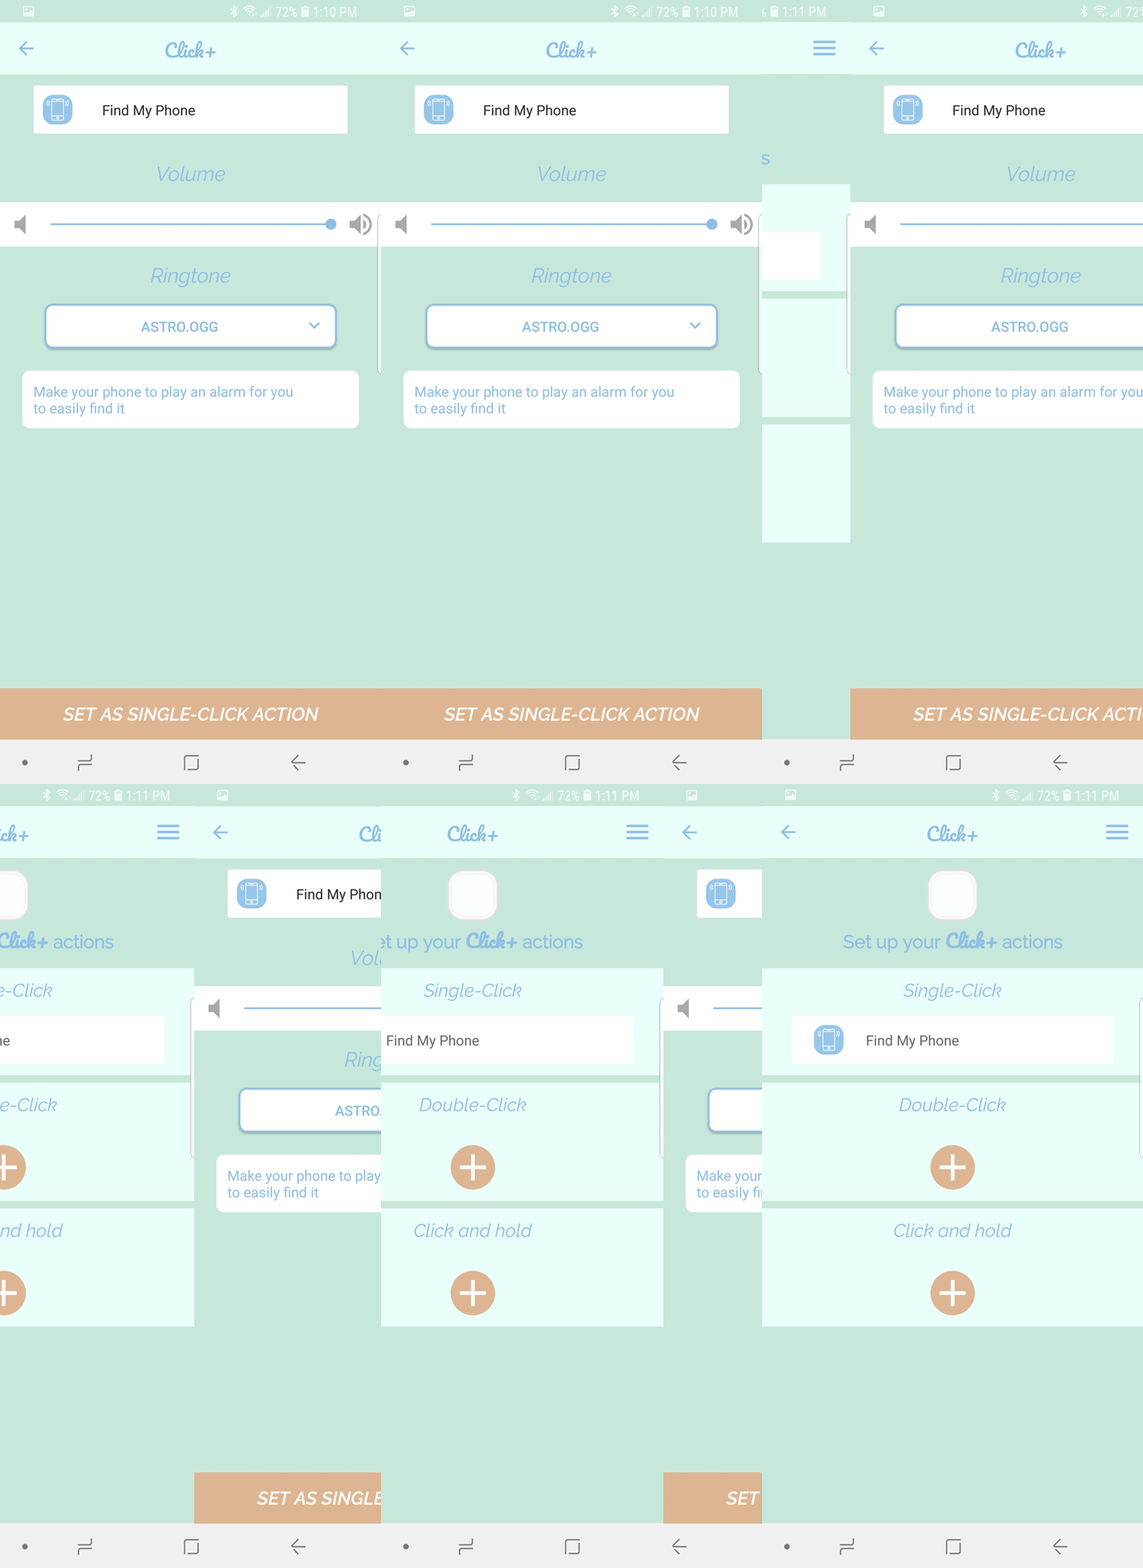
H. When you’re finished setting up your action, tap DONE. You will be brought back to the action set-up screen where you can follow the same process to set up the Double-Click and Click and Hold actions.
ALL ACTIONS
The following examples of setting up and using each action are shown with the “Single-Click” action. The same steps are used with the “Double-Click” and “Click and Hold” actions.
**Please note that the Click+ App must be running in the background to communicate with your Click+ smart button for the Find My Phone action.**

A. Open the app and tap the Click+ whose actions you would like to edit.

B. This brings you to the action set-up screen. Tap SINGLE-CLICK, DOUBLE-CLICK or CLICK AND HOLD depending on which one you want to edit.
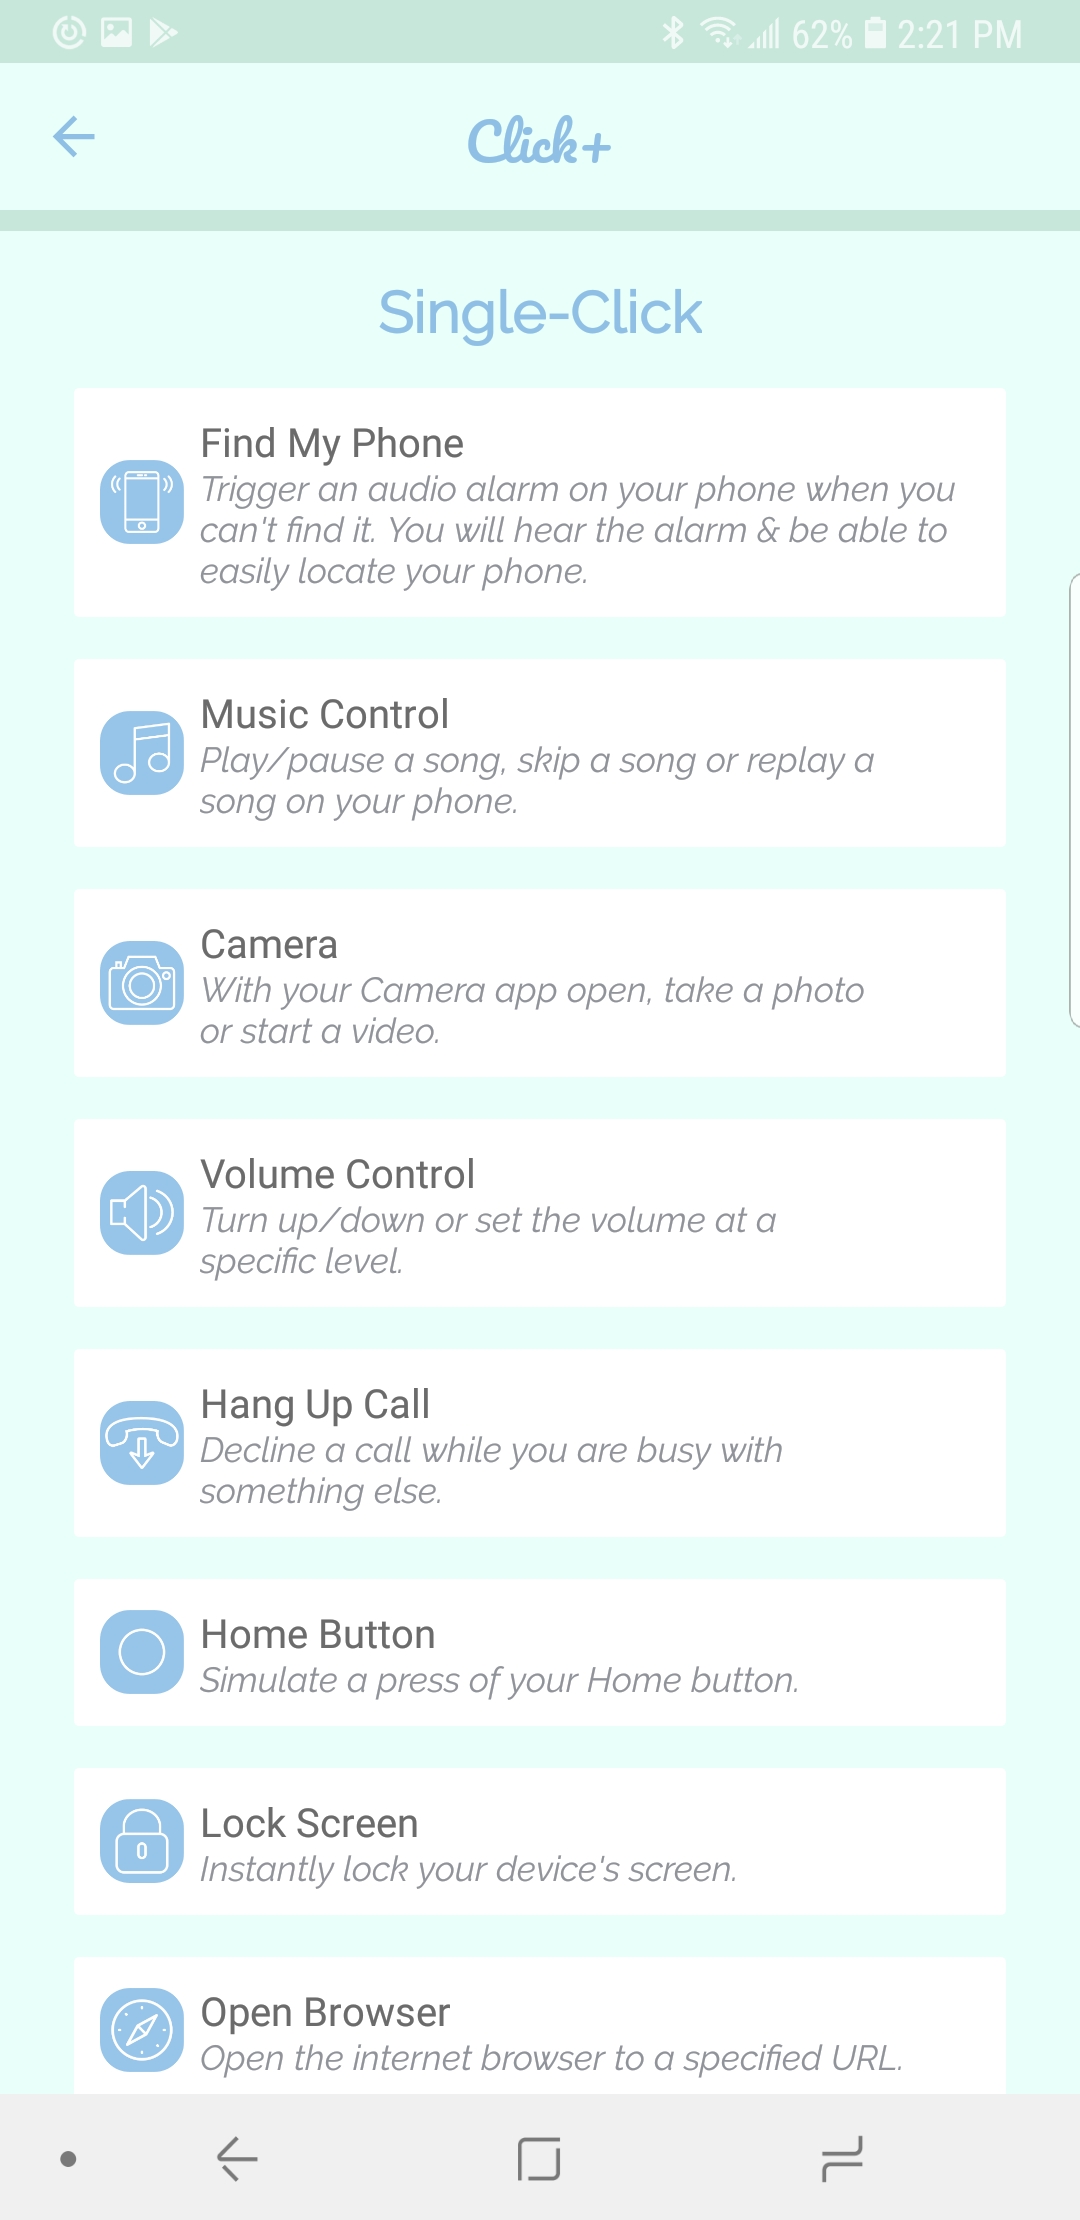
C. This brings you to the list of available actions. Tap FIND MY PHONE.
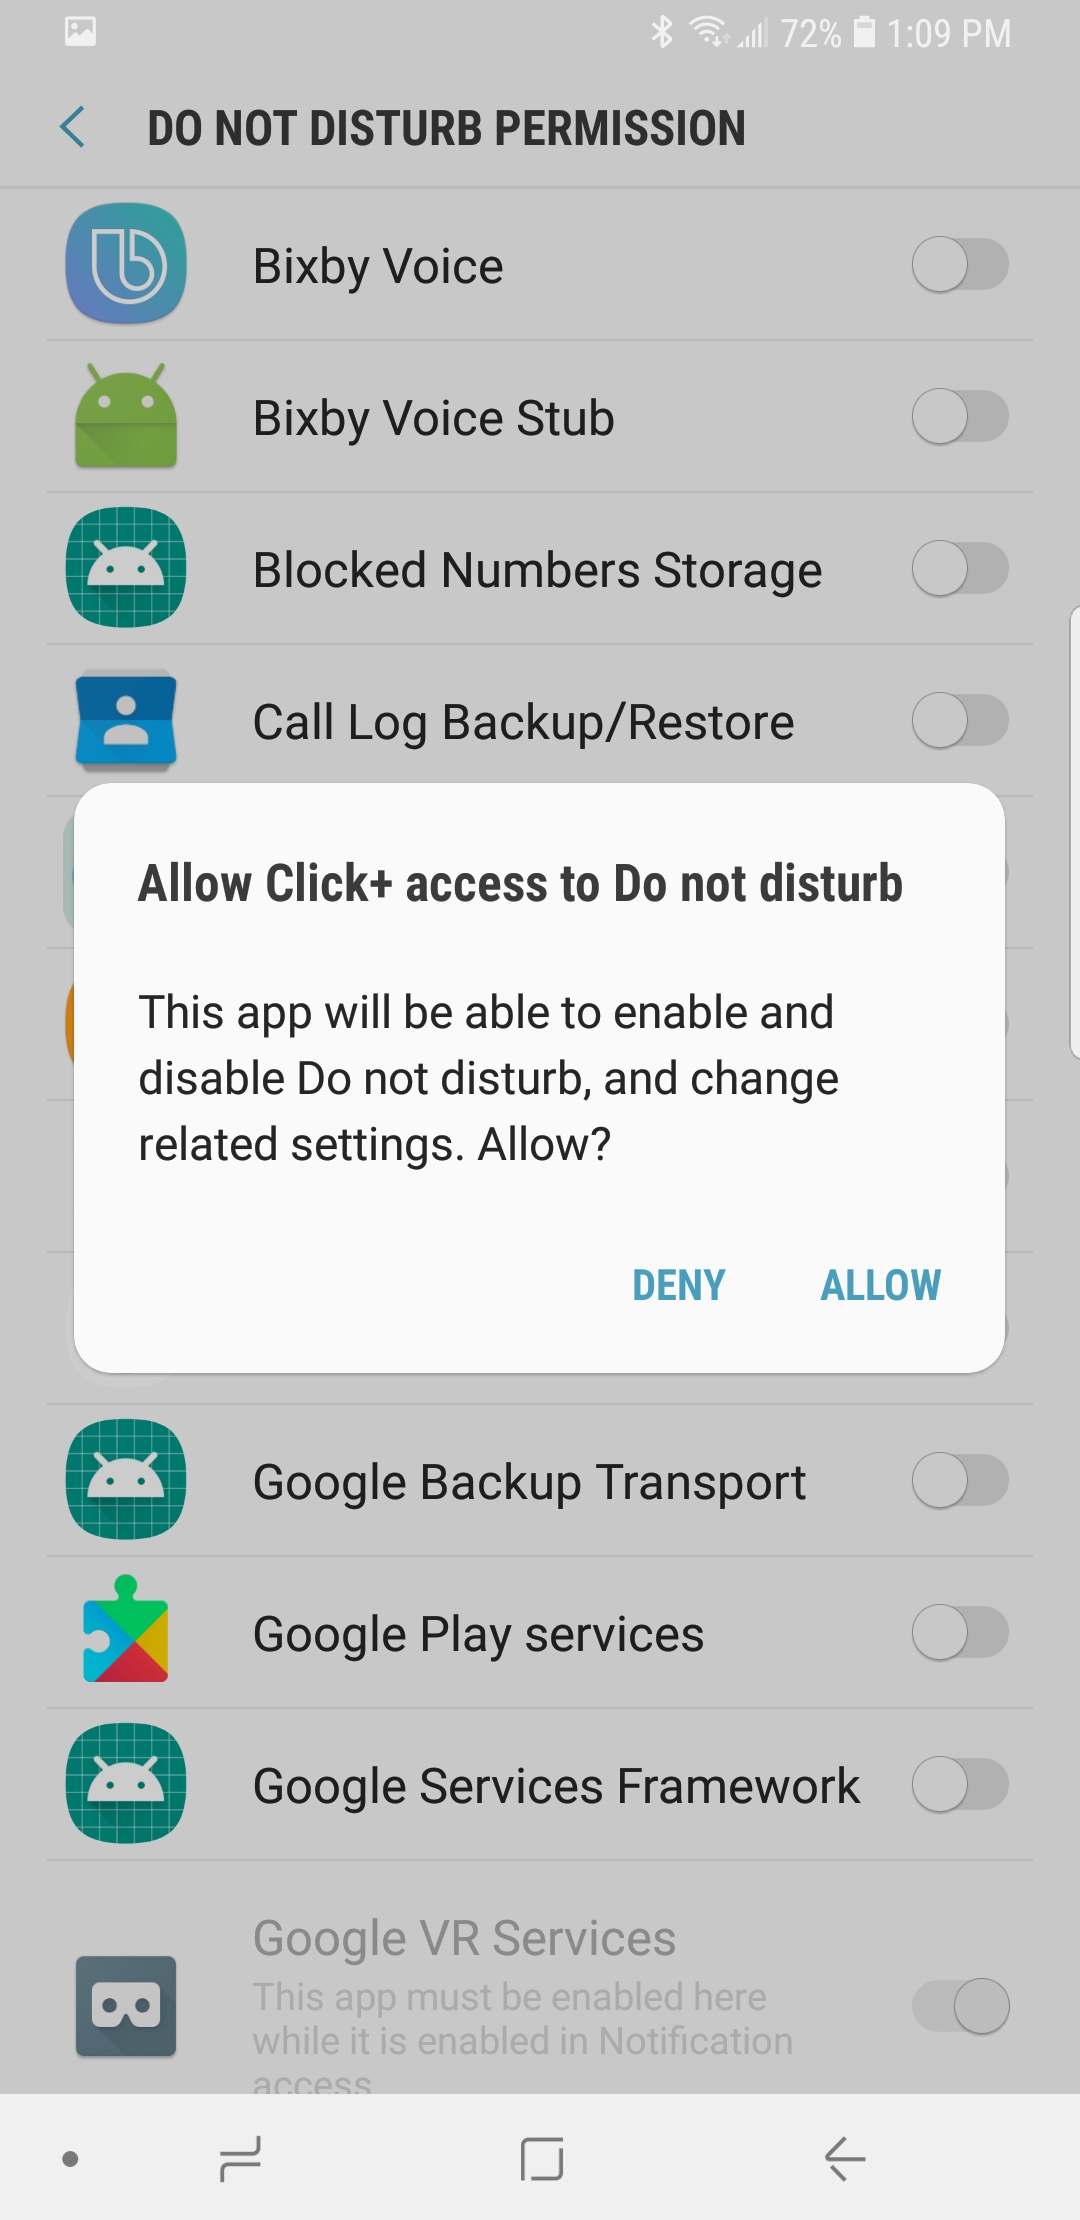
D. A window may pop up asking you to allow the Click+ to access Do Not Disturb settings. Tap ALLOW.
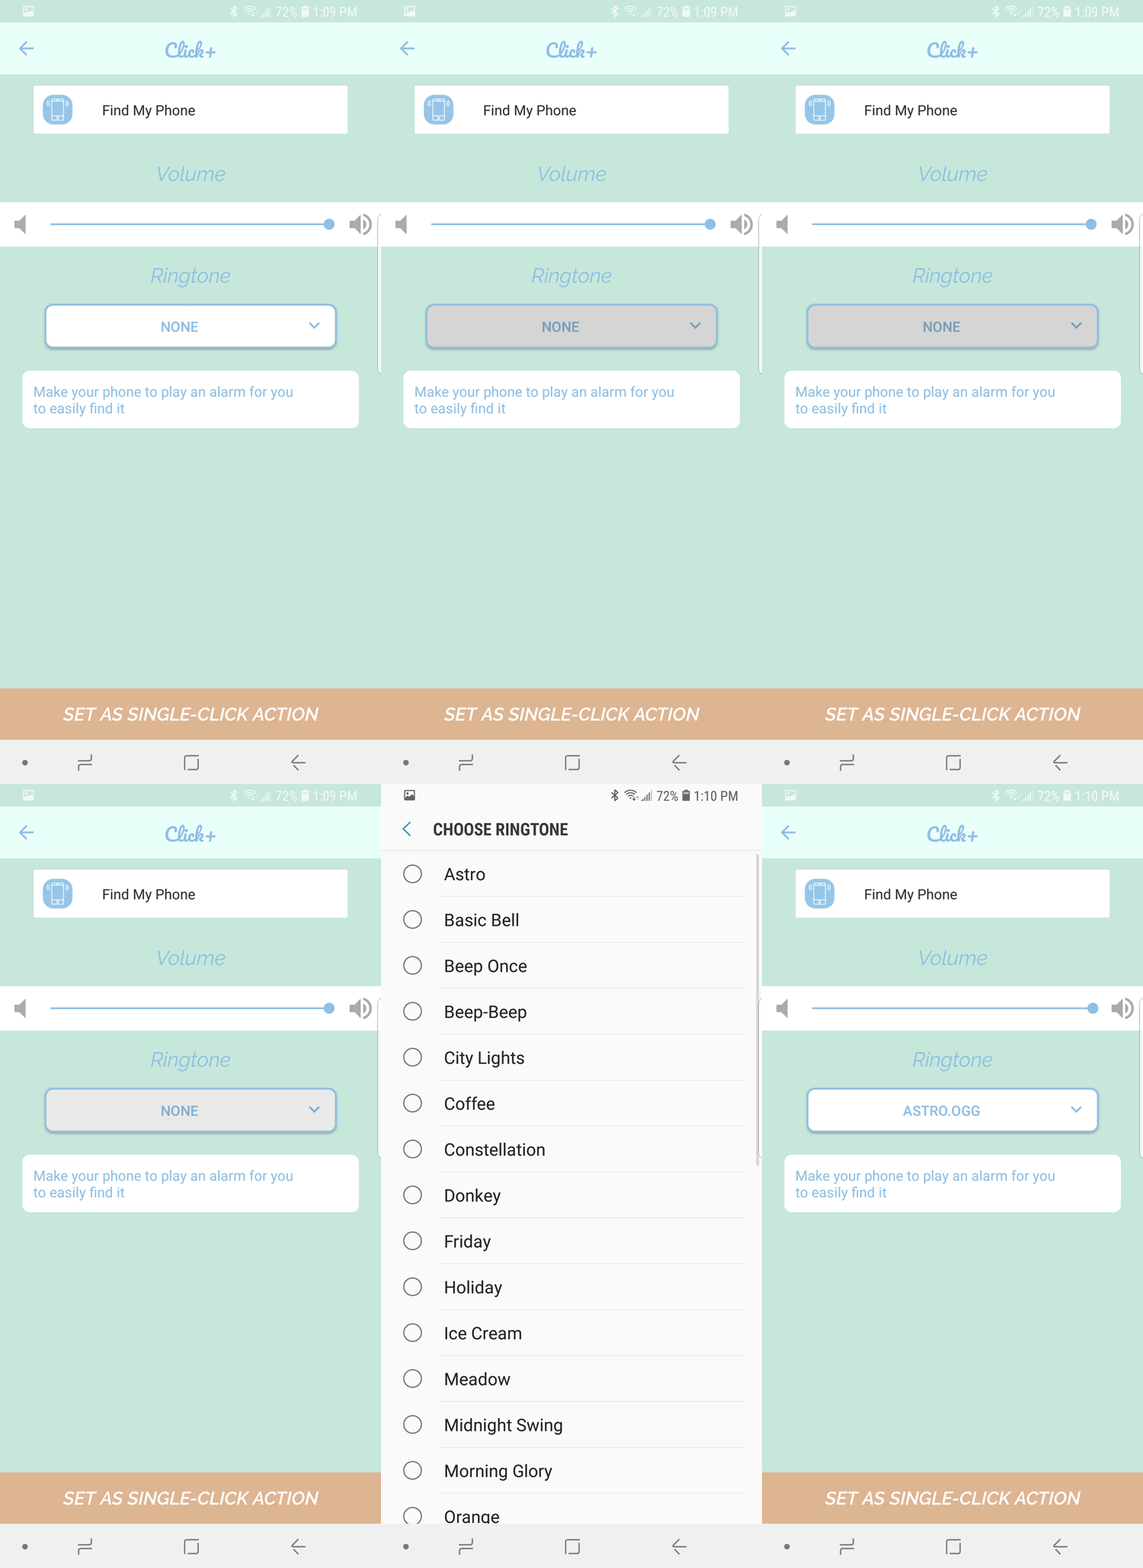
E. Find My Phone triggers an audio alarm on your phone to help you locate it when it is missing. Choose which alarm you would like to hear when the Click+ button is pressed.
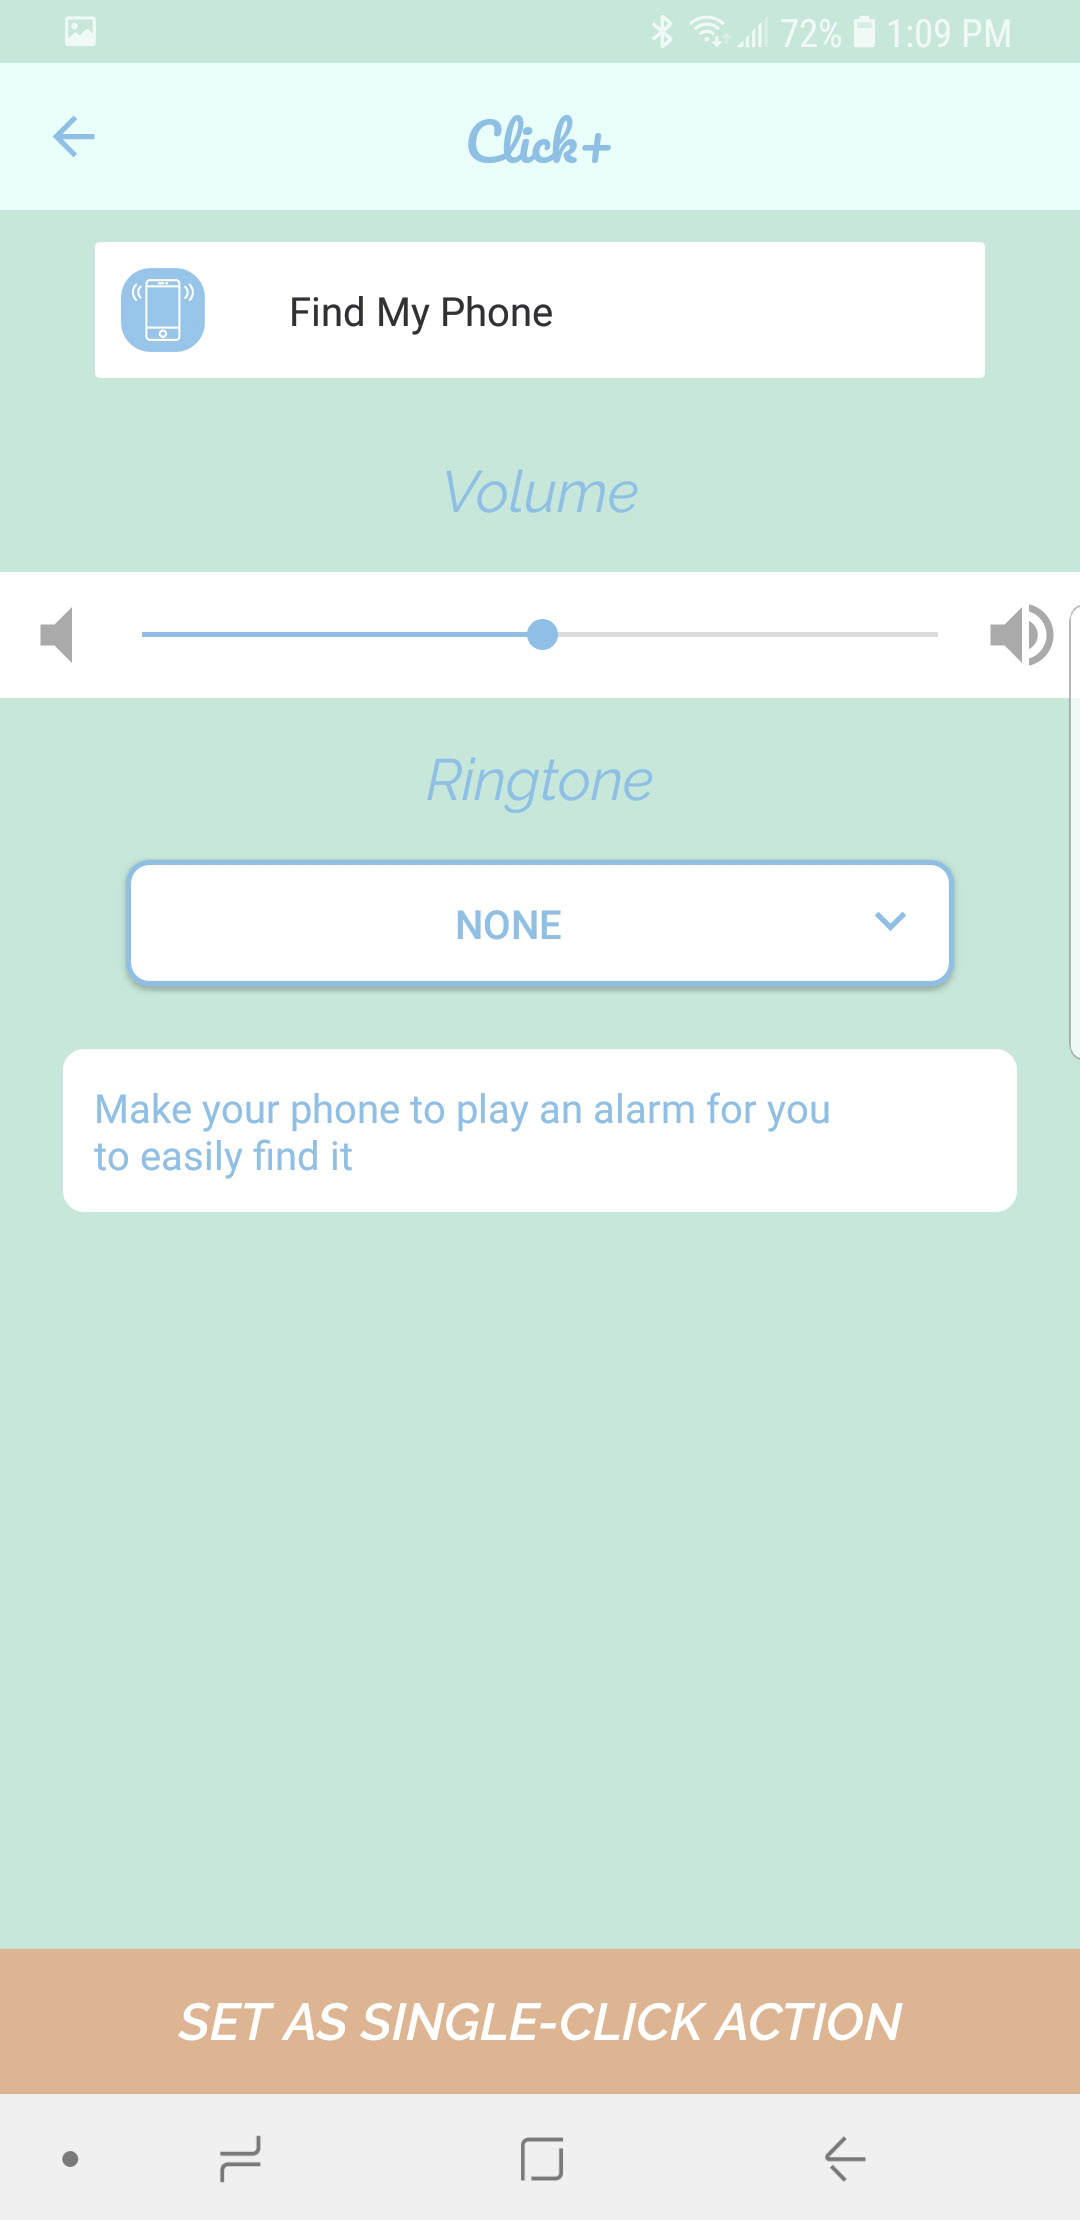
F. Choose how loud you would like this audio alarm to be when the Click+ button is pressed.
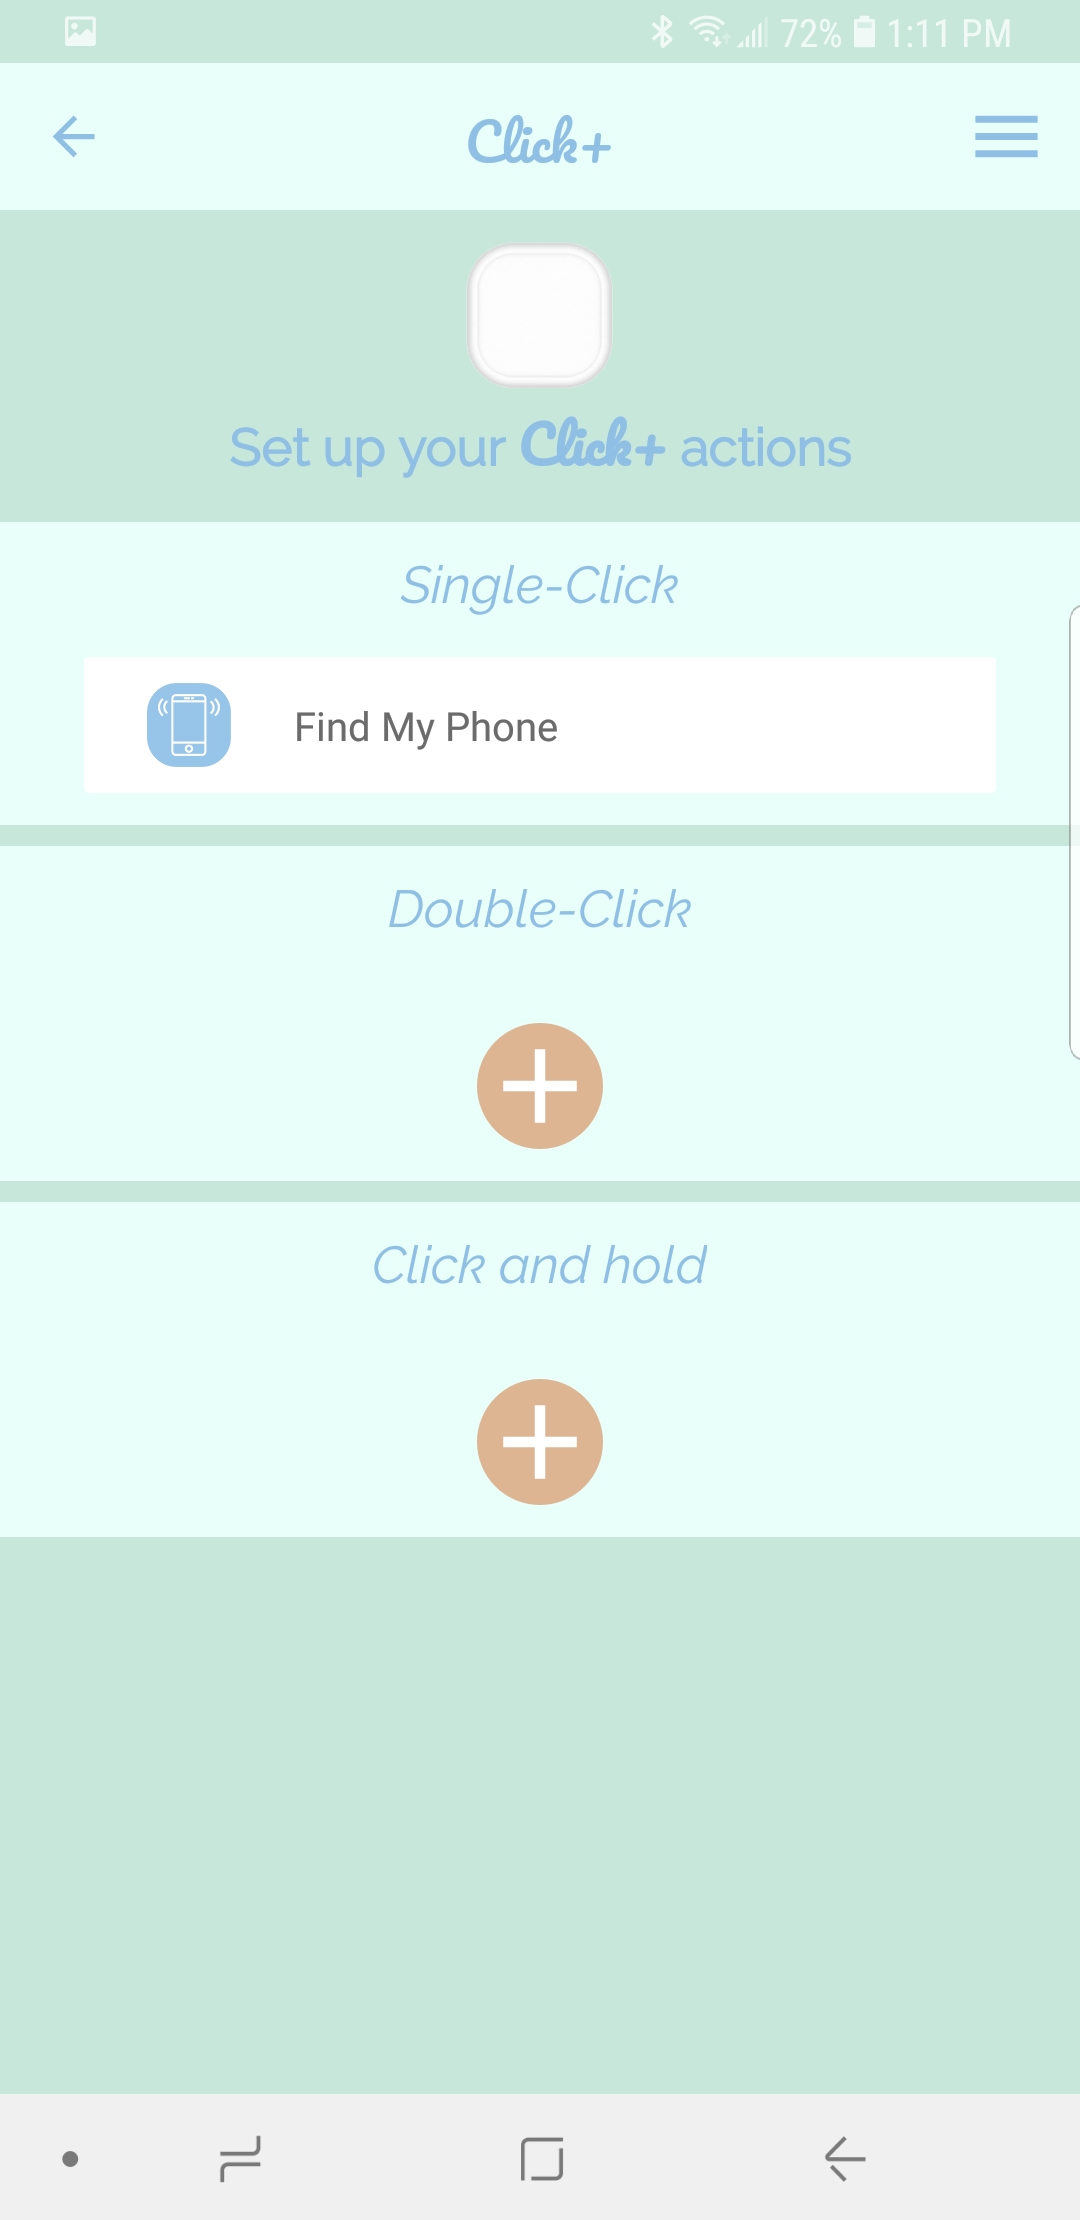
G. Tap SET AS SINGLE-CLICK ACTION and you will be brought back to the action set-up screen. Now you can press the Click+ button and the alarm on your phone will sound until you are able to find it. Press the button on the Click+ again to turn off the alarm.
**Please note that the Click+ App must be running in the background to communicate with your Click+ smart button for the Music Control action.**

A. Open the app and tap the Click+ whose actions you would like to edit.

B. This brings you to the action set-up screen. Tap SINGLE-CLICK, DOUBLE-CLICK or CLICK AND HOLD depending on which one you want to edit.

C. This brings you to the list of available actions. Tap MUSIC CONTROL.
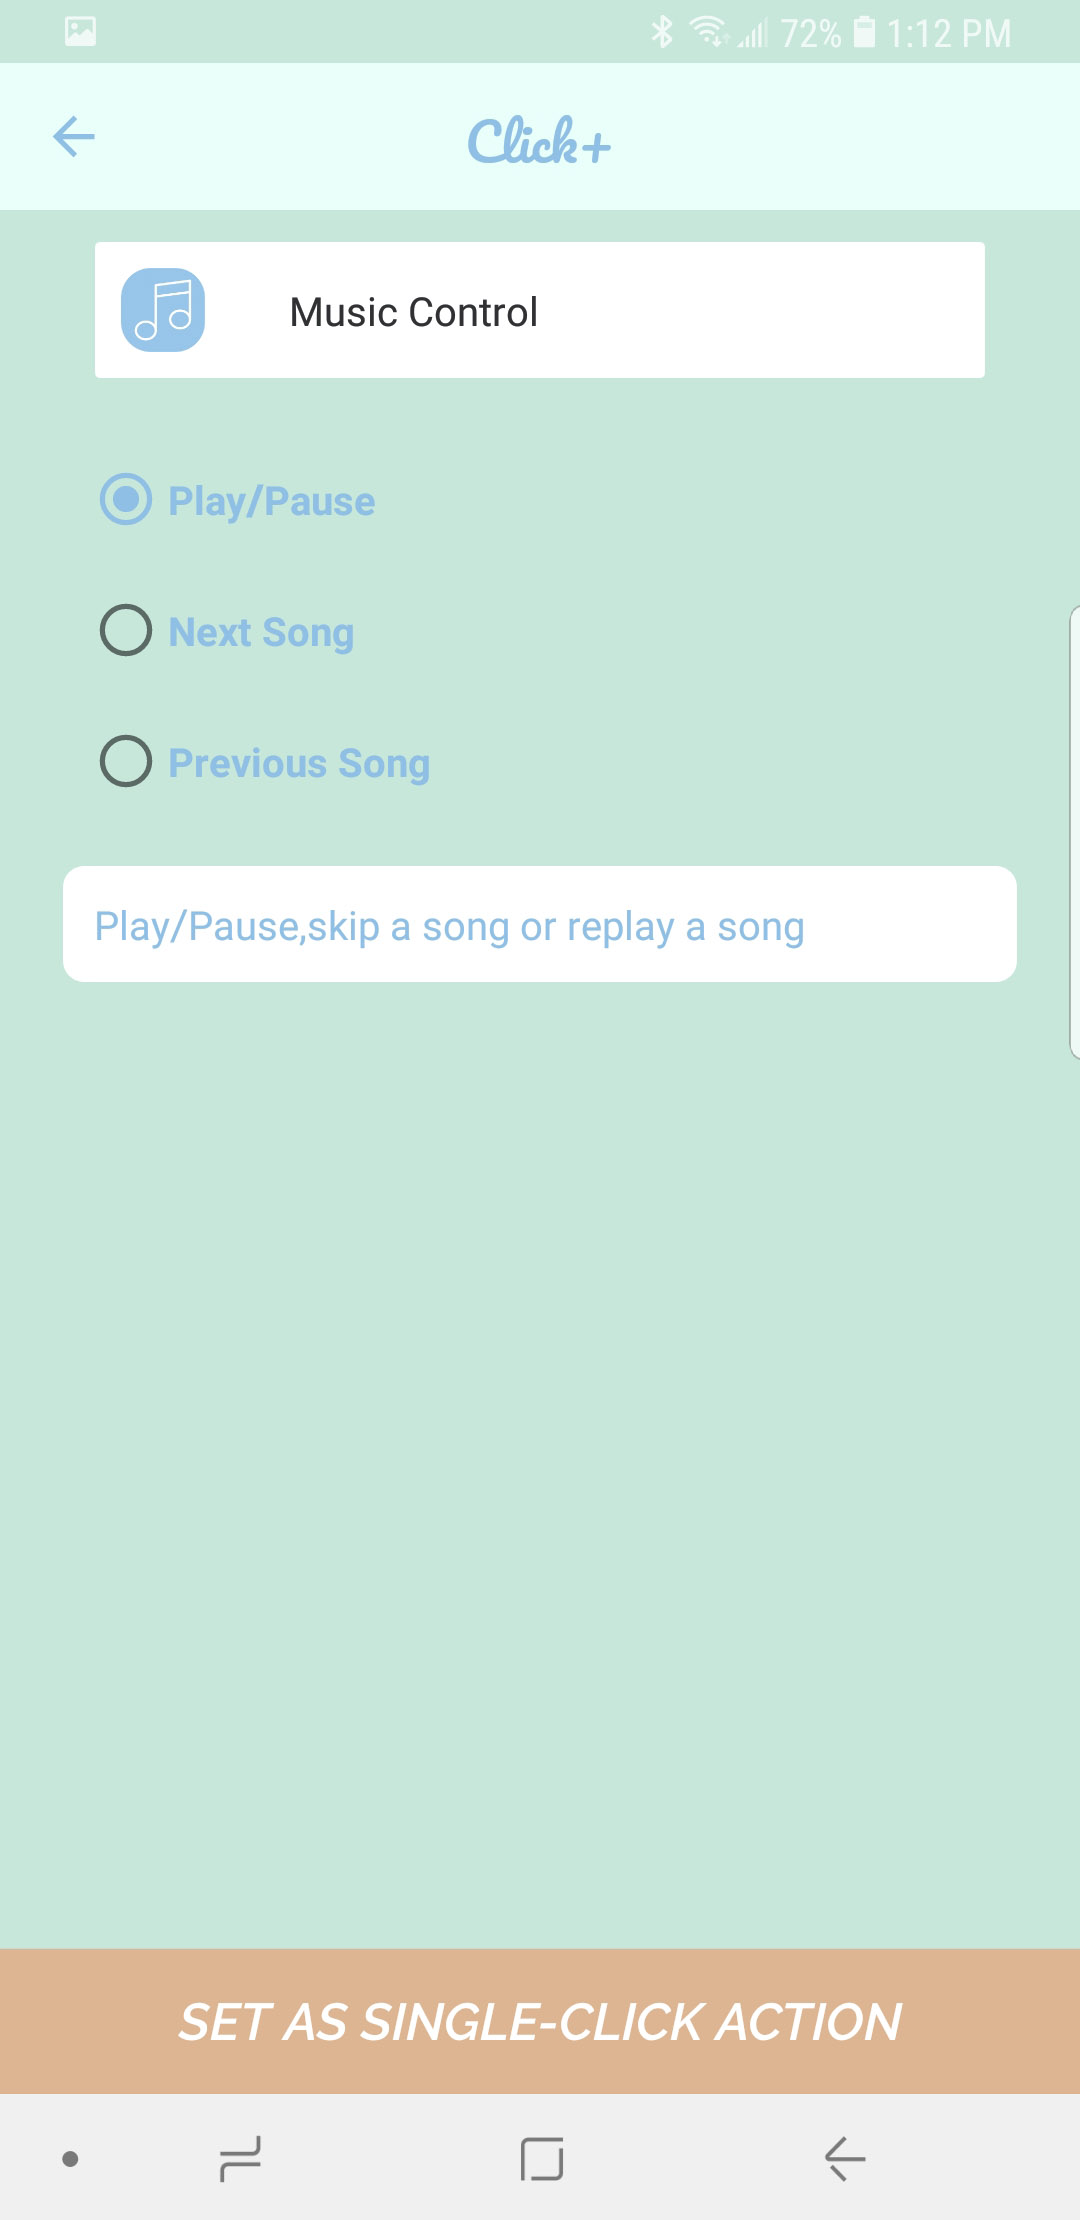
D. Select whether you would like this action to play and pause a song (podcast, etc), go to the next song or go to the previous song. Tip: Set up all three of these actions on one Click+ to have full control of of your music from a distance when your phone is plugged into your speaker.
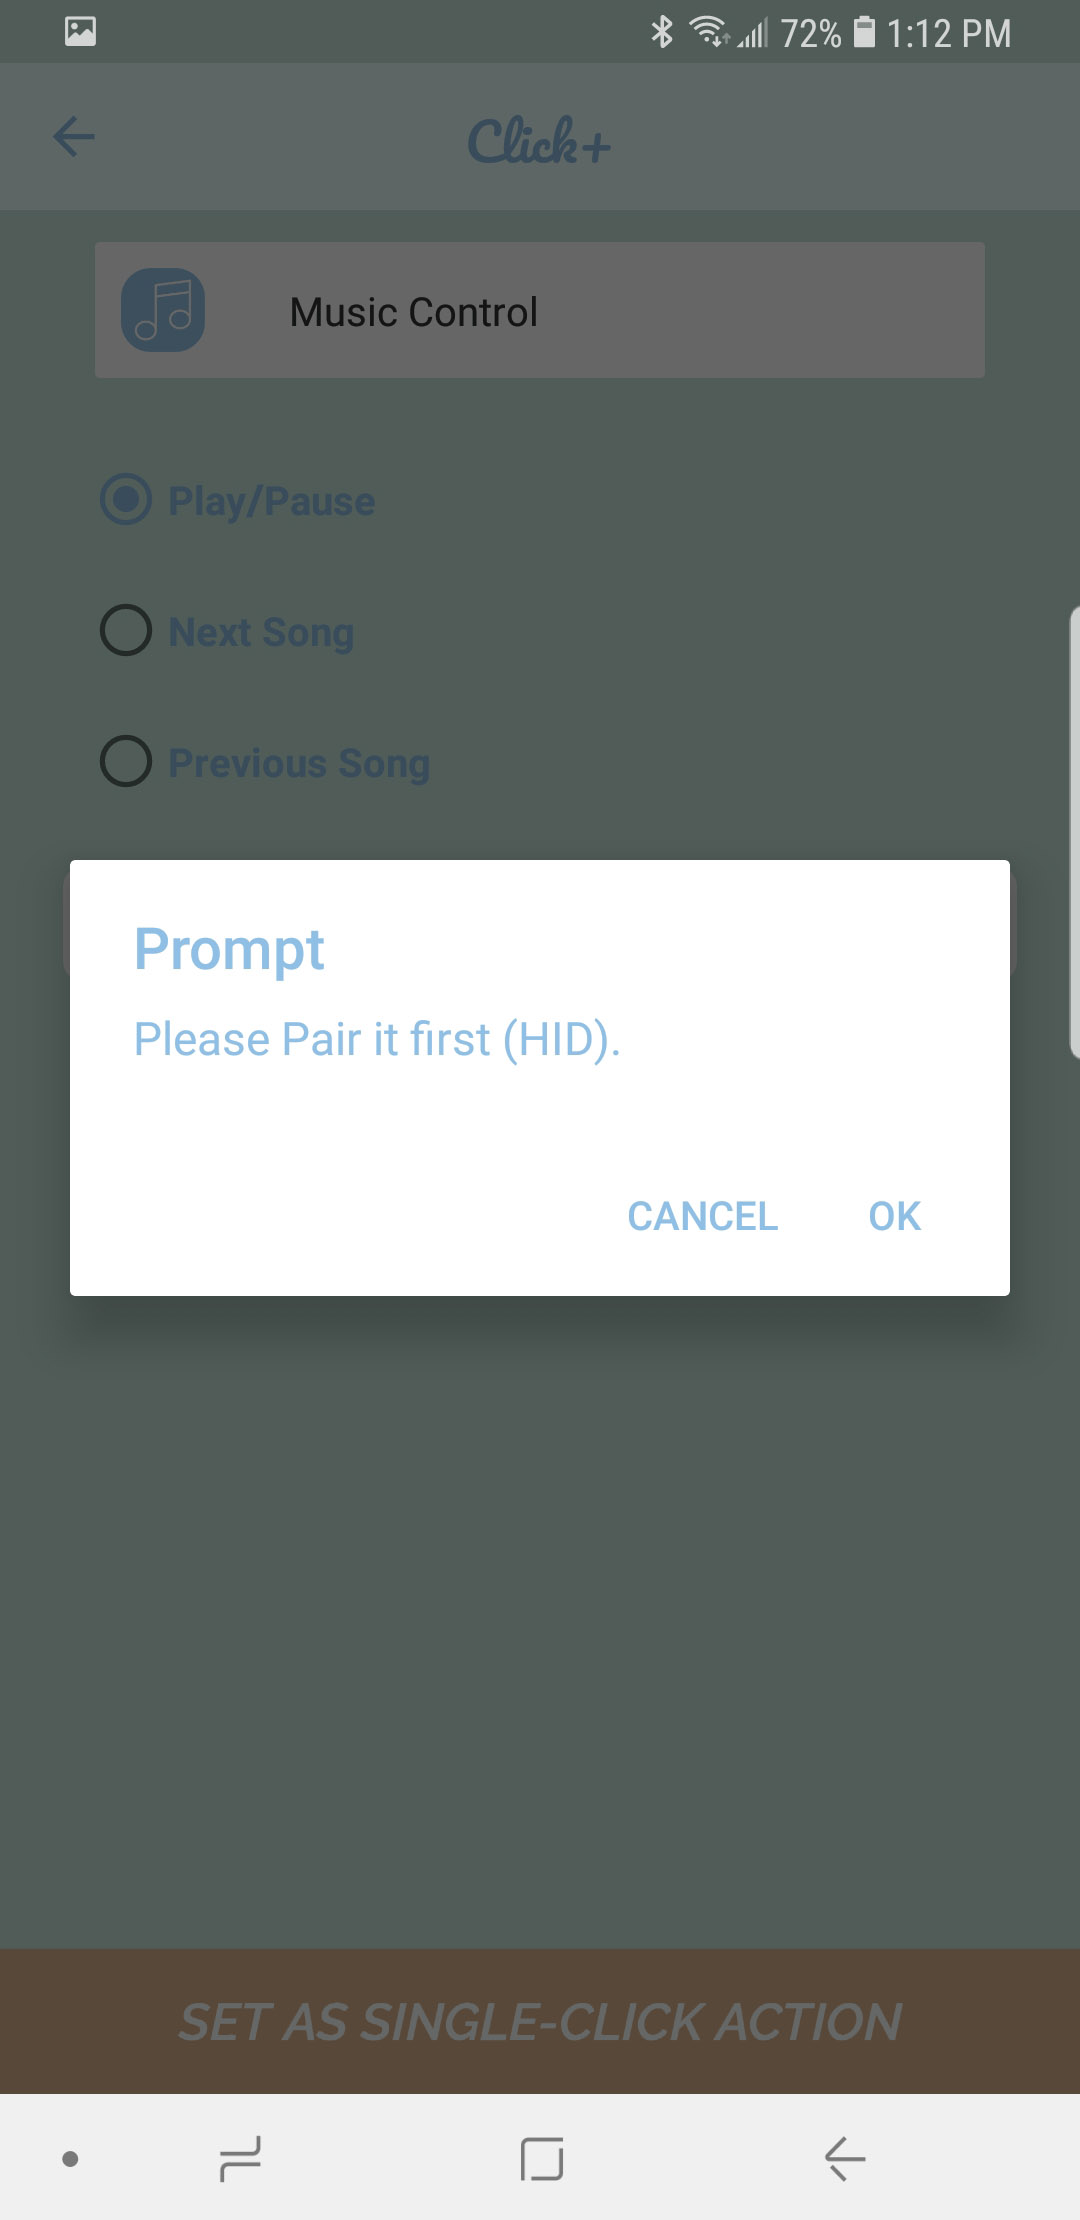
E. Tap SET AS SINGLE-CLICK ACTION and a window may pop up telling you to pair your Click+. Tap OK.
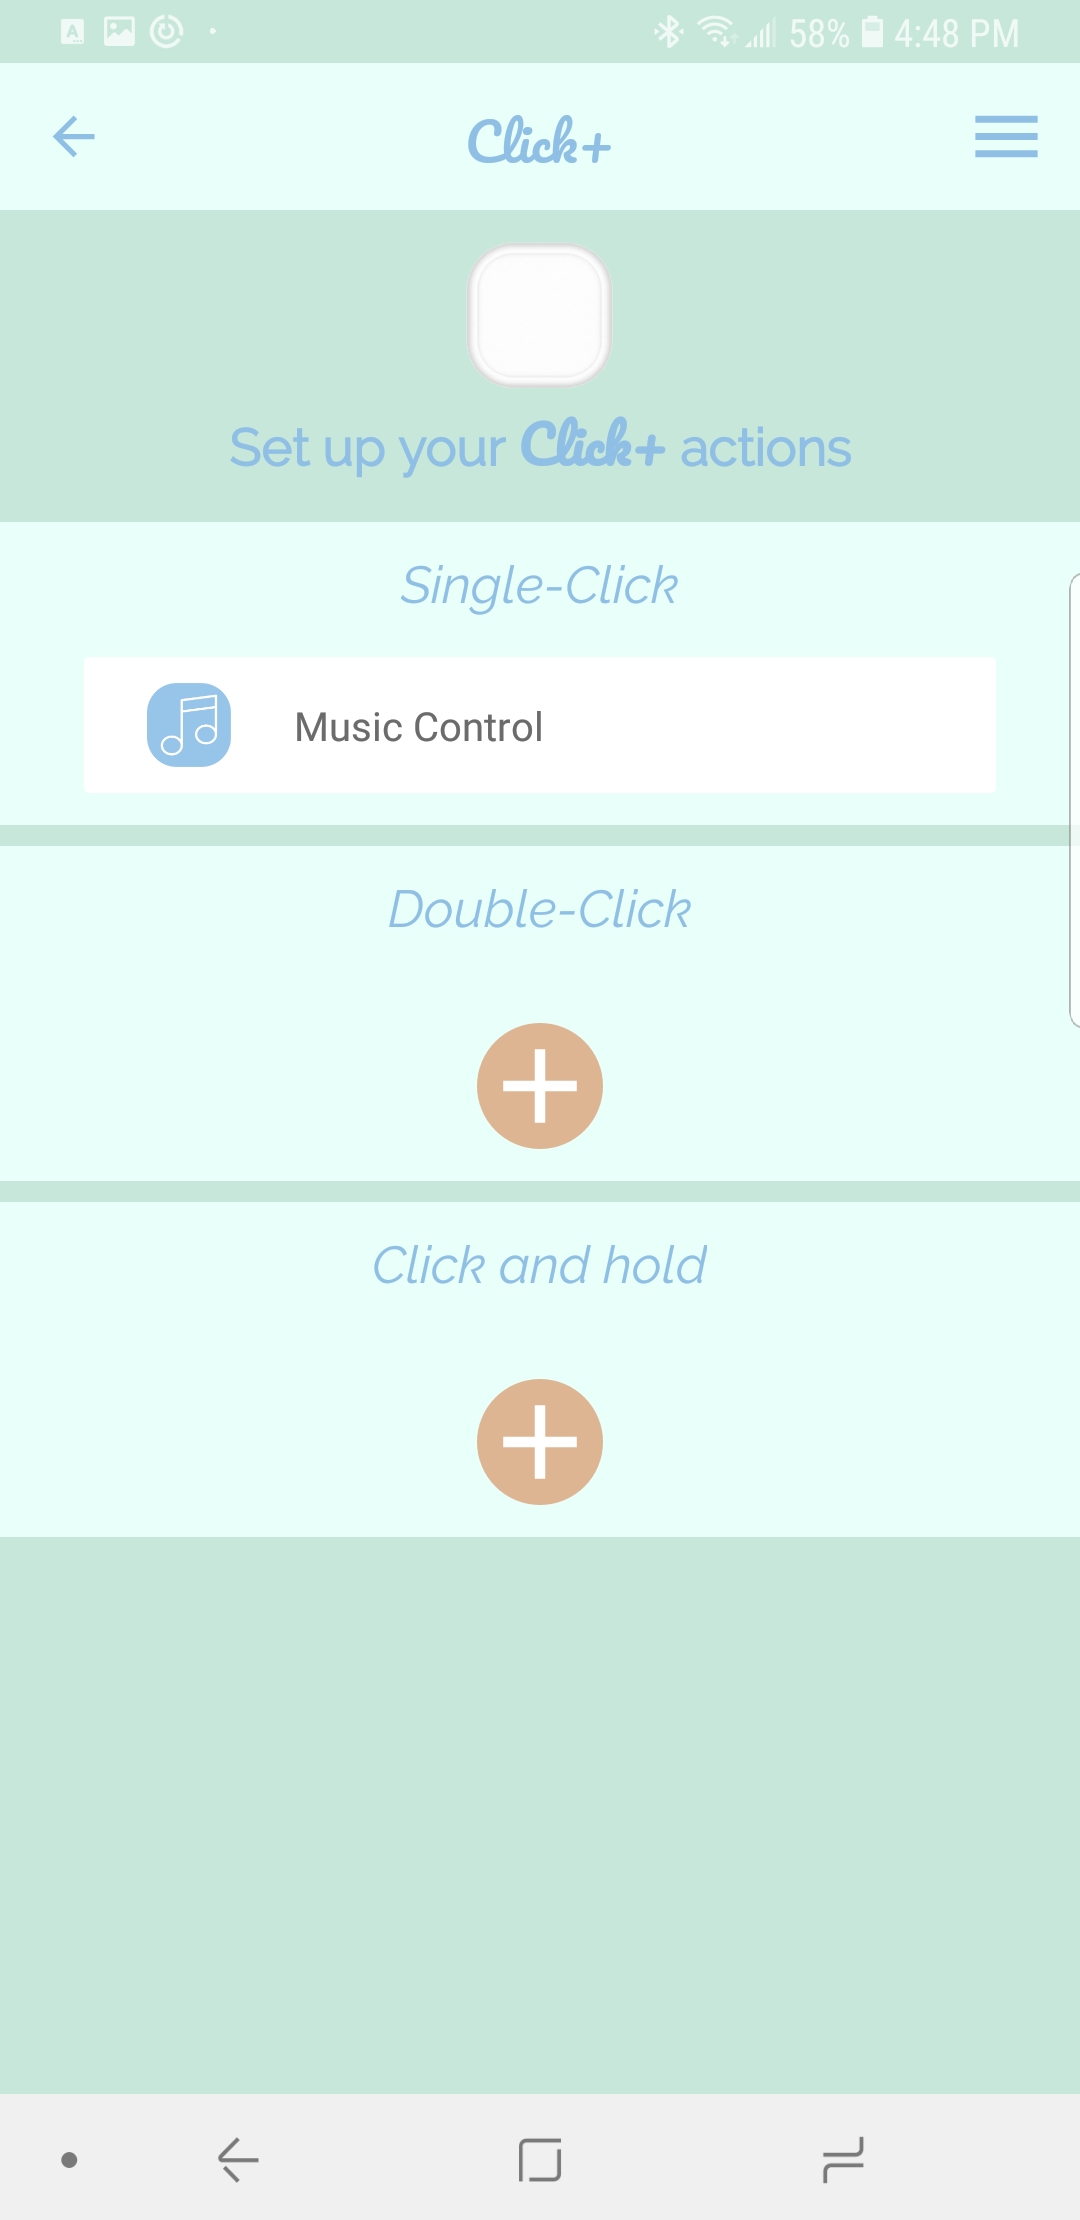
F. Tap SET AS SINGLE-CLICK ACTION again and you will be brought back to the action set-up screen.

G. Open your music app and click the button on your Click+ to perform your chosen action. This also works when the music app is running in the background of your phone.
**Please note that the Click+ App must be running in the background to communicate with your Click+ smart button for the Camera action.**

A. Open the app and tap the Click+ whose actions you would like to edit.

B. This brings you to the action set-up screen. Tap SINGLE-CLICK, DOUBLE-CLICK or CLICK AND HOLD depending on which one you want to edit.

C. This brings you to the list of available actions. Tap CAMERA.
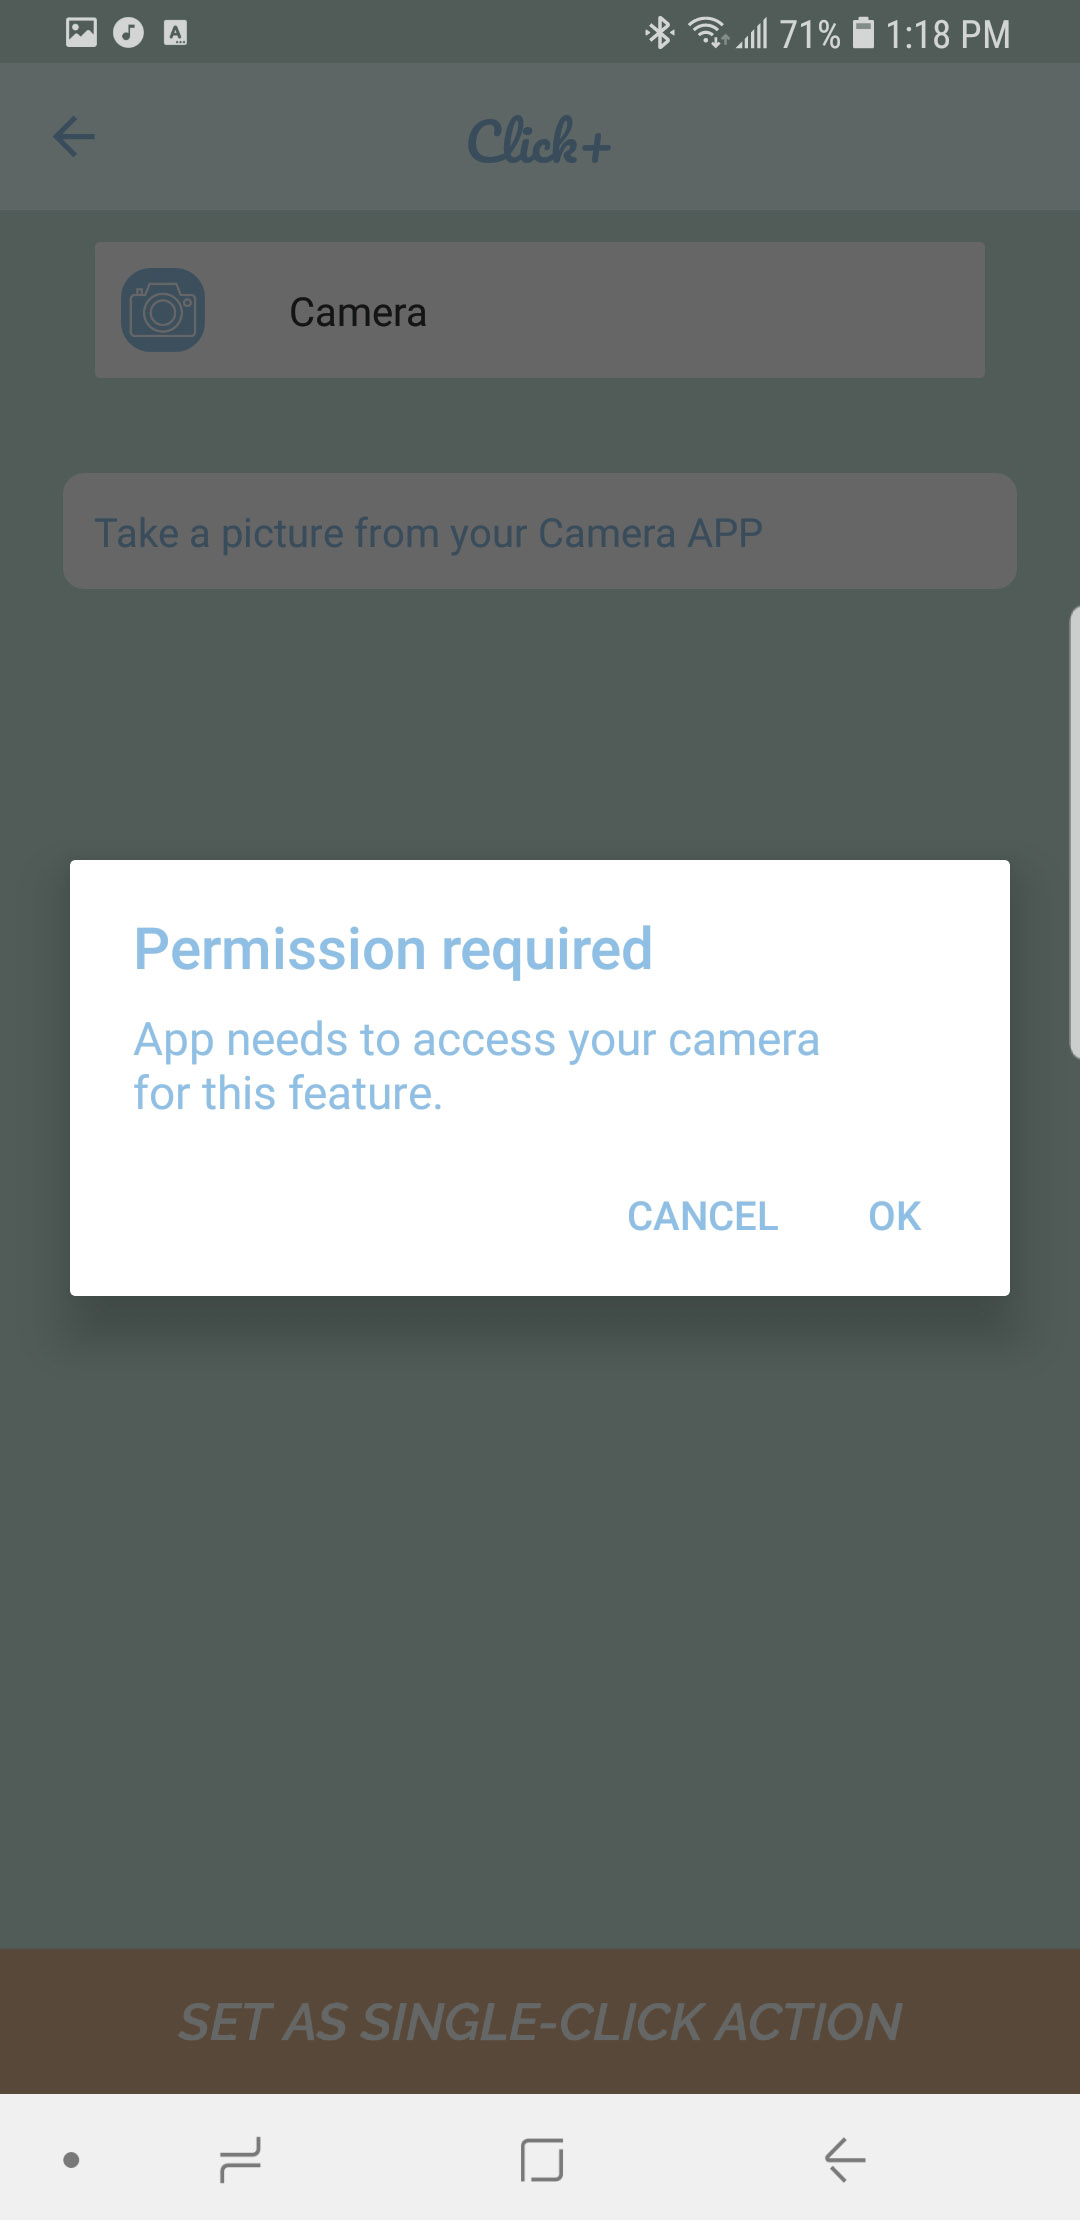
D. A window may pop up asking you to give permission for the Click+ app to access your phone’s camera. Tap OK.
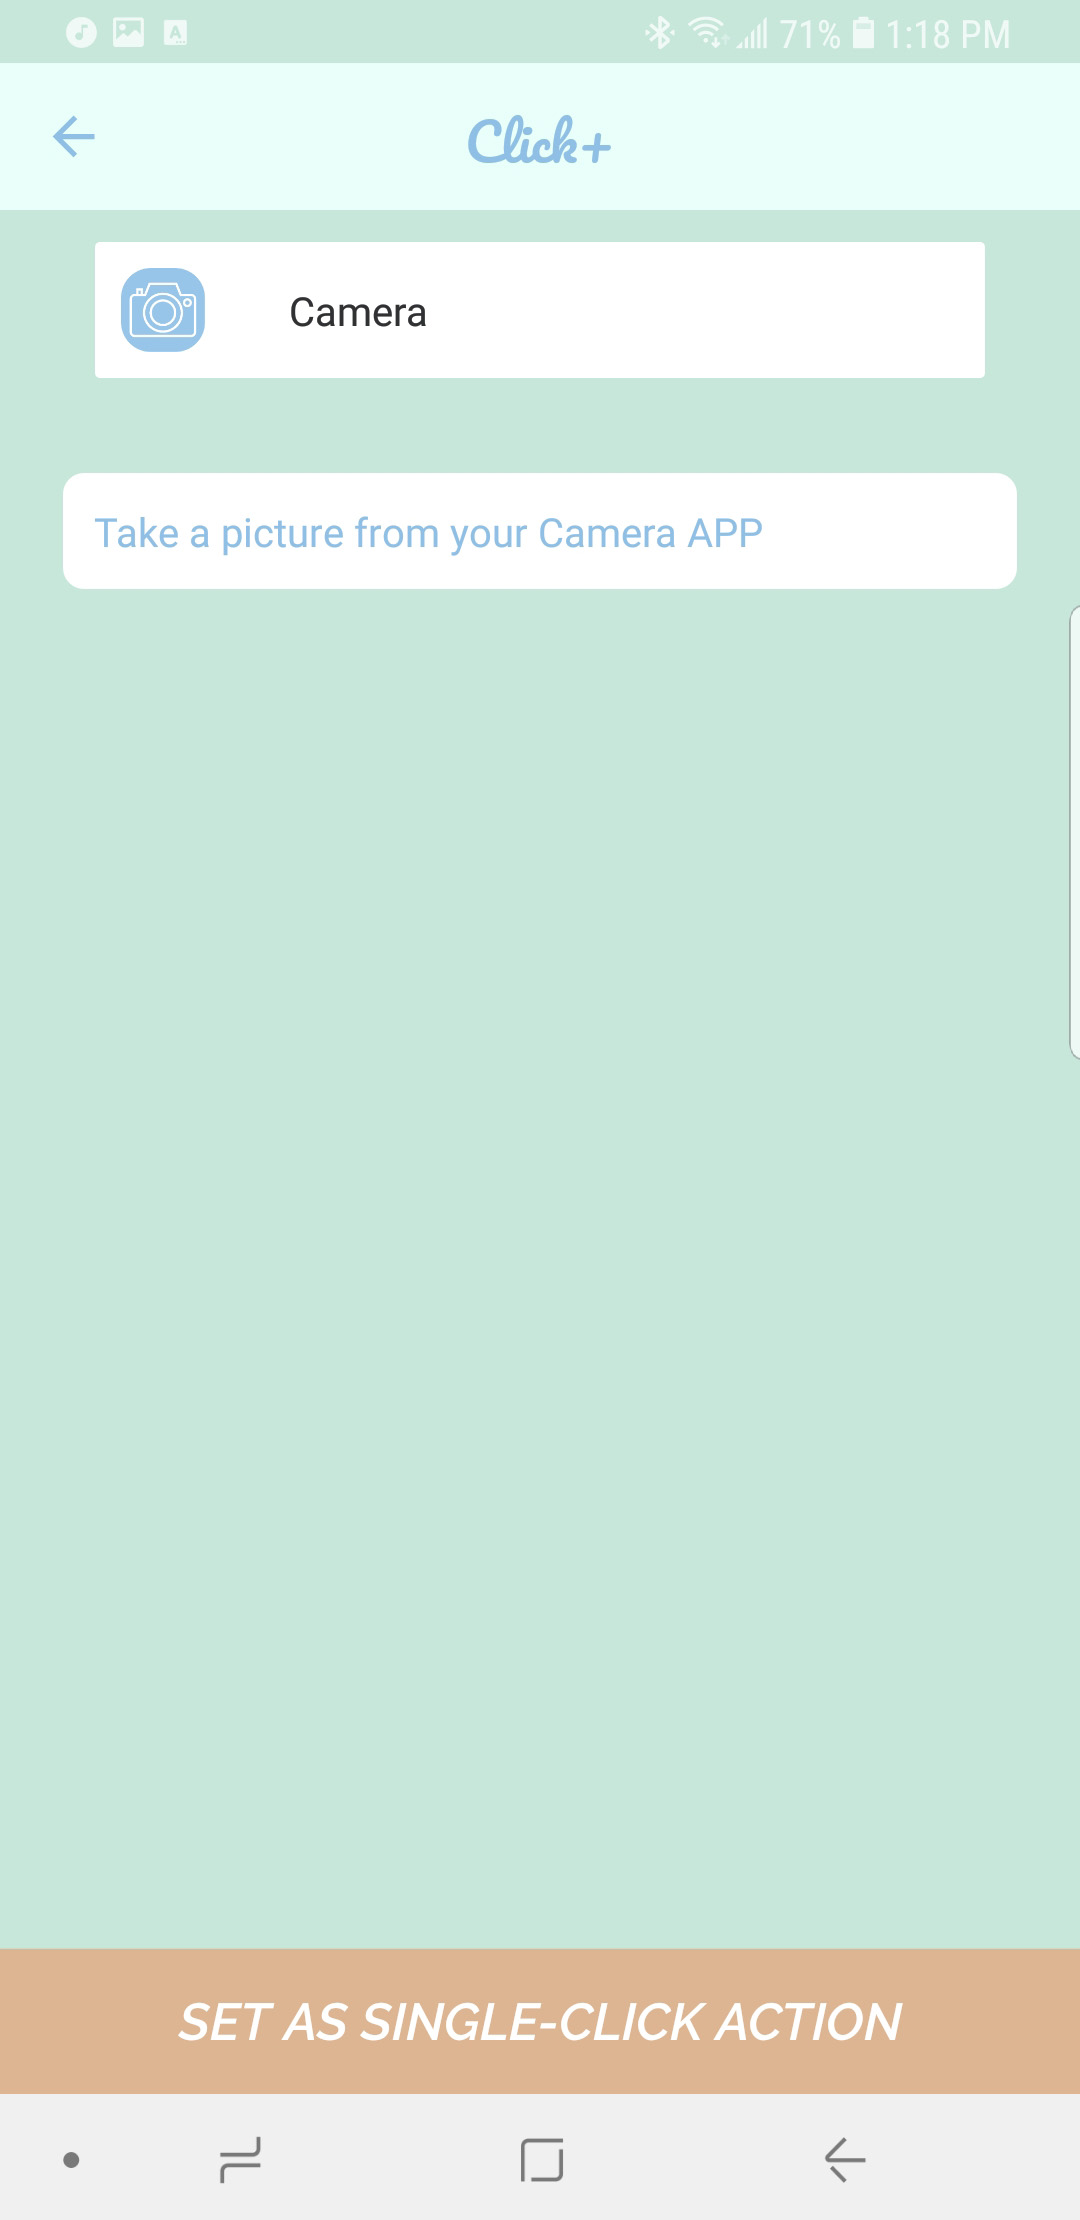
E. Camera allows you to take a photo from your phone’s camera.
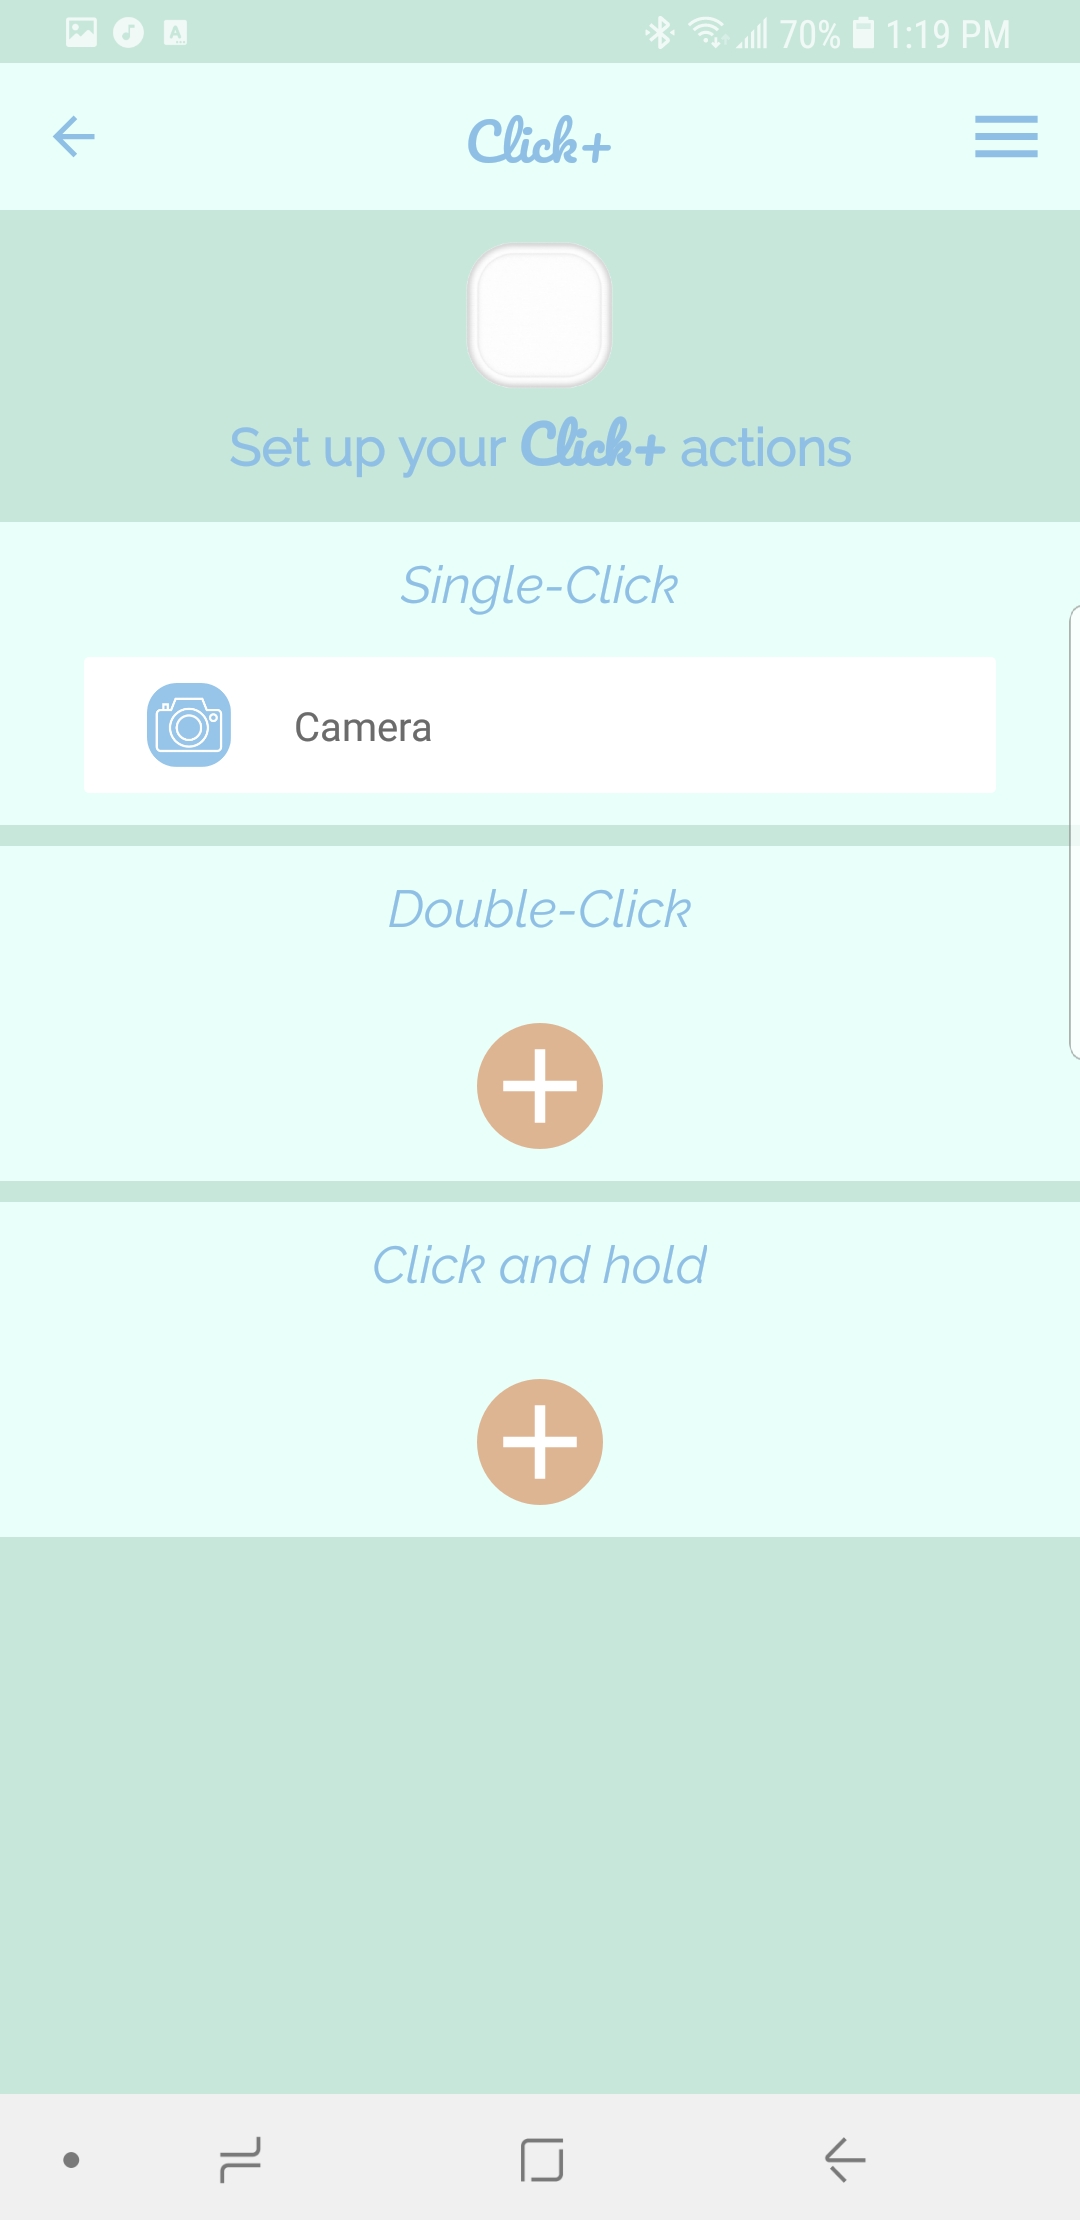
F. Tap SET AS SINGLE-CLICK ACTION and you will be brought back to the action set-up screen.

G. Open your phone’s camera app (also can work in some other photo apps, like Snapchat) and select PHOTO if you would like to take a picture. Click the button on your Click+ and a photo will be taken on your phone.
Note: When the Camera action is active, the Click+ may be linked to the volume button on the side of your phone. This is because the volume button also acts as a shutter button when the camera app is open. Because of this link, if you click the button on your Click+ when the camera app is not open, the action may control other features of your phone.
**Please note that the Click+ App must be running in the background to communicate with your Click+ smart button for the Volume Control action.**

A. Open the app and tap the Click+ whose actions you would like to edit.

B. This brings you to the action set-up screen. Tap SINGLE-CLICK, DOUBLE-CLICK or CLICK AND HOLD depending on which one you want to edit.

C. This brings you to the list of available actions. Tap VOLUME CONTROL.
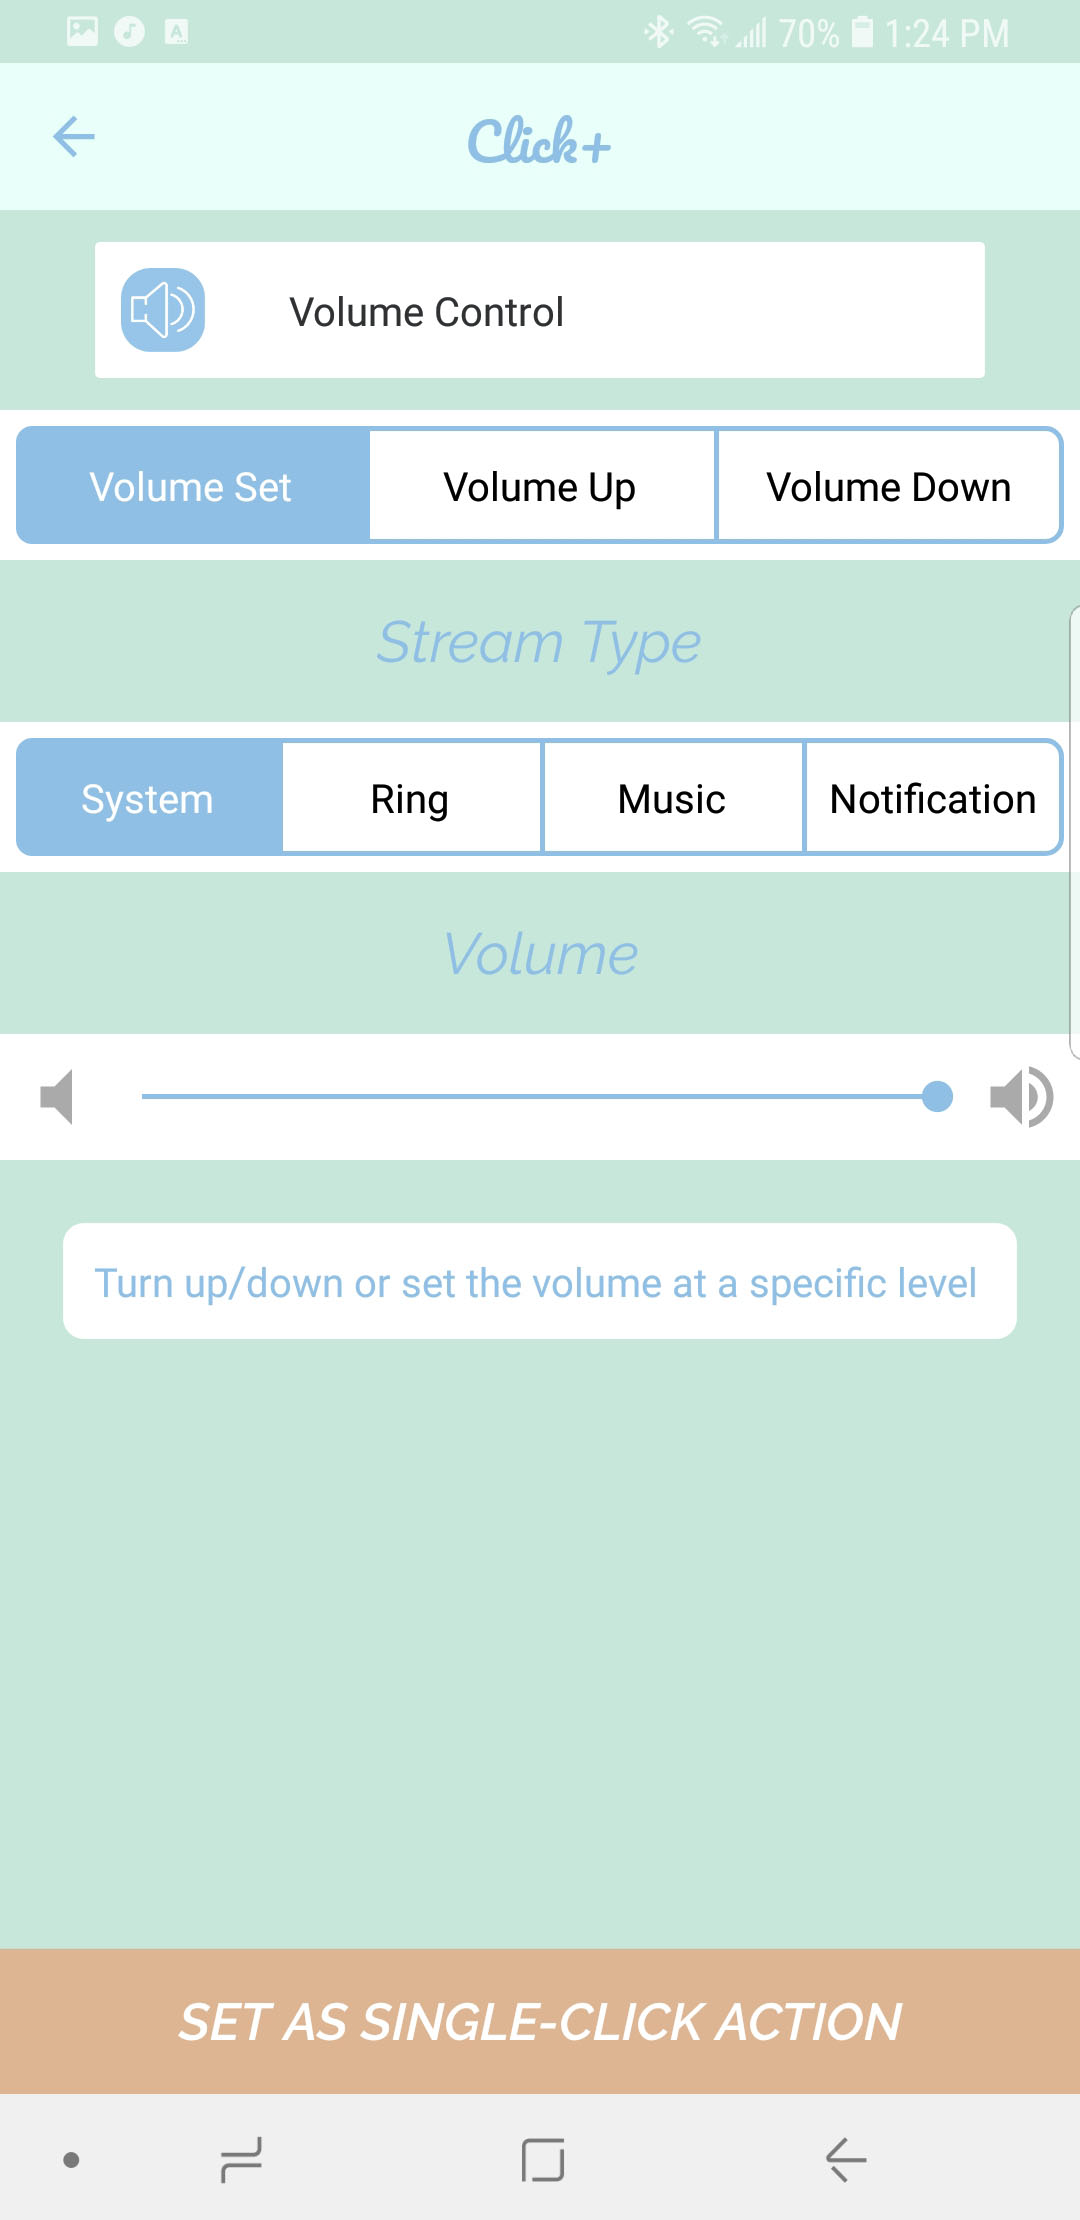
D. Select whether you would like this action to set the volume of your phone to a specified level, turn the volume up or turn the volume down. Tip: Set one action to Volume Set, one action to Volume Up and one action to Volume Down to have full volume control from your Click+.

E. Select wether you want this volume action to affect your entire phone (System) or just your ring, music, or notifications. Tip: This can be helpful if you would like to be able to control the volume of your music but would like your other system sounds to be unaffected.
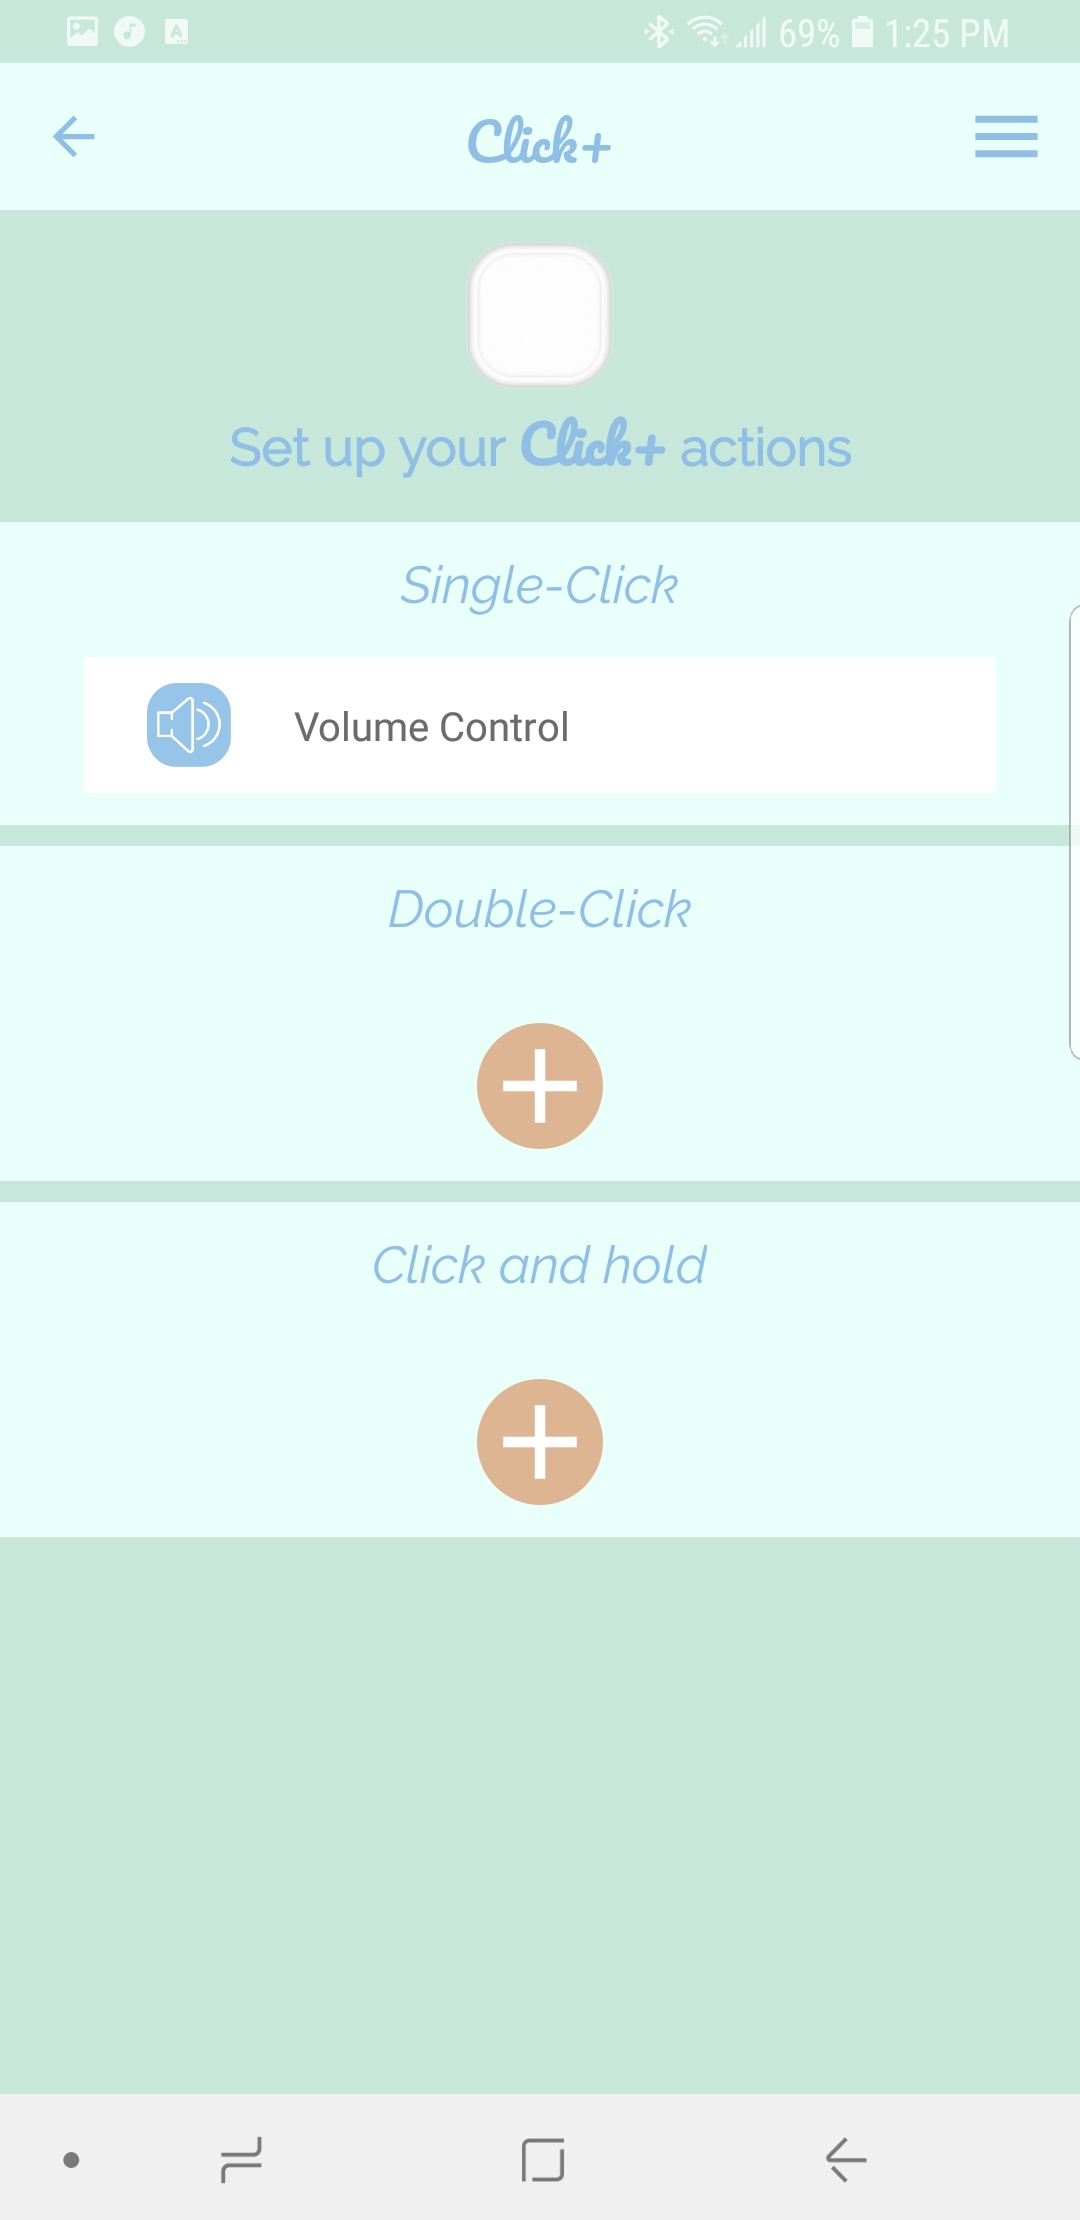
F. Tap SET AS SINGLE-CLICK ACTION and you will be brought back to the action set-up screen.
**Please note that the Click+ App must be running in the background to communicate with your Click+ smart button for the Home Button action.**

A. Open the app and tap the Click+ whose actions you would like to edit.

B. This brings you to the action set-up screen. Tap SINGLE-CLICK, DOUBLE-CLICK or CLICK AND HOLD depending on which one you want to edit.

C. This brings you to the list of available actions. Tap HOME BUTTON.
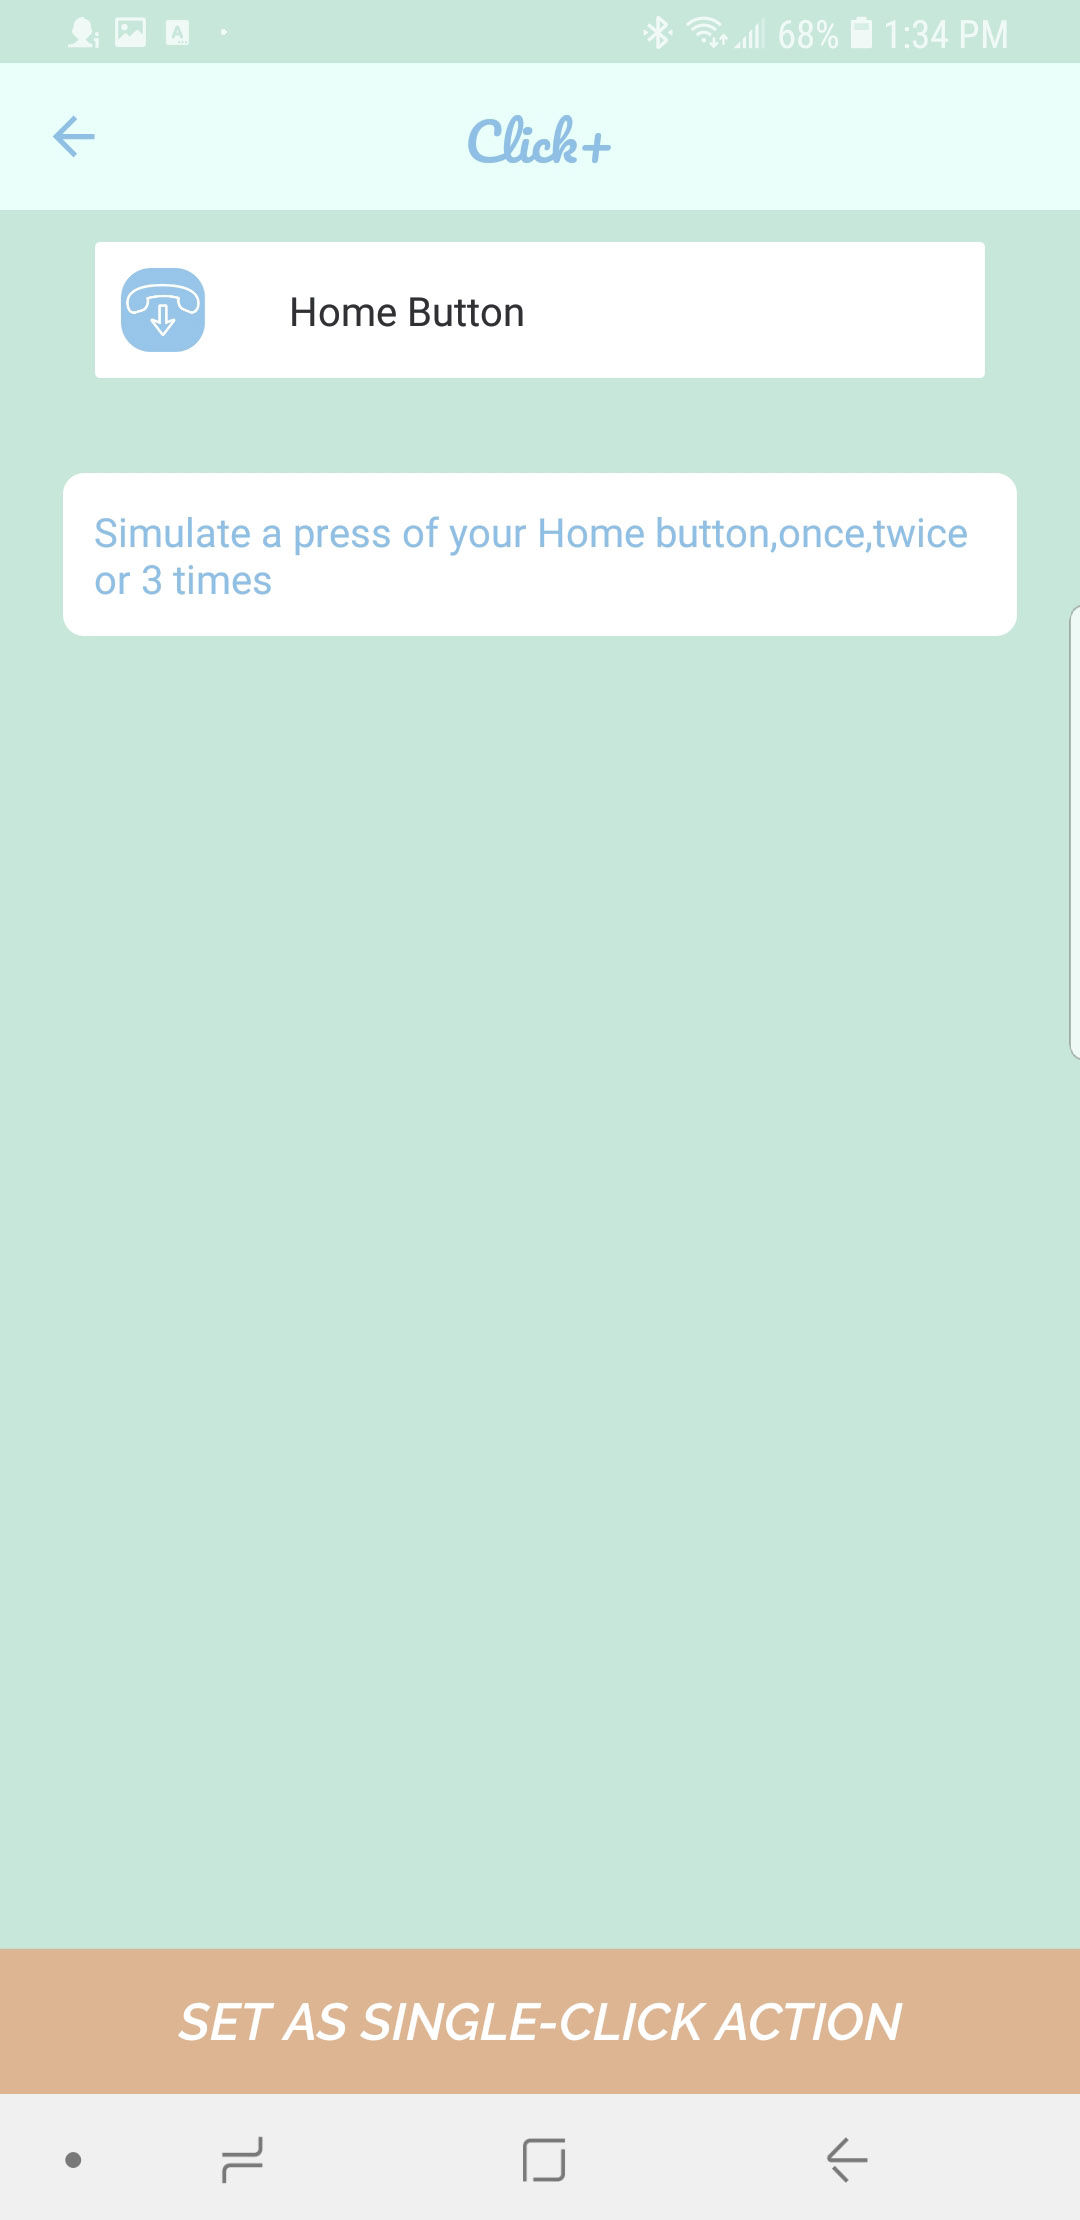
D. This action allows you to press the button on your Click+ to act as your home button anytime.
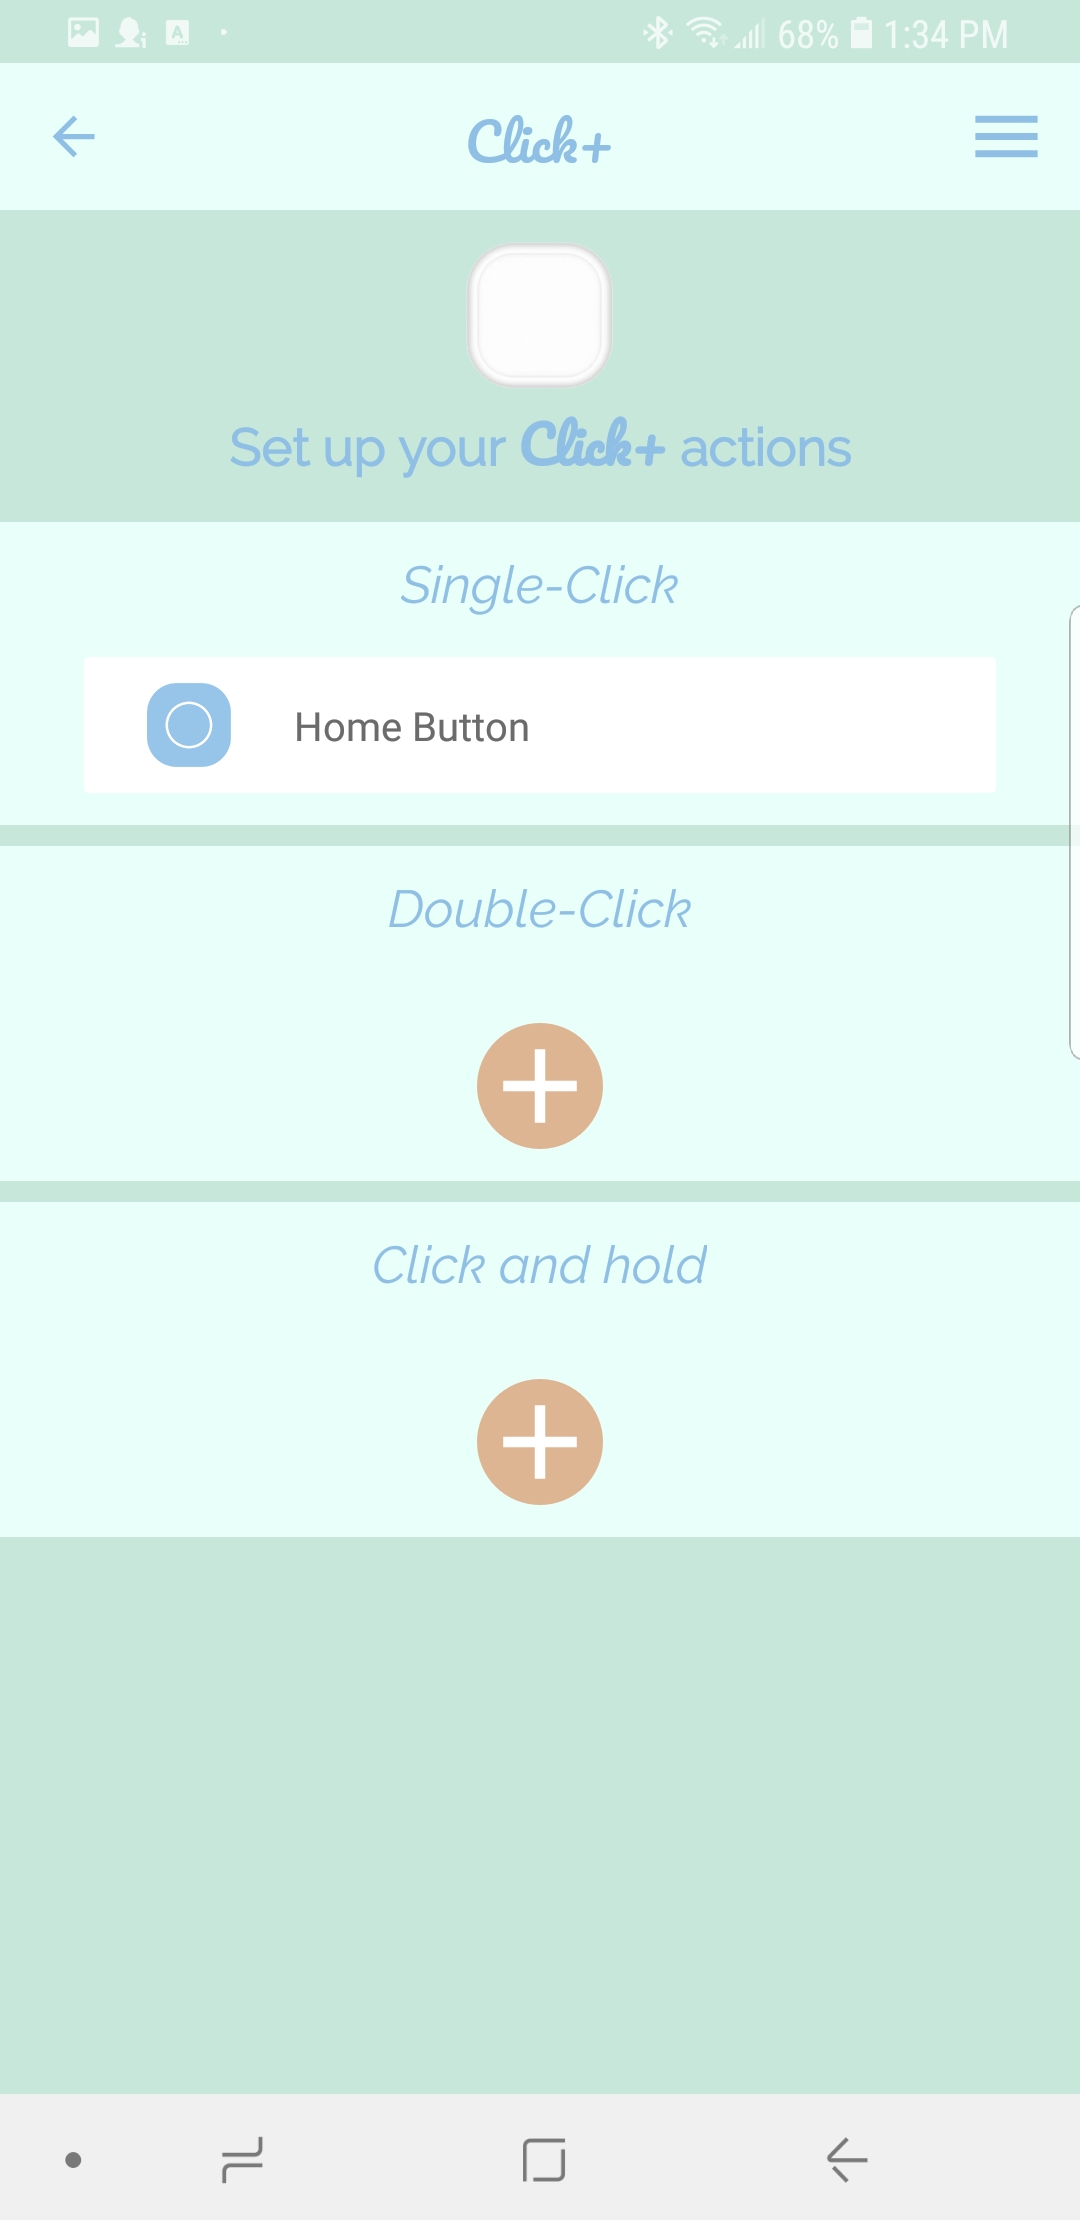
E. Tap SET AS SINGLE-CLICK ACTION and you will be brought back to the action set-up screen.
**Please note that the Click+ App must be running in the background to communicate with your Click+ smart button for the Lock Screen action.**

A. Open the app and tap the Click+ whose actions you would like to edit.

B. This brings you to the action set-up screen. Tap SINGLE-CLICK, DOUBLE-CLICK or CLICK AND HOLD depending on which one you want to edit.

C. This brings you to the list of available actions. Tap LOCK SCREEN.
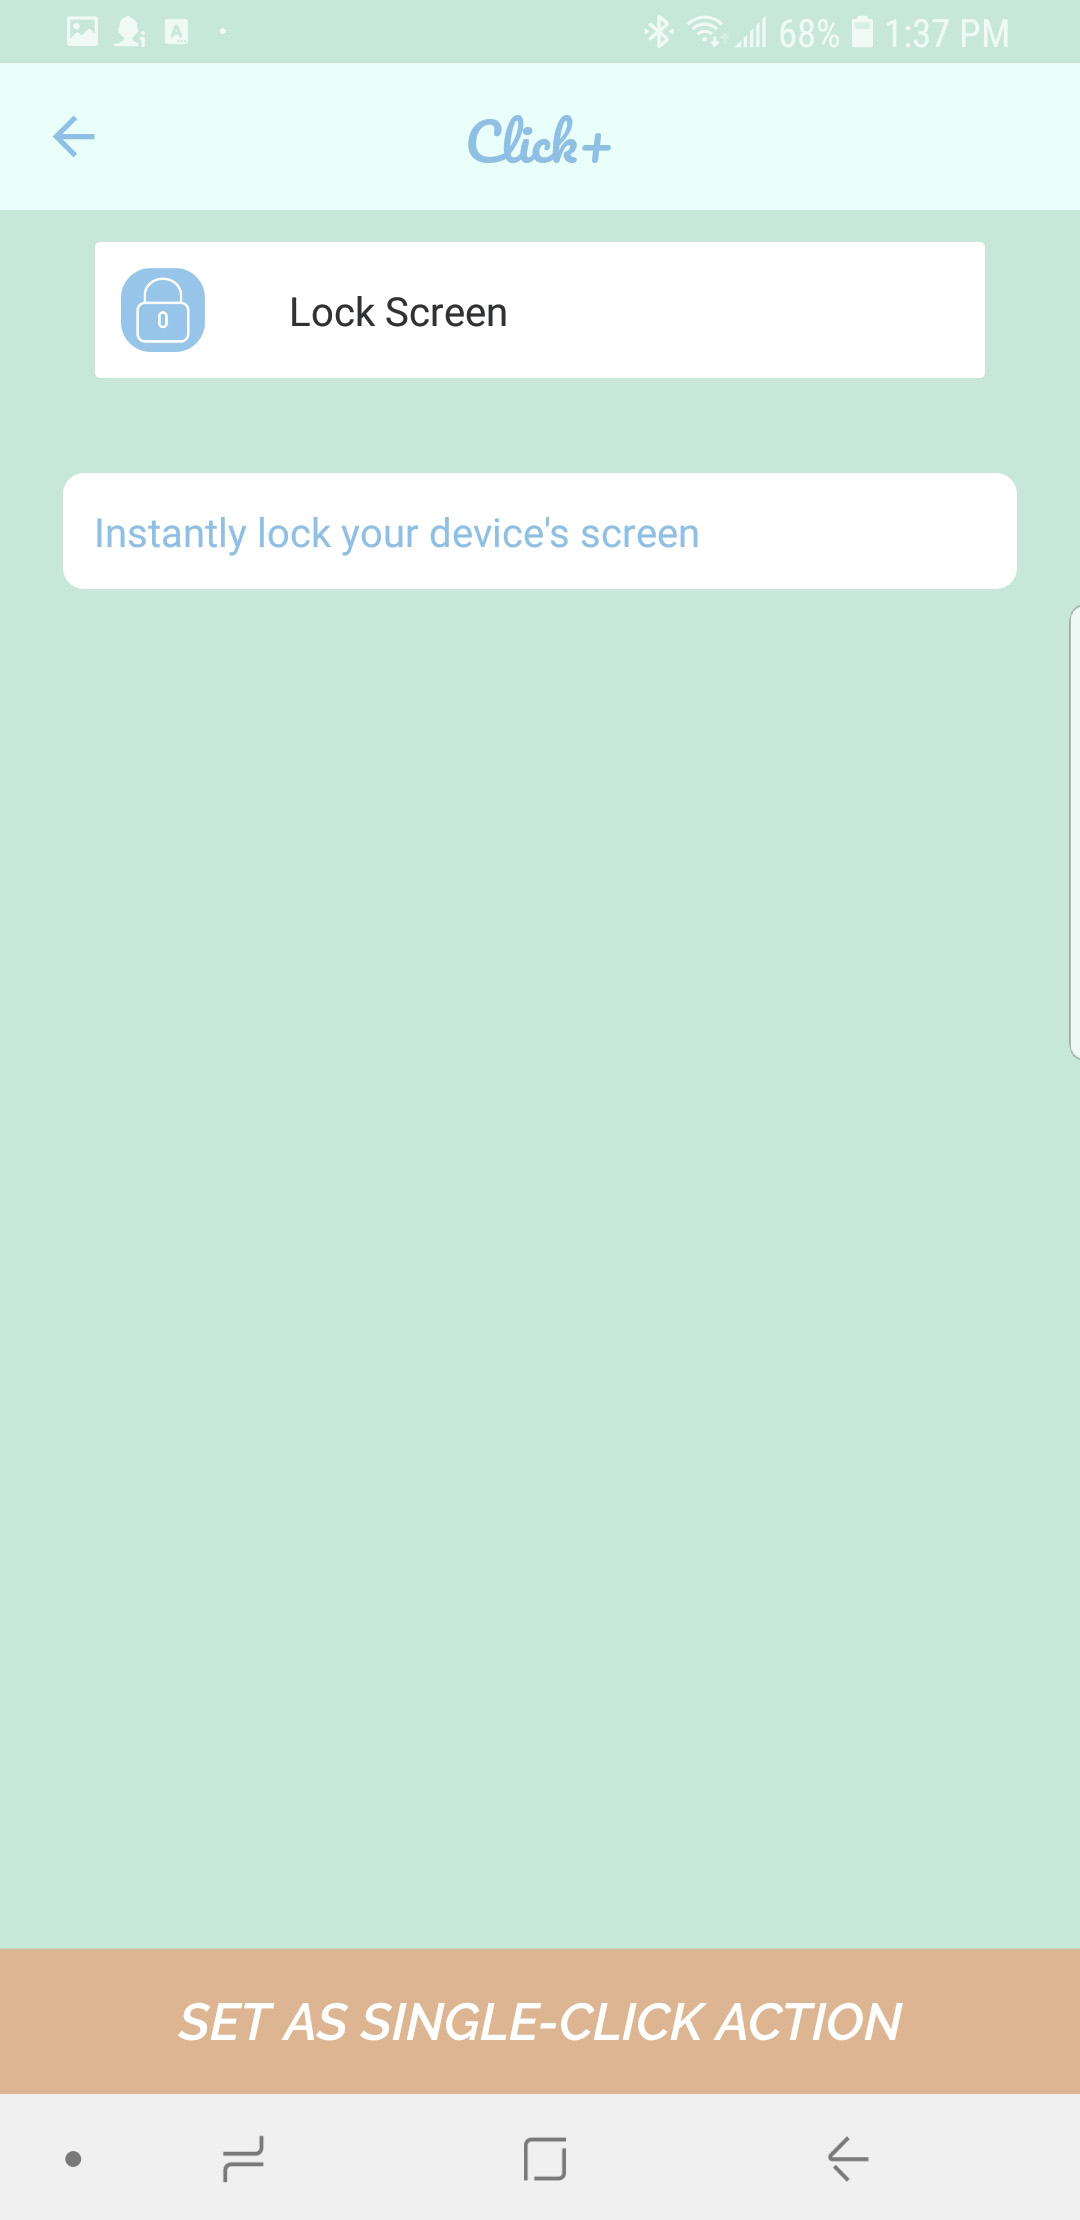
D. The Lock Screen action lets you press the button on your Click+ at any time to immediately lock your phone.
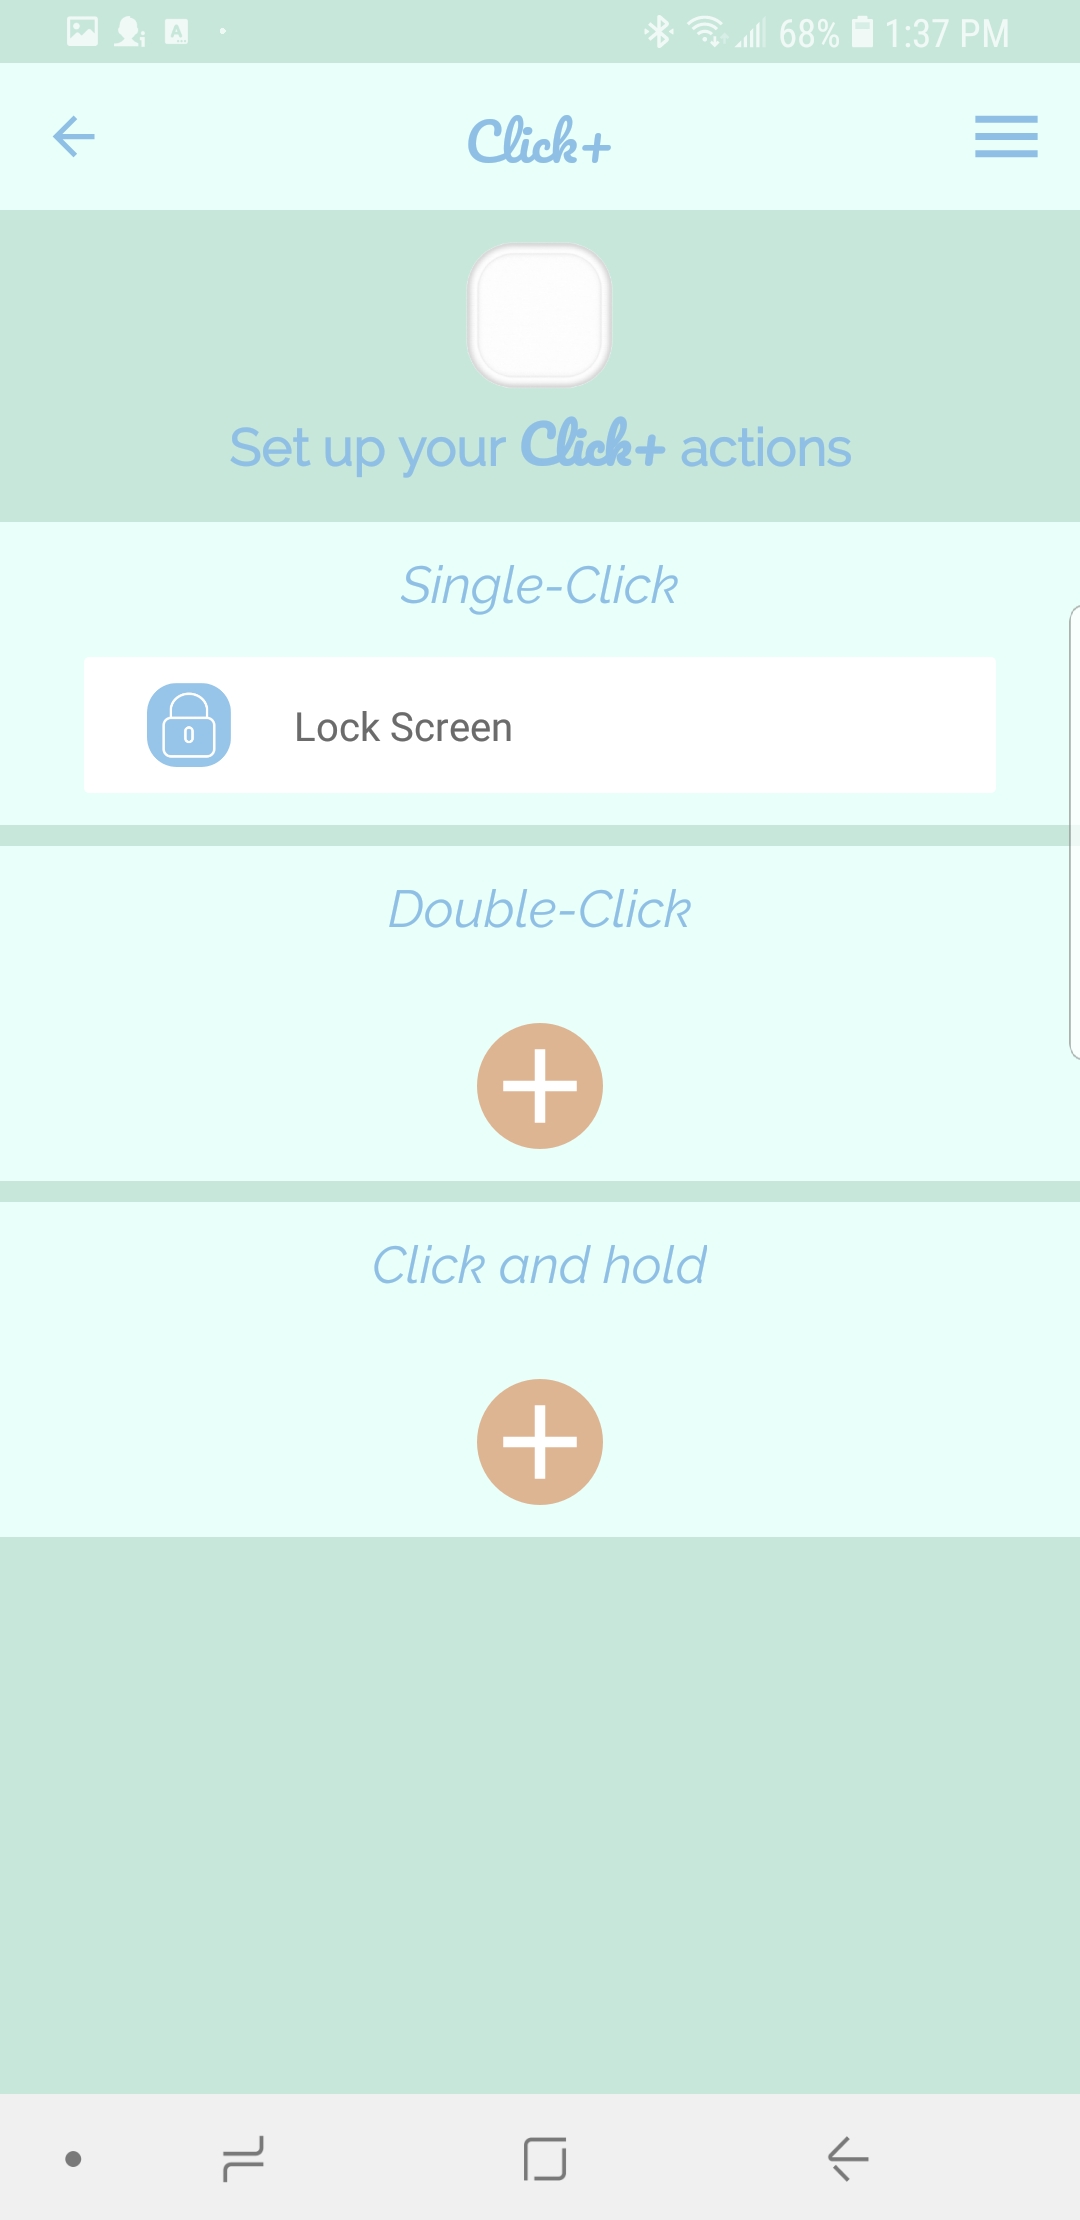
E. Tap SET AS SINGLE-CLICK ACTION and you will be brought back to the action set-up screen.
**Please note that the Click+ App must be running in the background to communicate with your Click+ smart button for the Open Browser action.**

A. Open the app and tap the Click+ whose actions you would like to edit.

B. This brings you to the action set-up screen. Tap SINGLE-CLICK, DOUBLE-CLICK or CLICK AND HOLD depending on which one you want to edit.

C. This brings you to the list of available actions. Tap OPEN BROWSER.
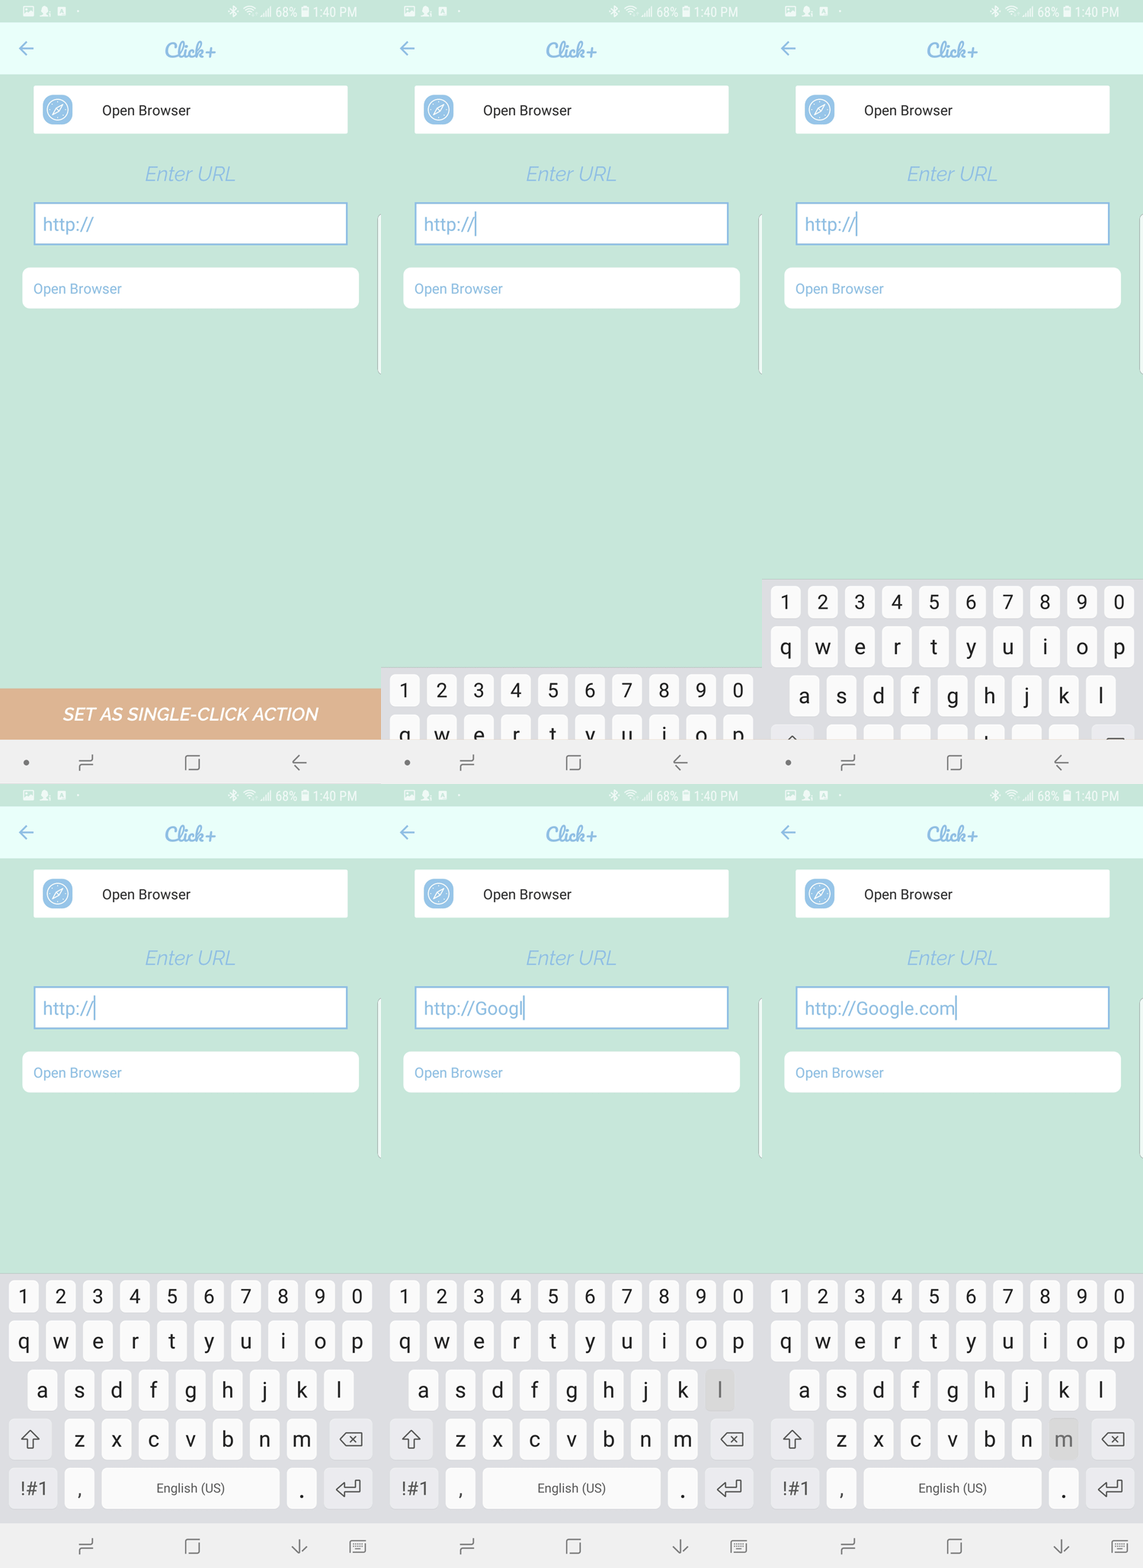
D. Type in the URL that you would like to have open in your internet browser when you press the Click+ smart button.
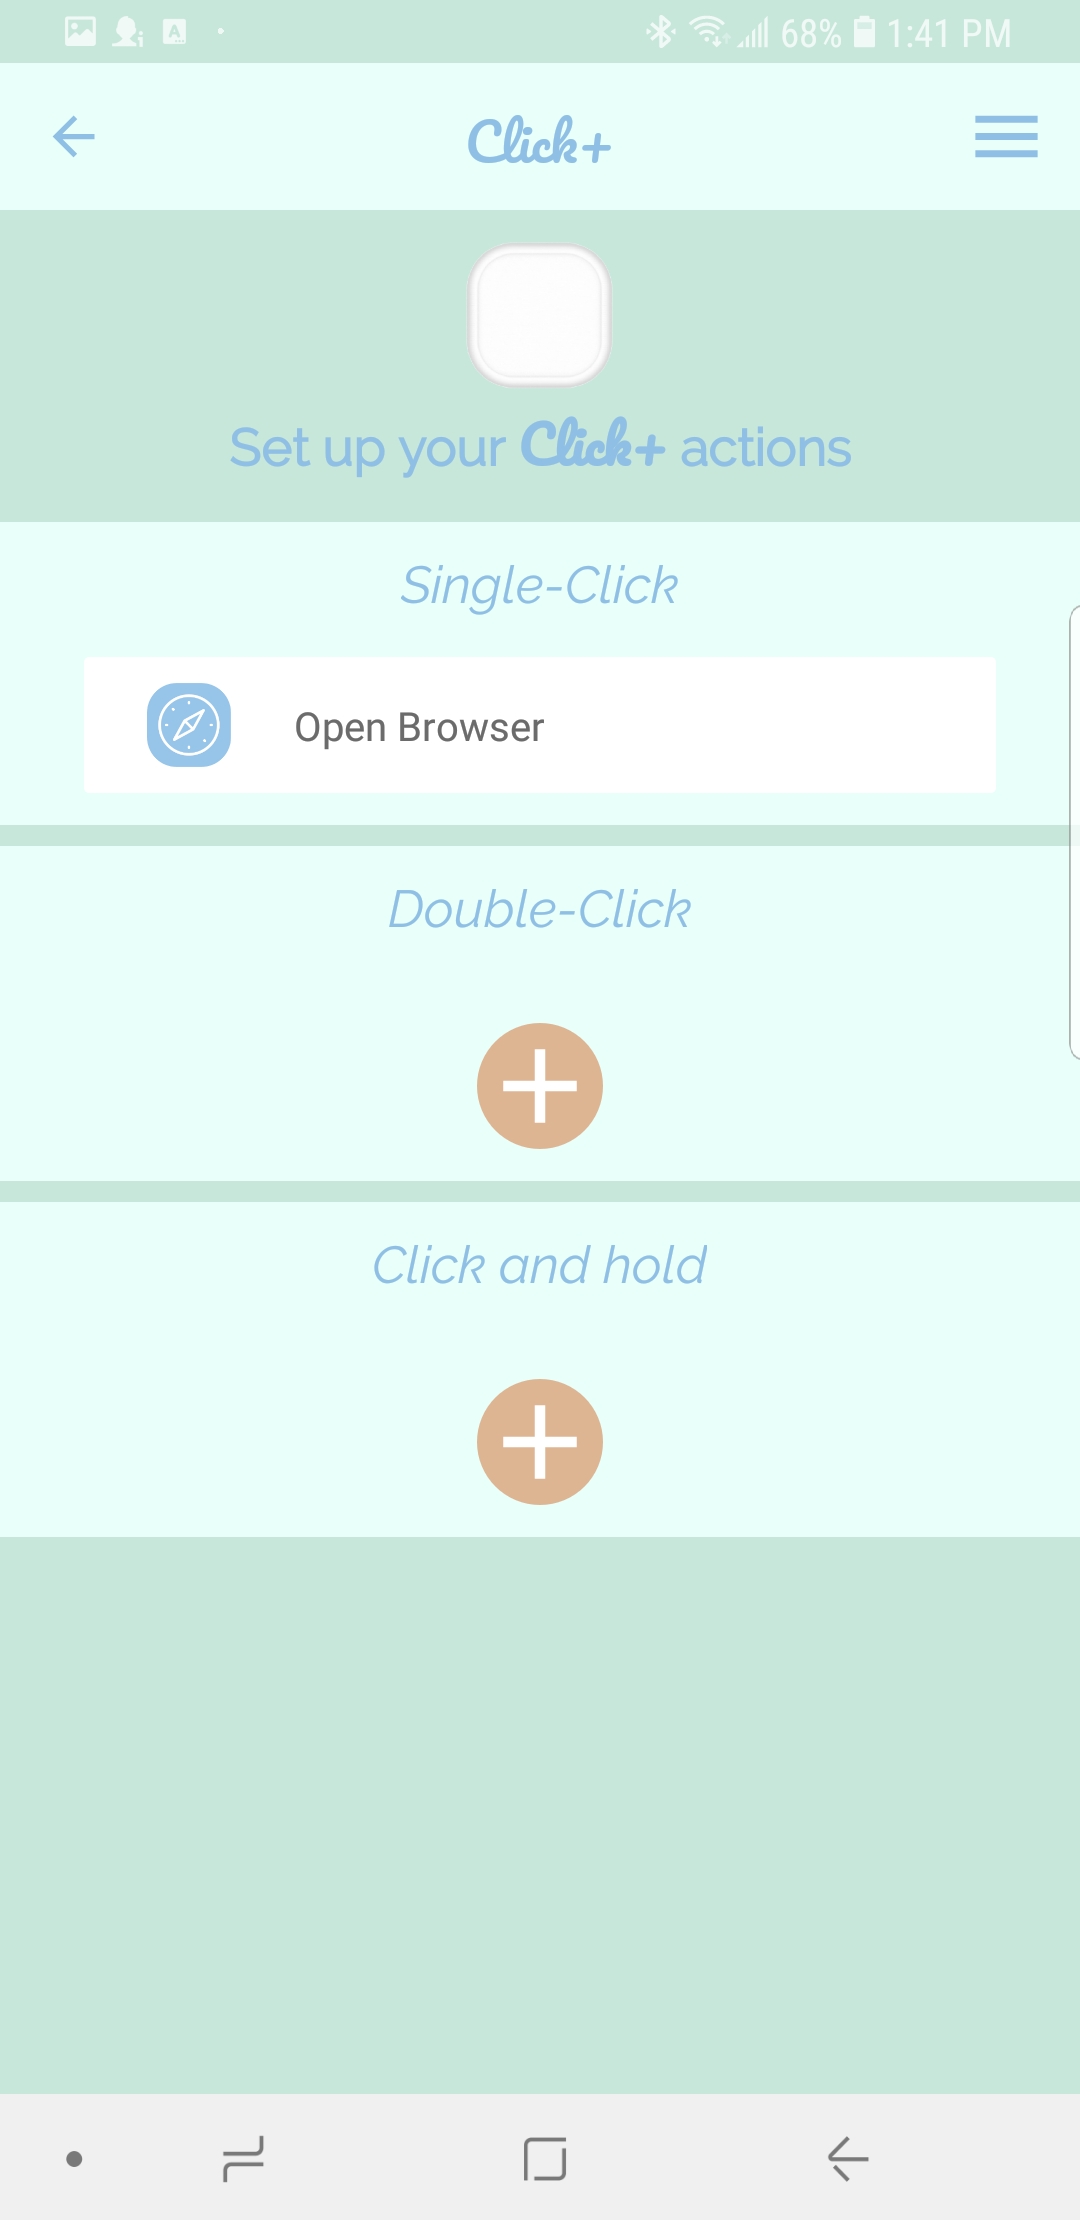
E. Tap SET AS SINGLE-CLICK ACTION and you will be brought back to the action set-up screen.
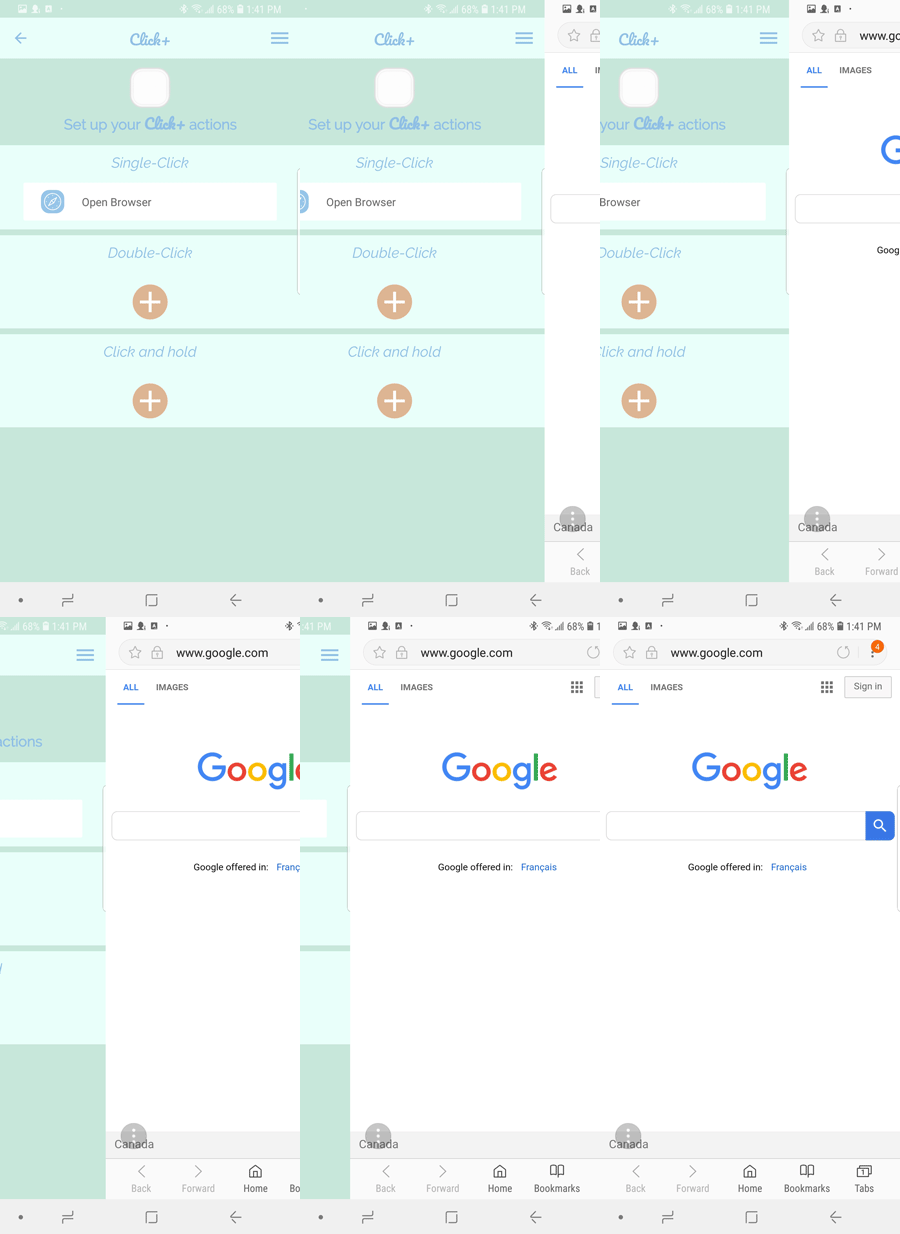
F. Simply press the button on your Click+ and the URL will open in your browser.
Note: Your internet browser does not have to be open already or running in the background for it to open with the Click+.
**Please note that the Click+ App must be running in the background to communicate with your Click+ smart button for the Vibrate action.**

A. Open the app and tap the Click+ whose actions you would like to edit.

B. This brings you to the action set-up screen. Tap SINGLE-CLICK, DOUBLE-CLICK or CLICK AND HOLD depending on which one you want to edit.
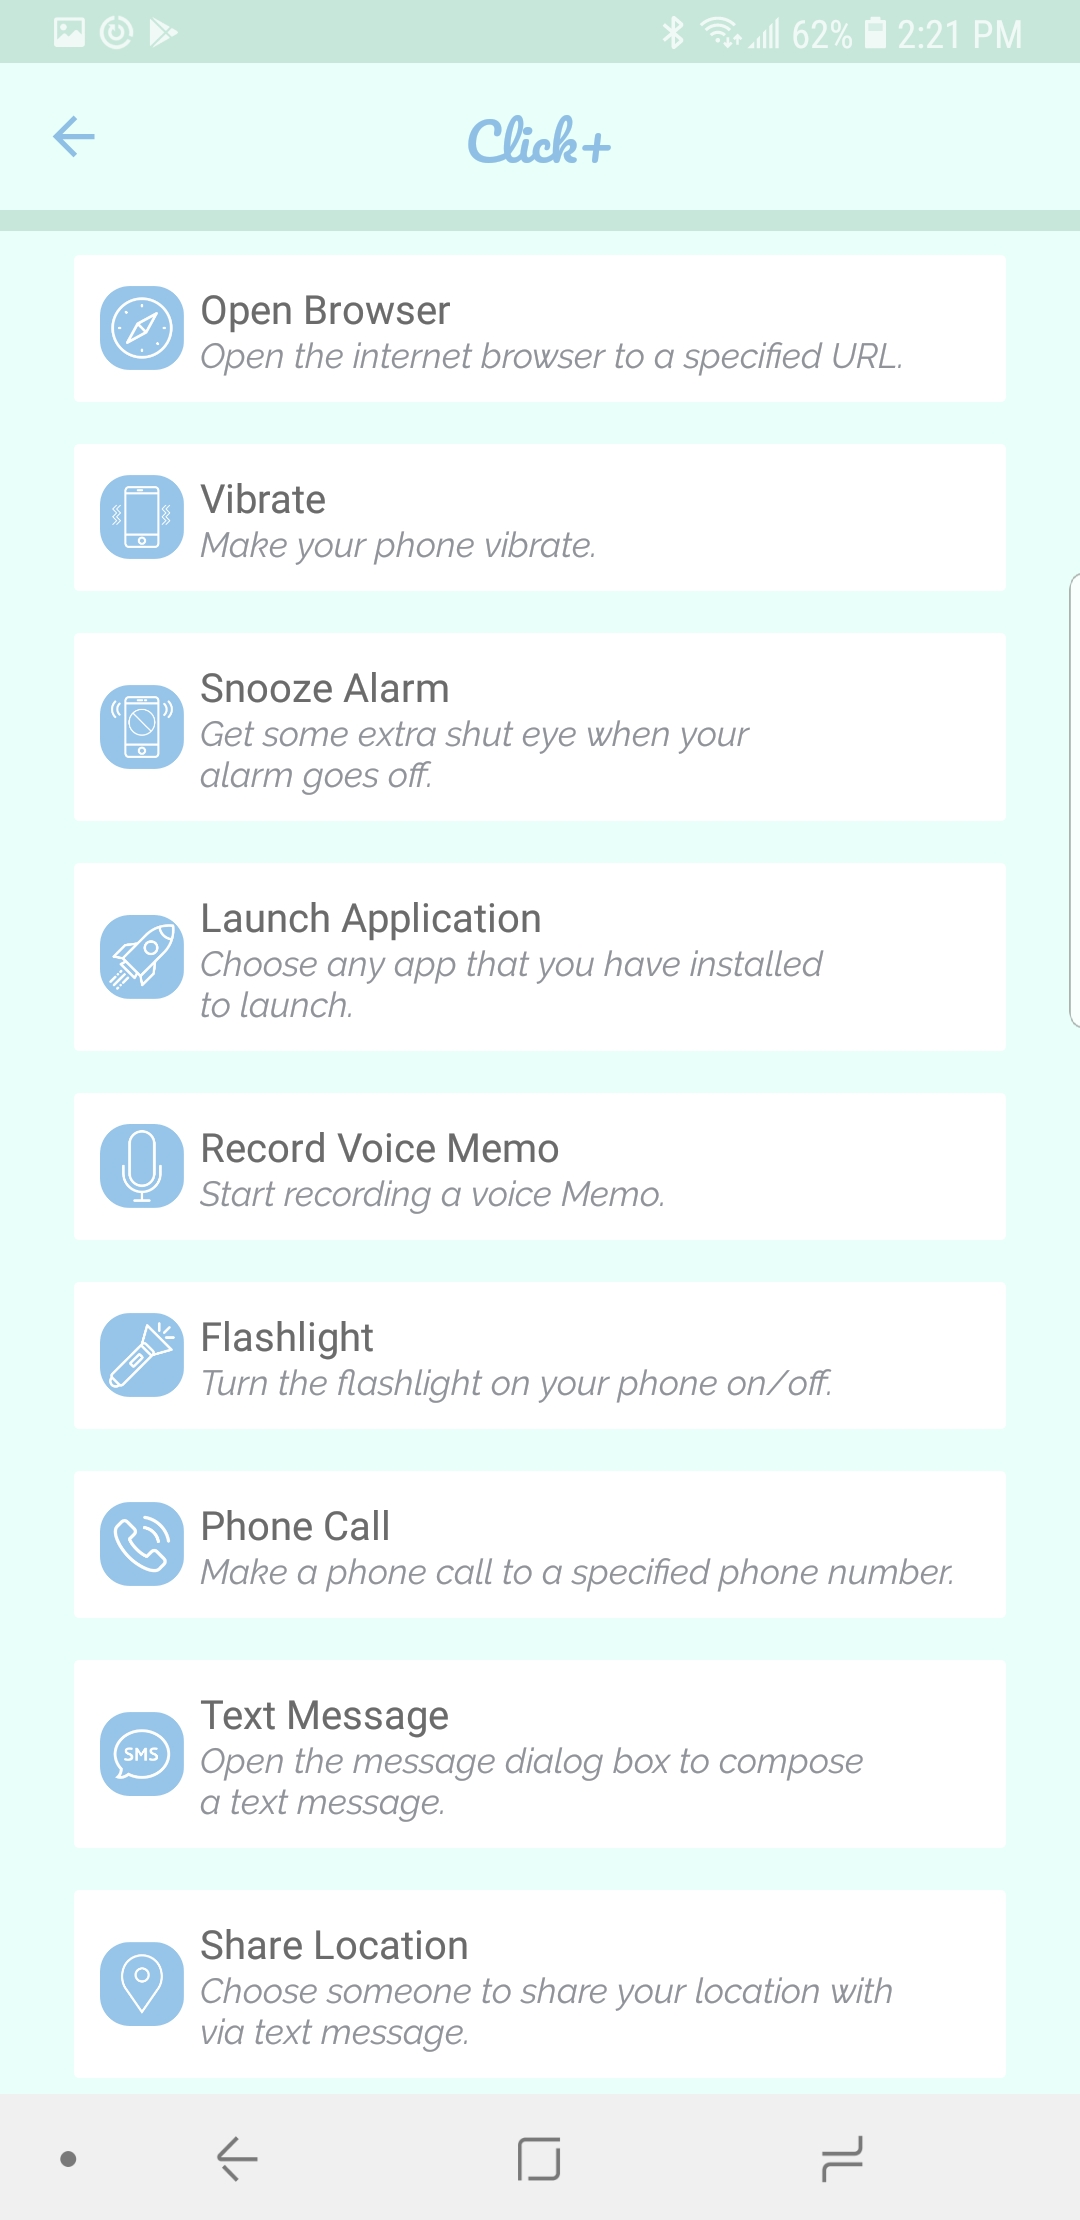
C. This brings you to the list of available actions. Tap VIBRATE.
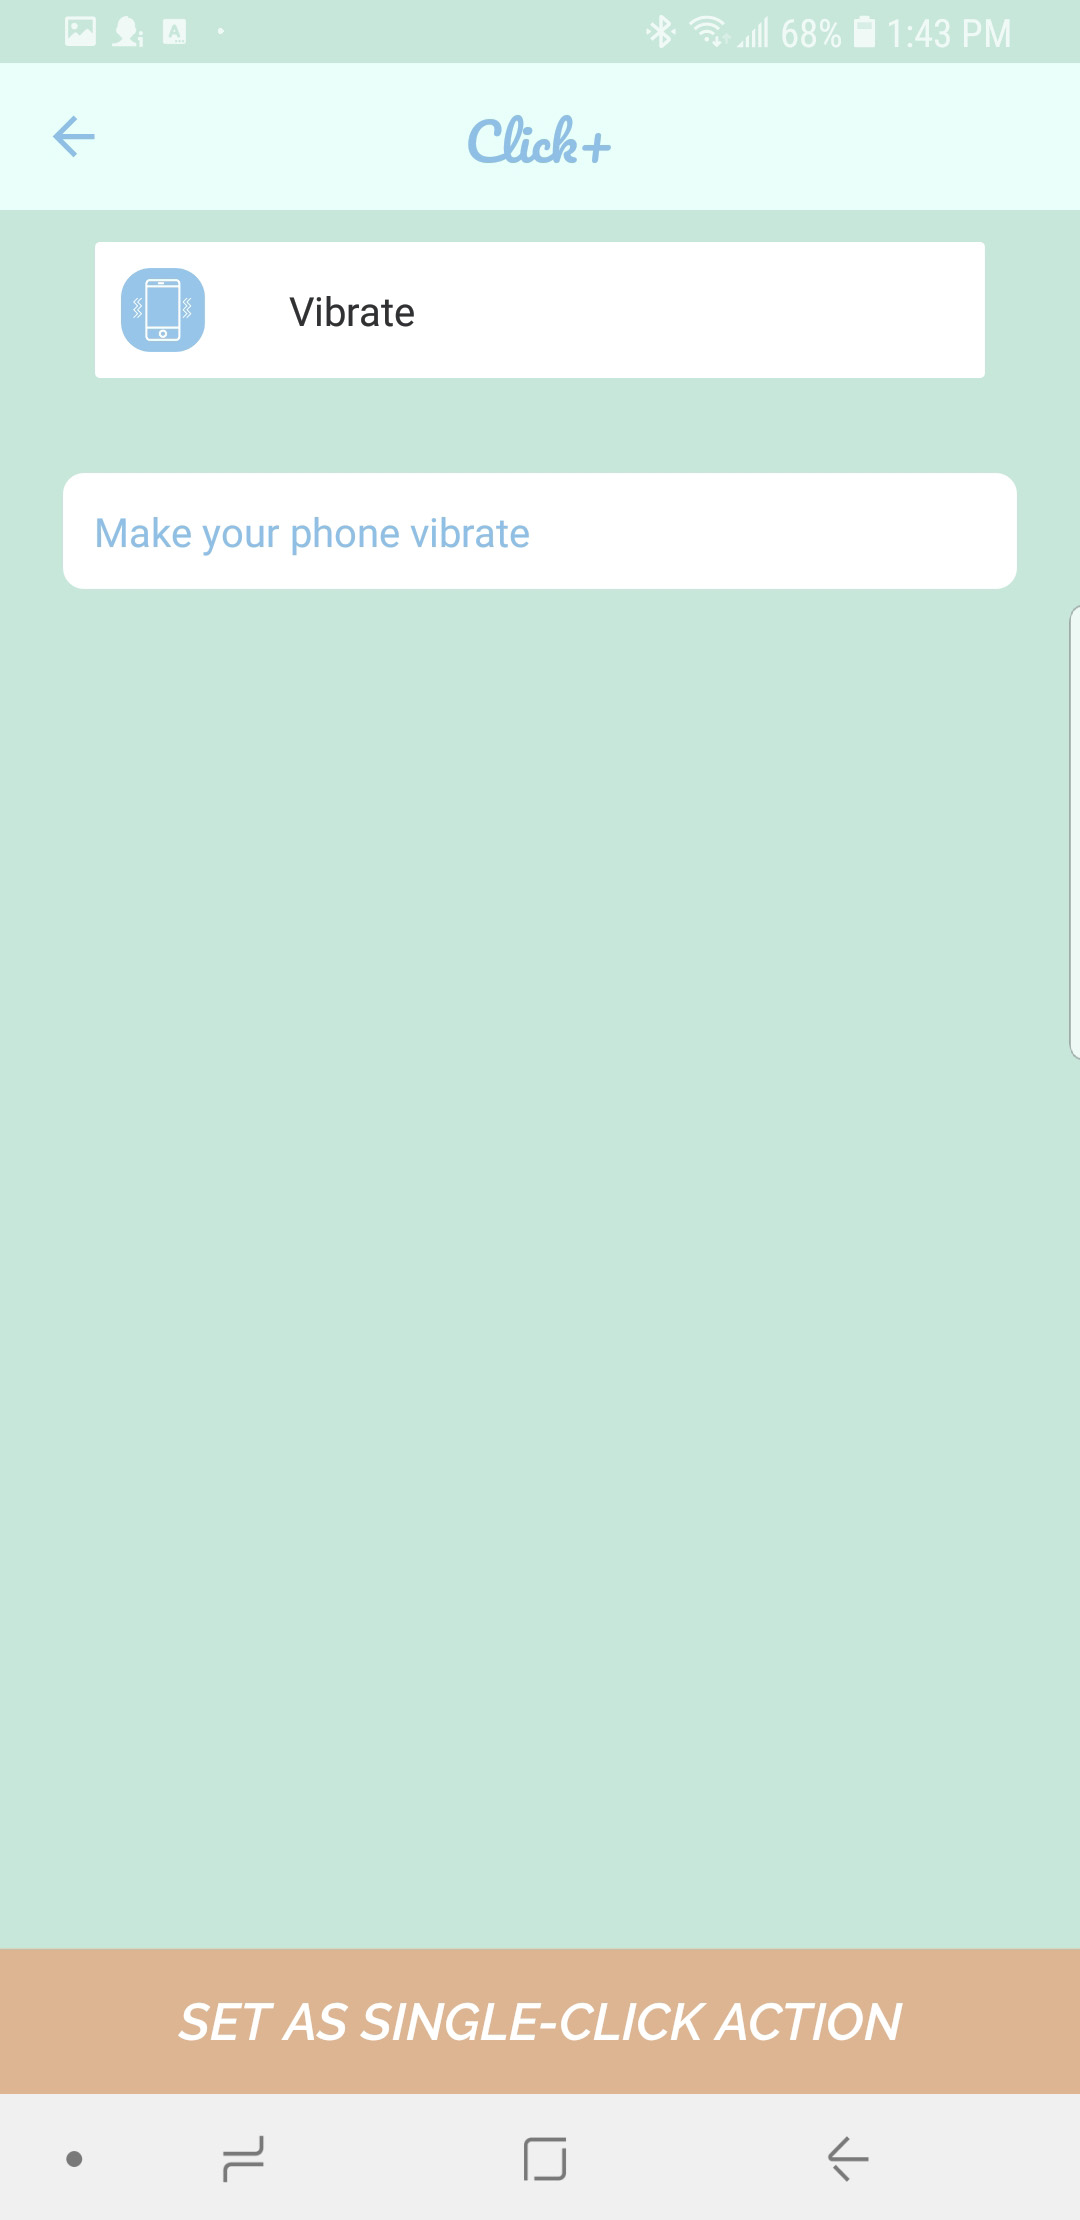
D. This action allows you to press the Click+ smart button at any time to make your phone vibrate. Tip: You can use this action as a more discrete alternative to the Find My Phone action.
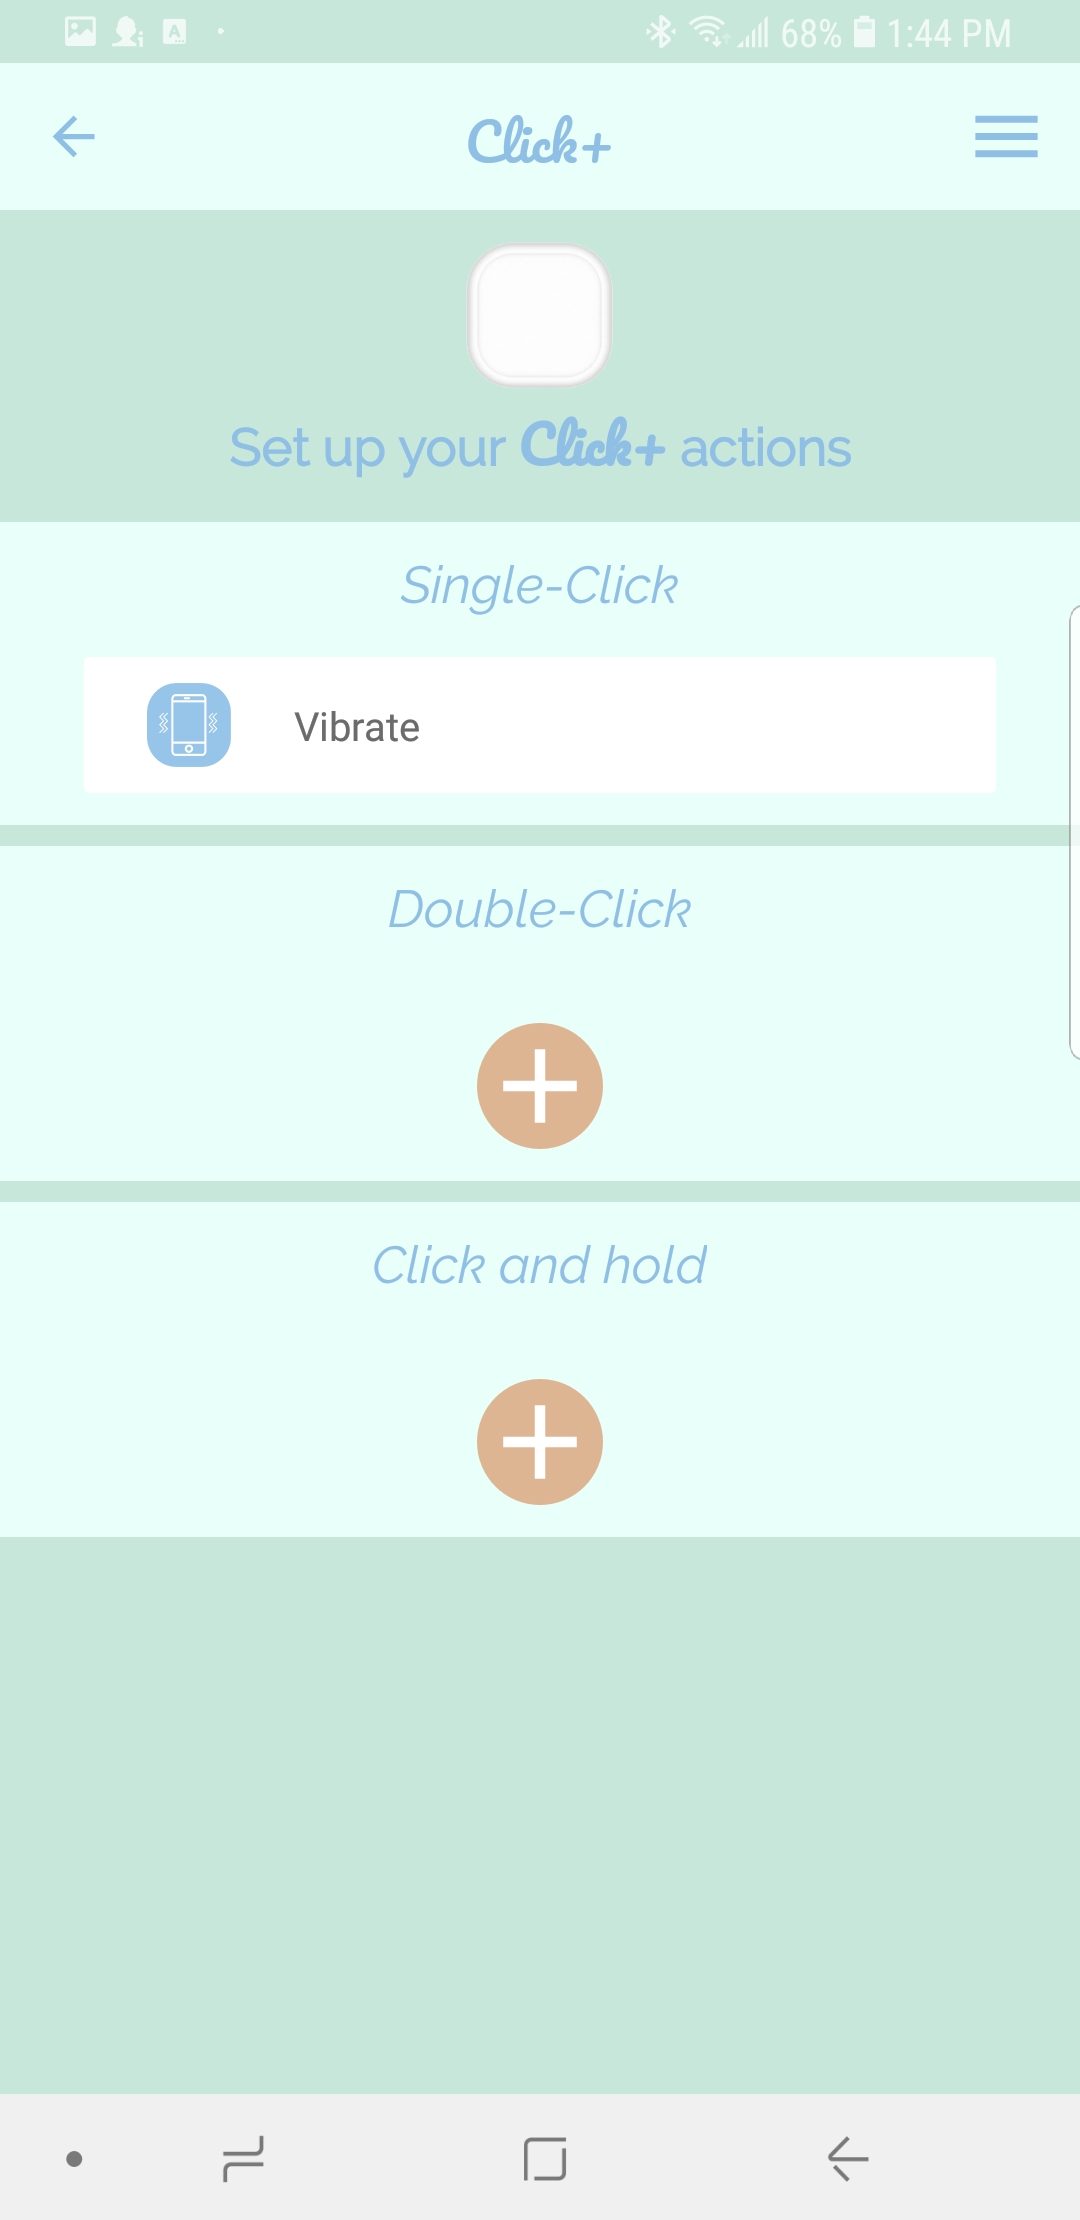
E. Tap SET AS SINGLE-CLICK ACTION and you will be brought back to the action set-up screen.
**Please note that the Click+ App must be running in the background to communicate with your Click+ smart button for the Snooze Alarm action.**

A. Open the app and tap the Click+ whose actions you would like to edit.

B. This brings you to the action set-up screen. Tap SINGLE-CLICK, DOUBLE-CLICK or CLICK AND HOLD depending on which one you want to edit.

C. This brings you to the list of available actions. Tap SNOOZE ALARM.
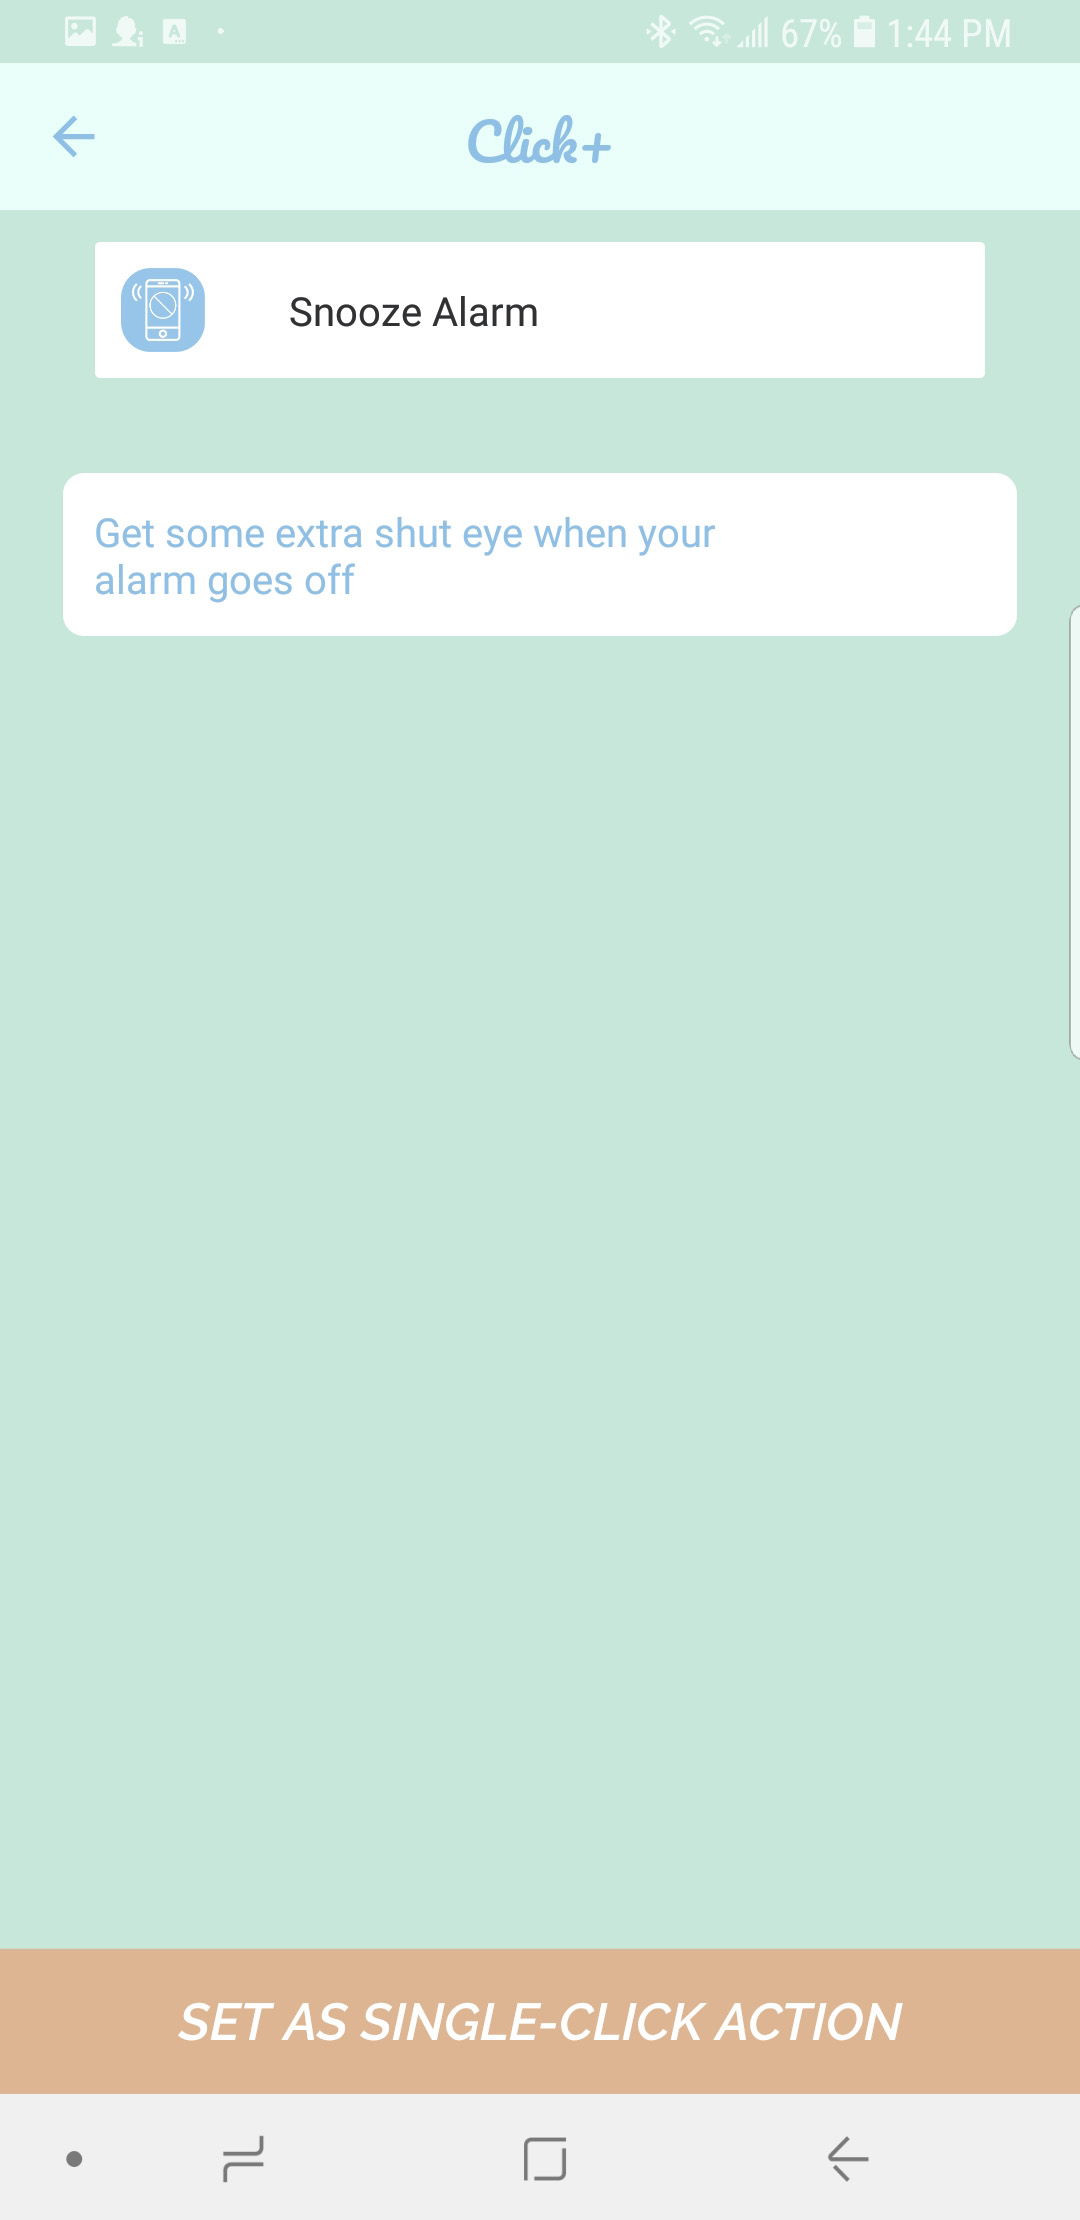
D. The Snooze Alarm action allows you to stop your alarm remotely by clicking the button on your Click+.
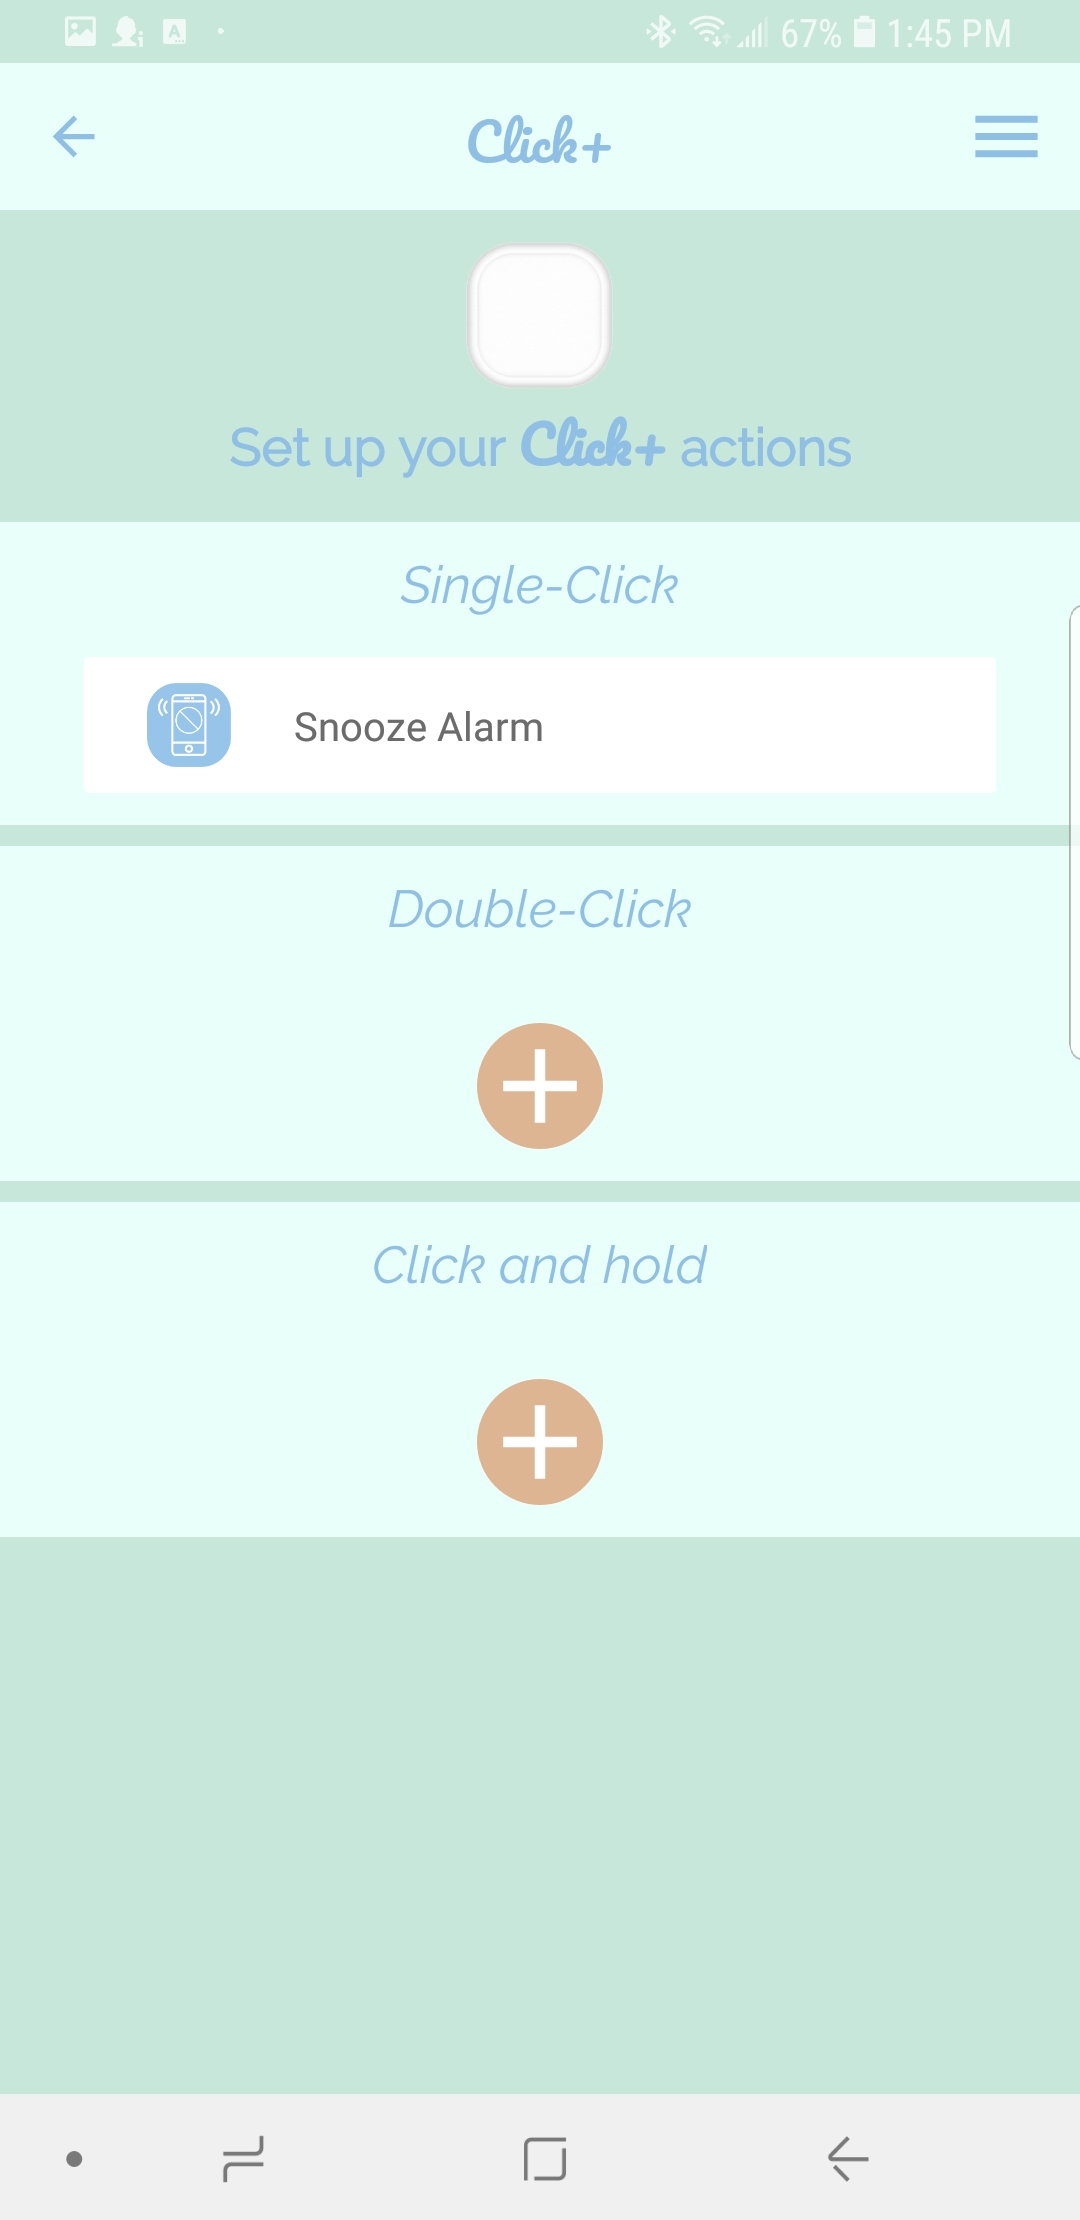
E. Tap SET AS SINGLE-CLICK ACTION and you will be brought back to the action set-up screen.
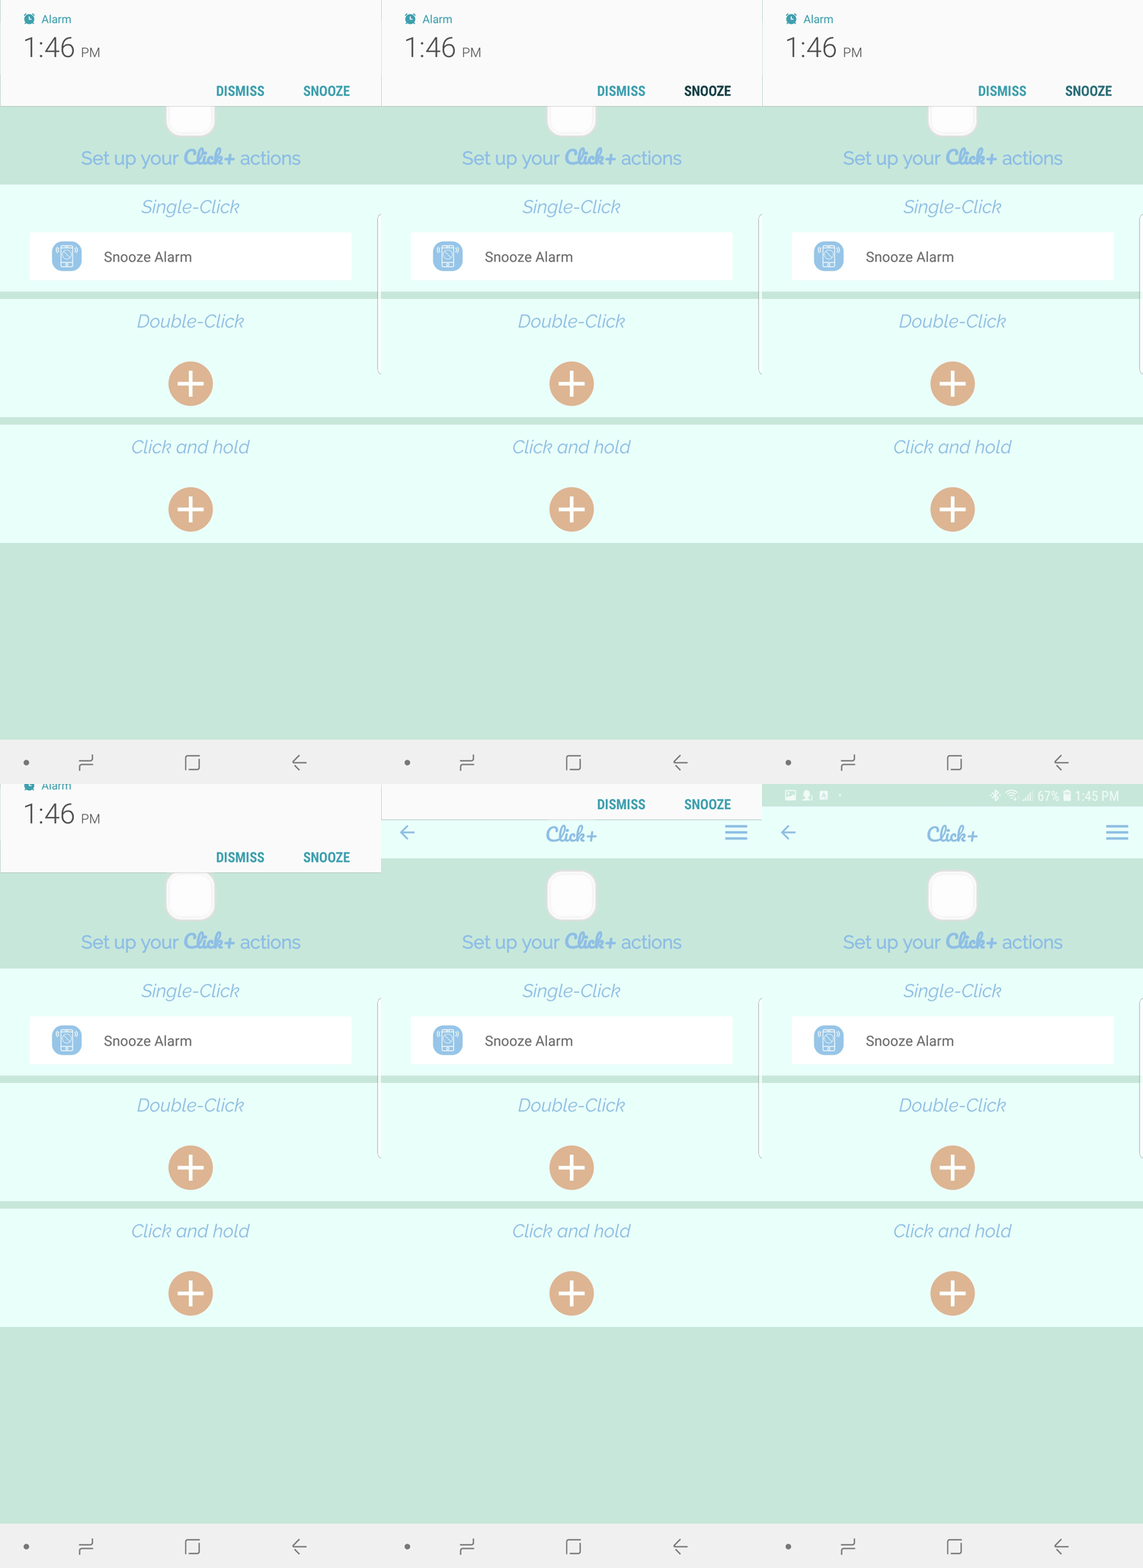
F. When your alarm goes off, simply press the button on your Click+ to snooze your alarm. Tip: This can be helpful in the mornings when you need a little more sleep. Simply click the button instead of having to snooze your alarm on your bright phone.
**Please note that the Click+ App must be running in the background to communicate with your Click+ smart button for the Launch App action.**

A. Open the app and tap the Click+ whose actions you would like to edit.

B. This brings you to the action set-up screen. Tap SINGLE-CLICK, DOUBLE-CLICK or CLICK AND HOLD depending on which one you want to edit.

C. This brings you to the list of available actions. Tap LAUNCH APP.
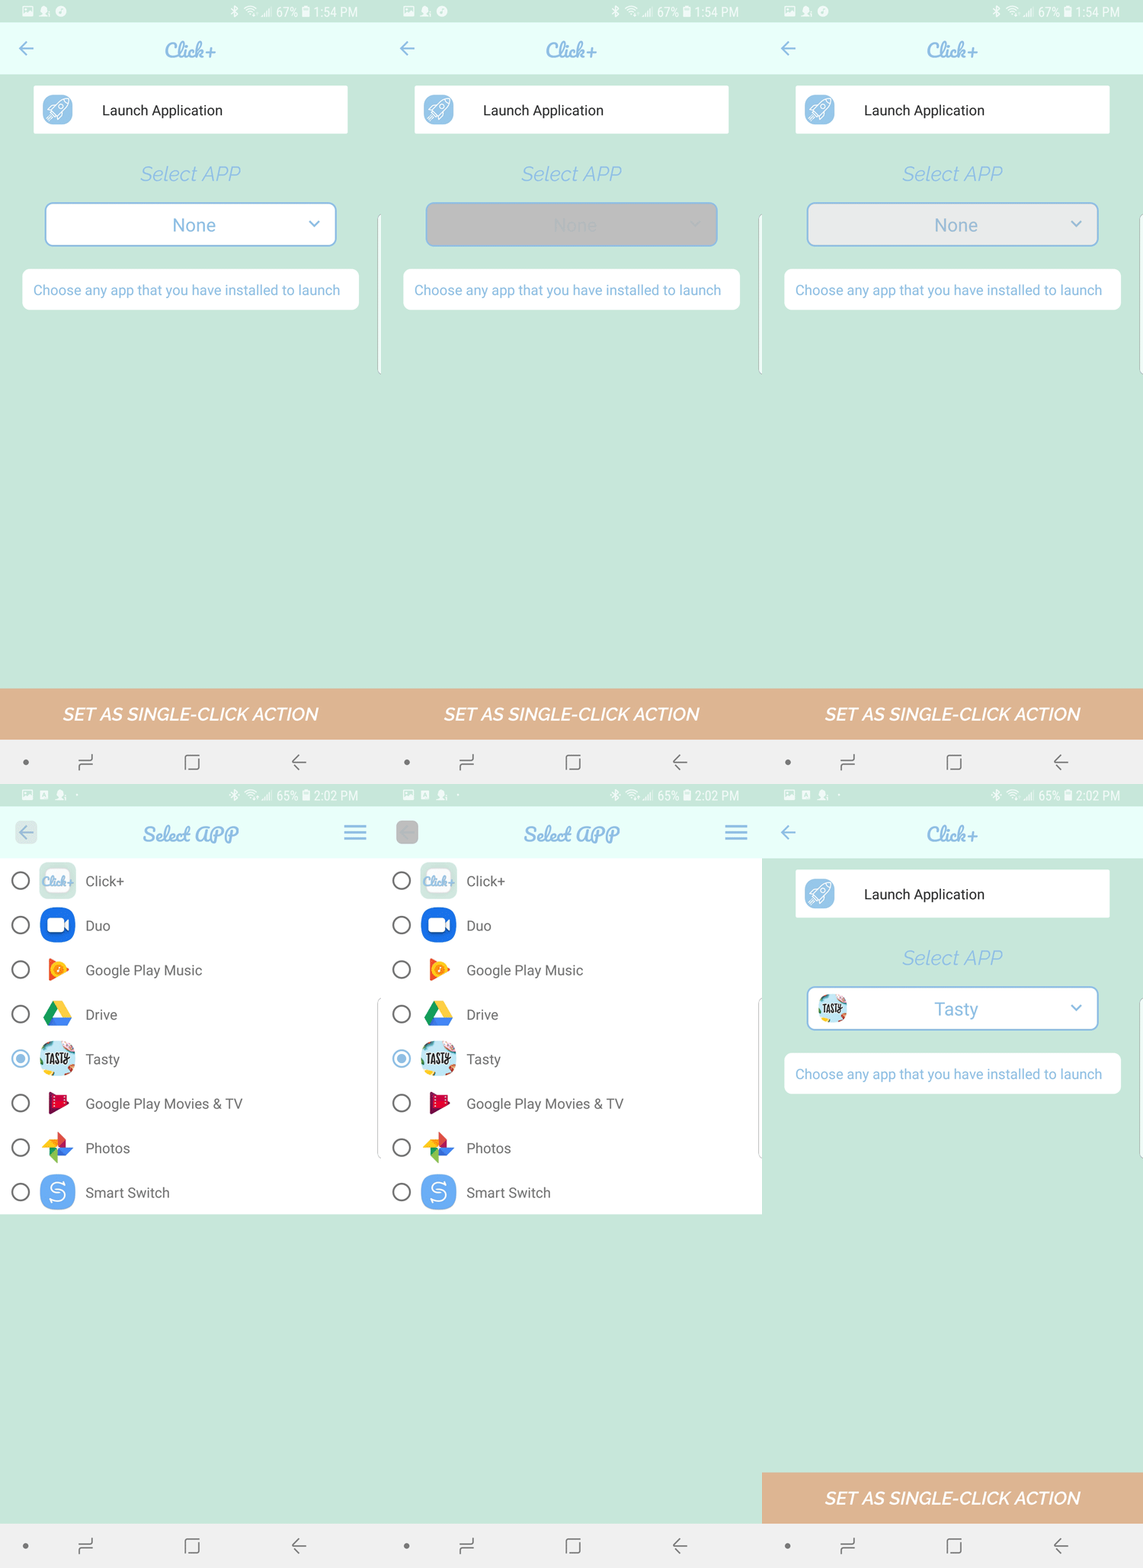
D. Select the app that you would like to be able to open with a click of your Click+ smart button.
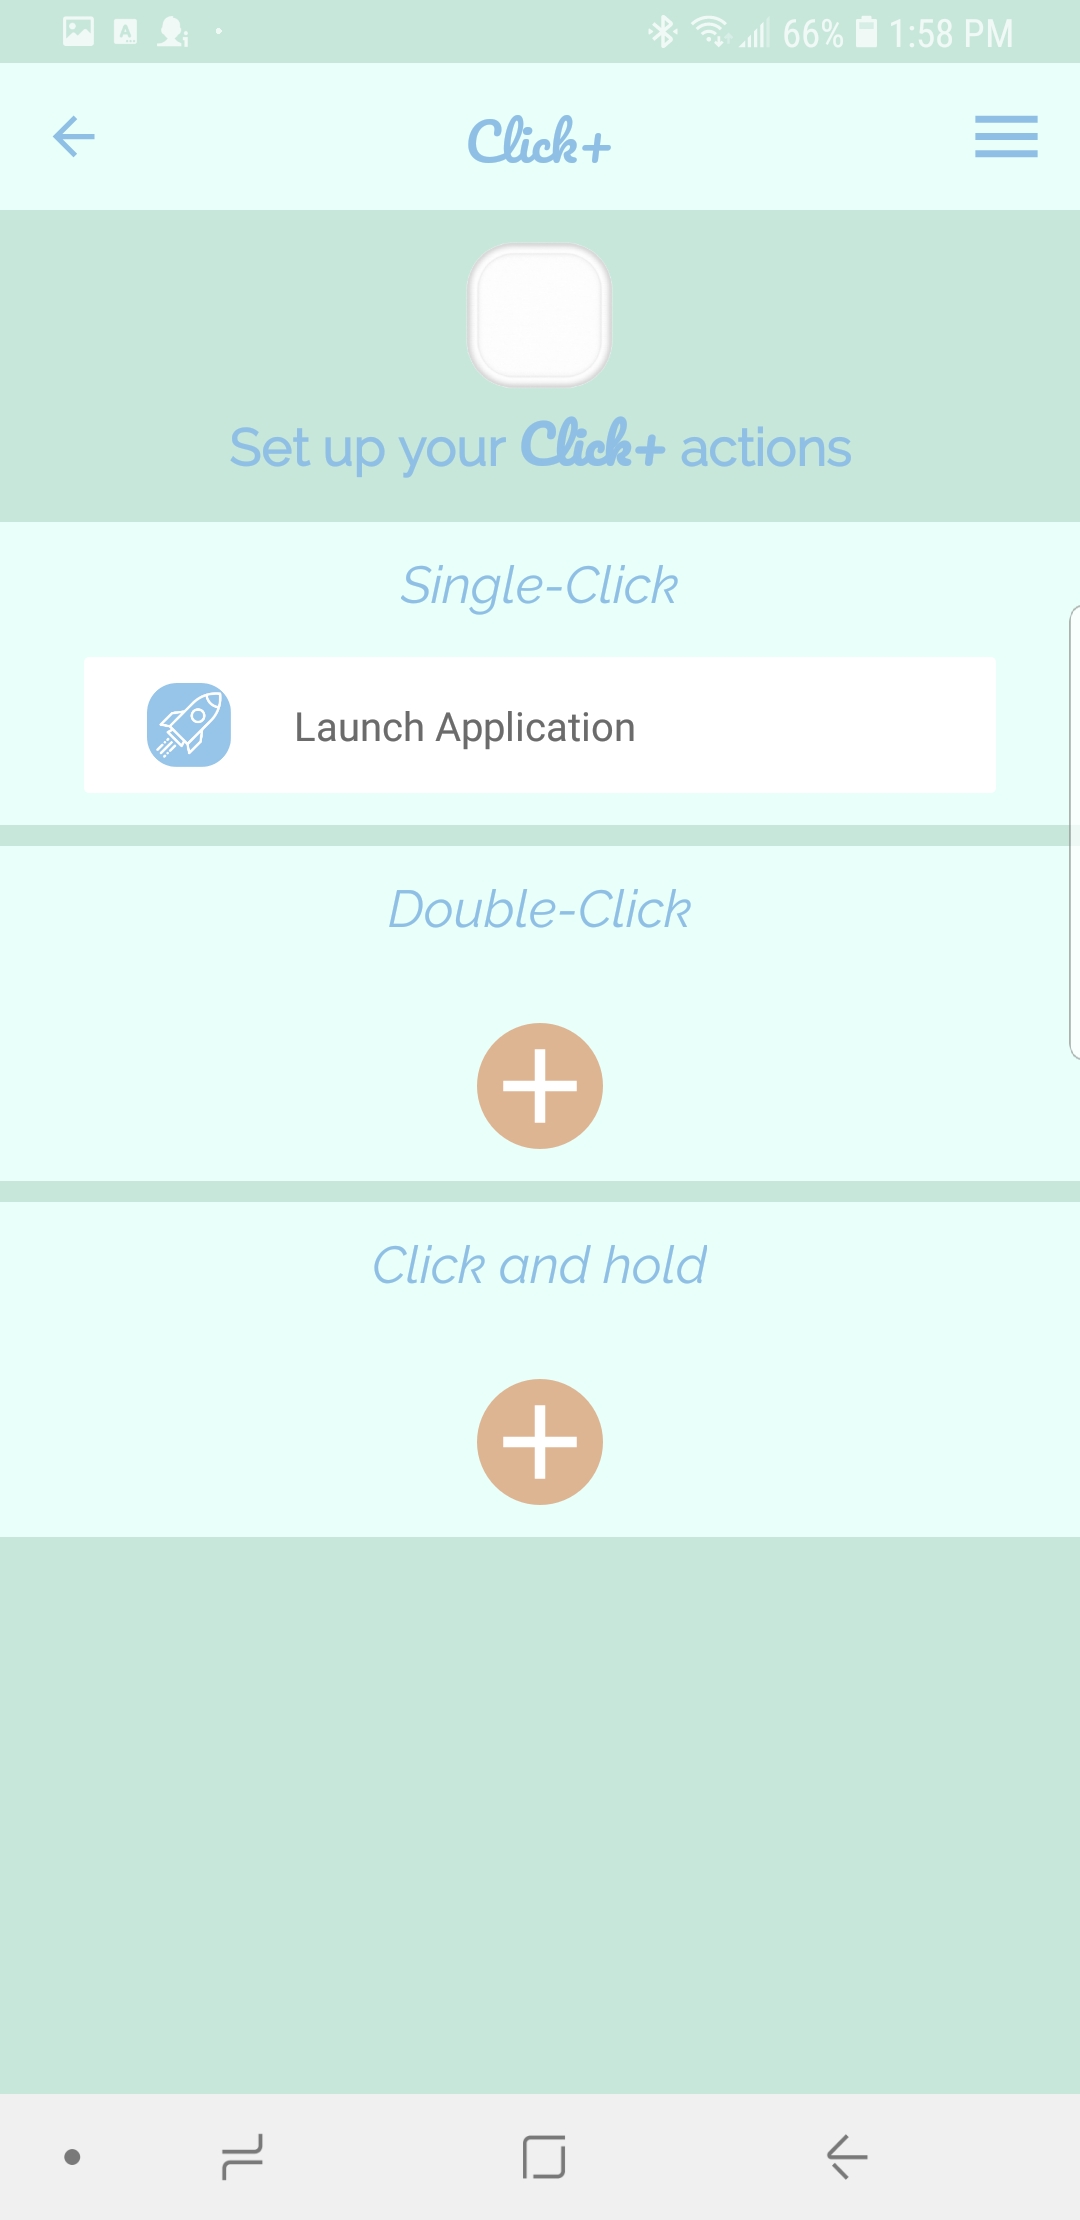
E. Tap SET AS SINGLE-CLICK ACTION and you will be brought back to the action set-up screen.
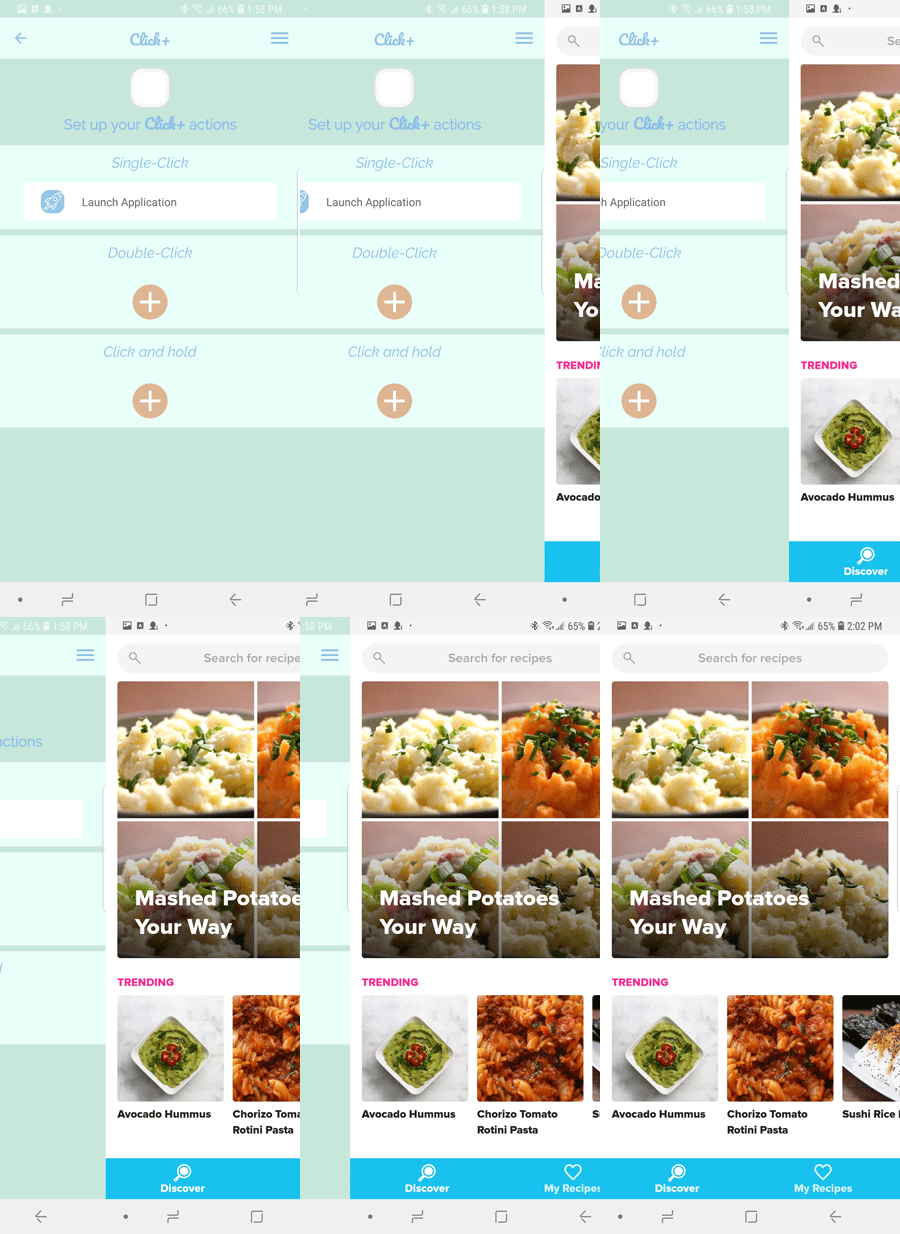
F. Simply press the button on your Click+ and the selected app will open on your phone.
**Please note that the Click+ App must be running in the background to communicate with your Click+ smart button for the Record Voice Memo action.**

A. Open the app and tap the Click+ whose actions you would like to edit.

B. This brings you to the action set-up screen. Tap SINGLE-CLICK, DOUBLE-CLICK or CLICK AND HOLD depending on which one you want to edit.

C. This brings you to the list of available actions. Tap RECORD VOICE MEMO.
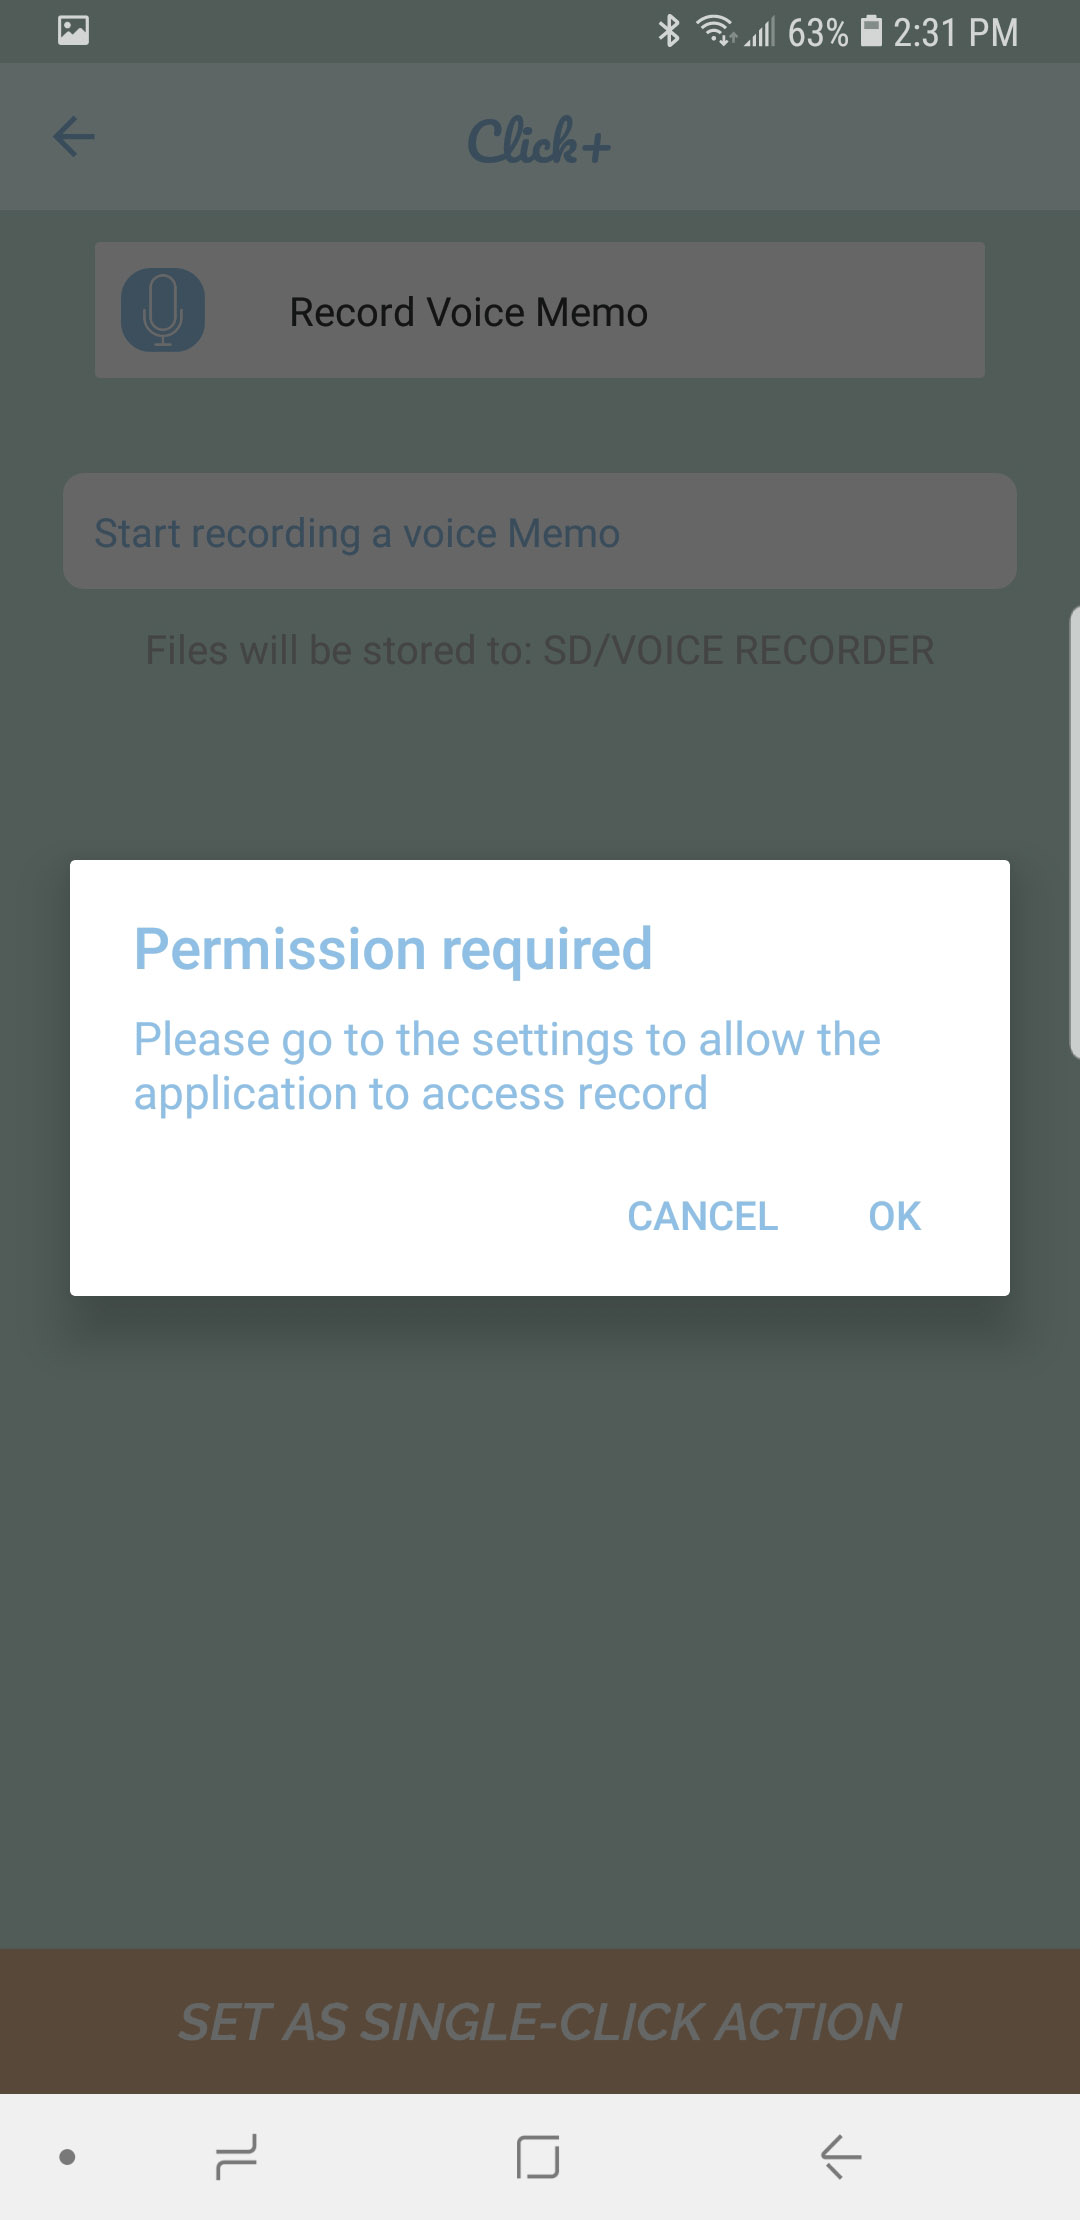
D. A window may pop up asking you to give permission for your Click+ to access the record function of your phone. Tap OK.
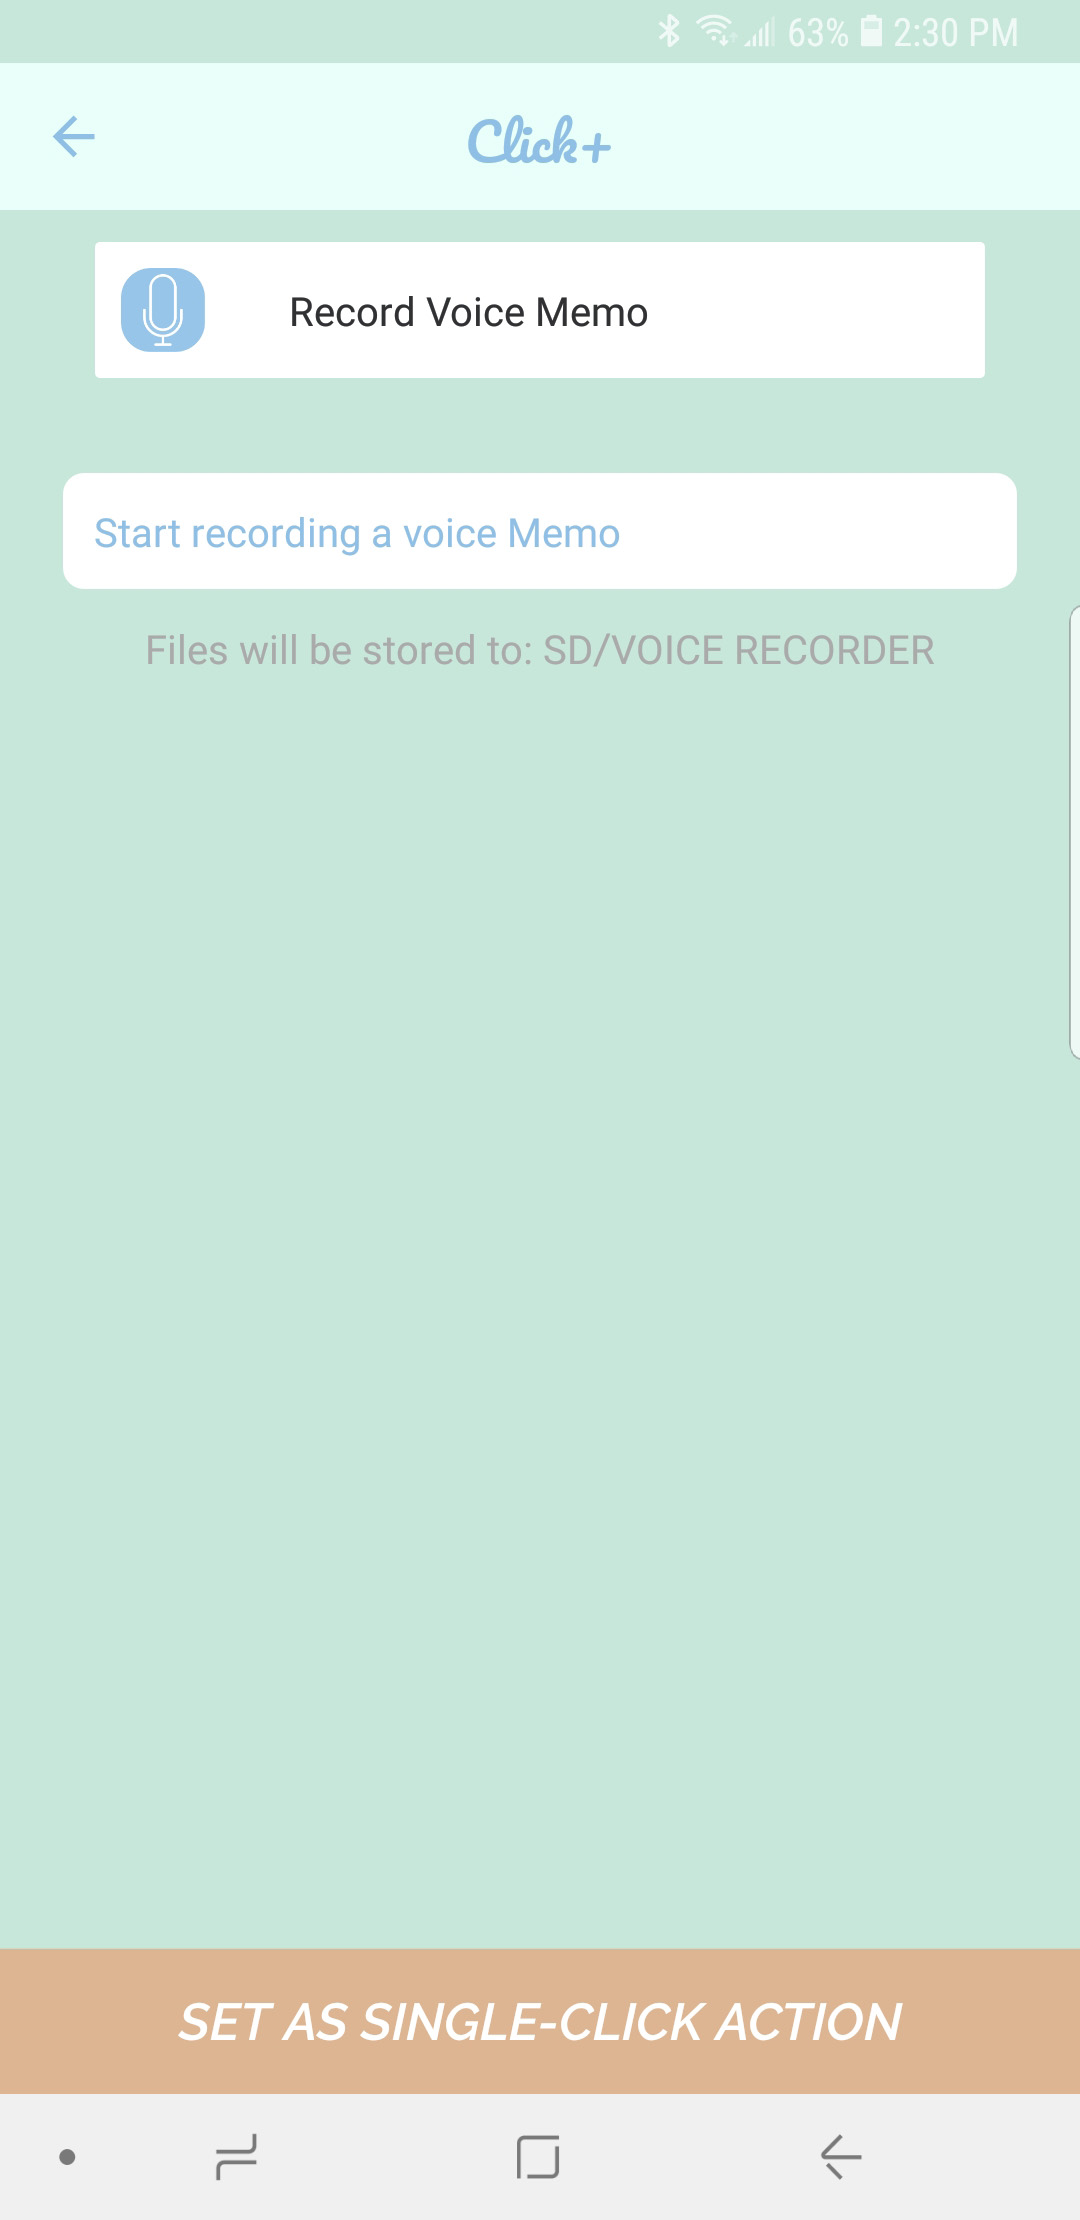
E. The Record Voice Memo action allows you to start and stop a voice memo with a click of your Click+ smart button. The memo will automatically save to your phone or tablet’s memory card.
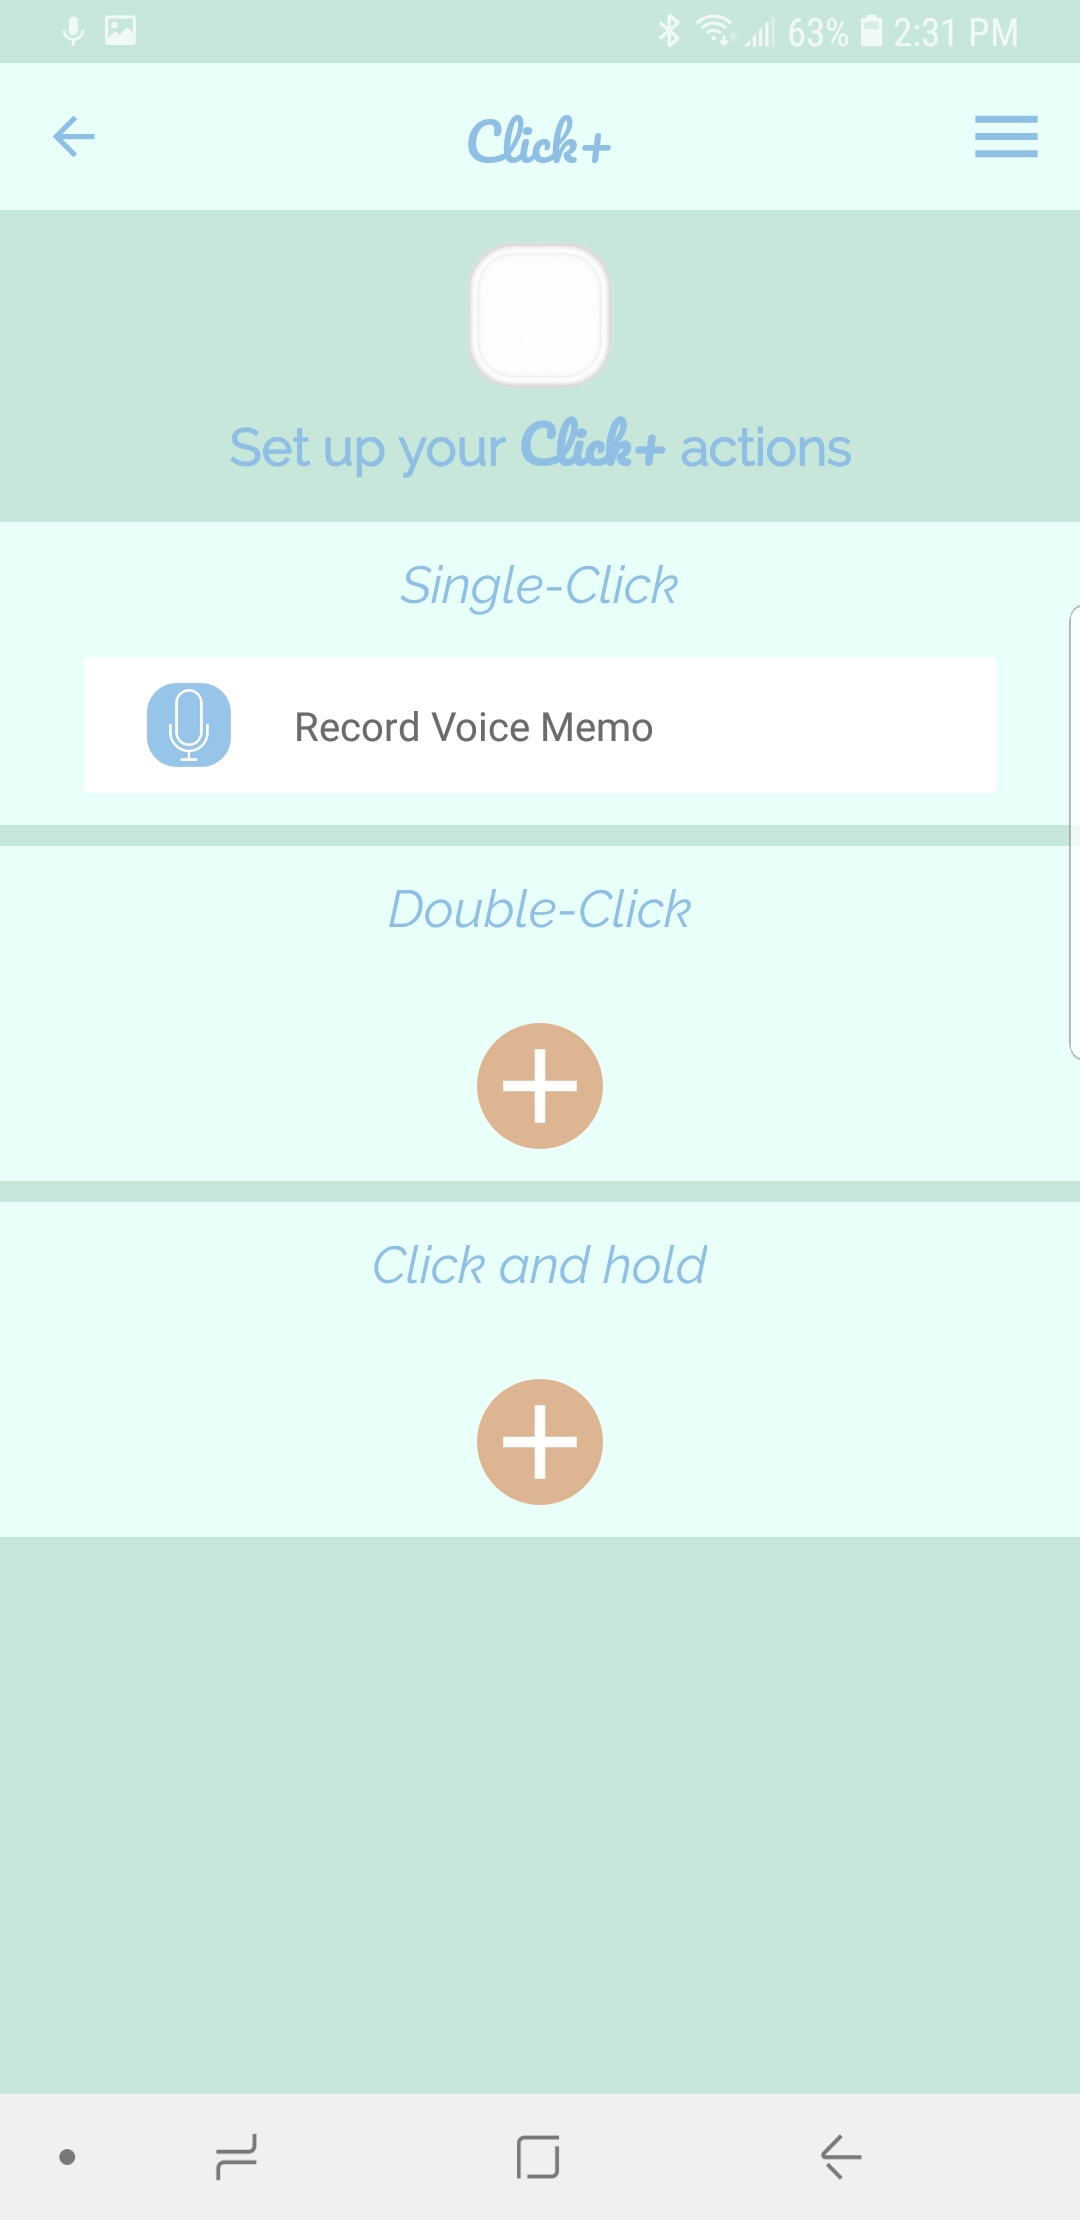
F. Tap SET AS SINGLE-CLICK ACTION and you will be brought back to the action set-up screen.
**Please note that the Click+ App must be open to communicate with your Click+ smart button for the Flashlight action.**

A. Open the app and tap the Click+ whose actions you would like to edit.

B. This brings you to the action set-up screen. Tap SINGLE-CLICK, DOUBLE-CLICK or CLICK AND HOLD depending on which one you want to edit.

C. This brings you to the list of available actions. Tap FLASHLIGHT.
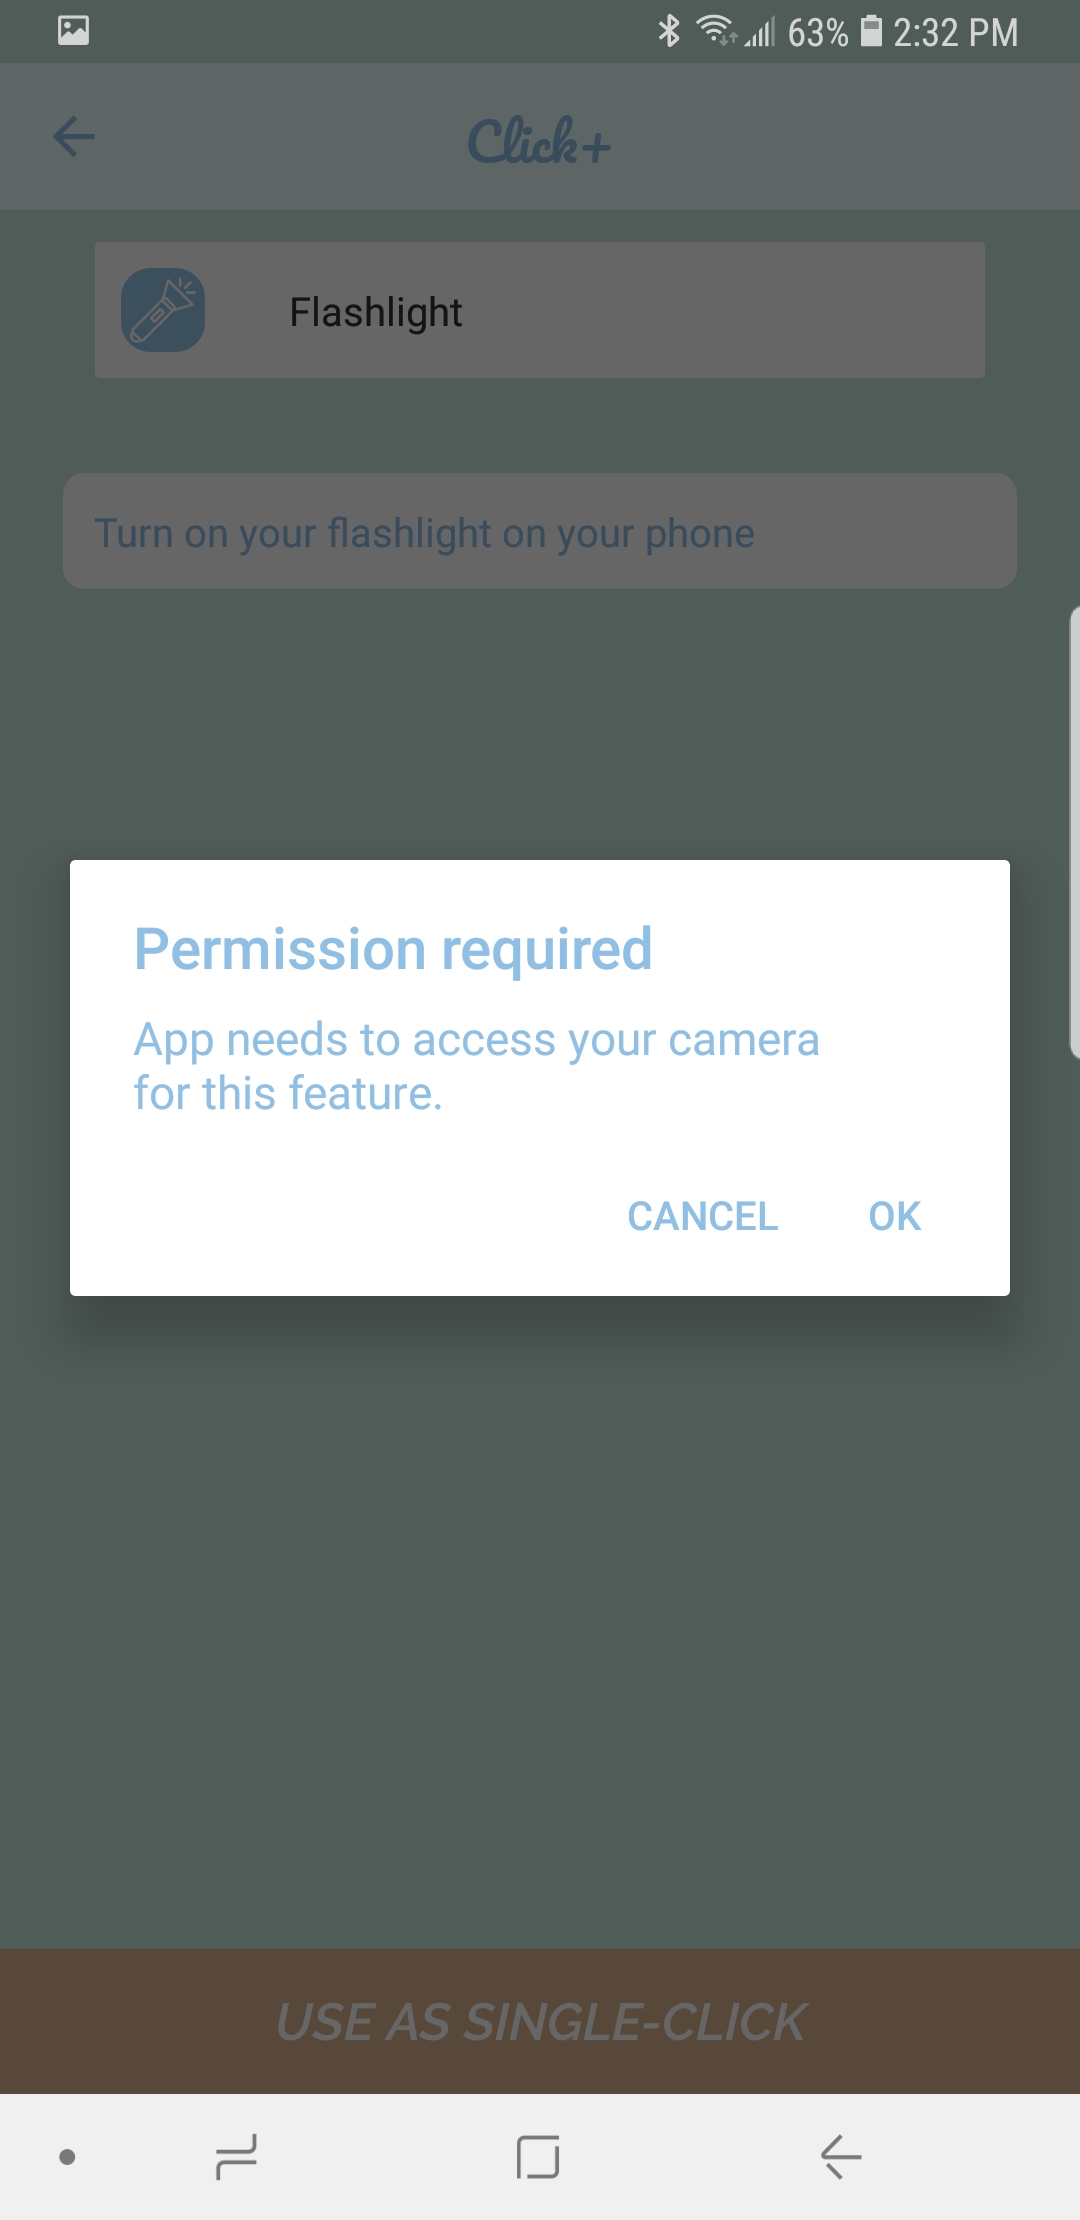
D. A window may pop up asking you to give permission for your Click+ to access your phone. Tap OK.
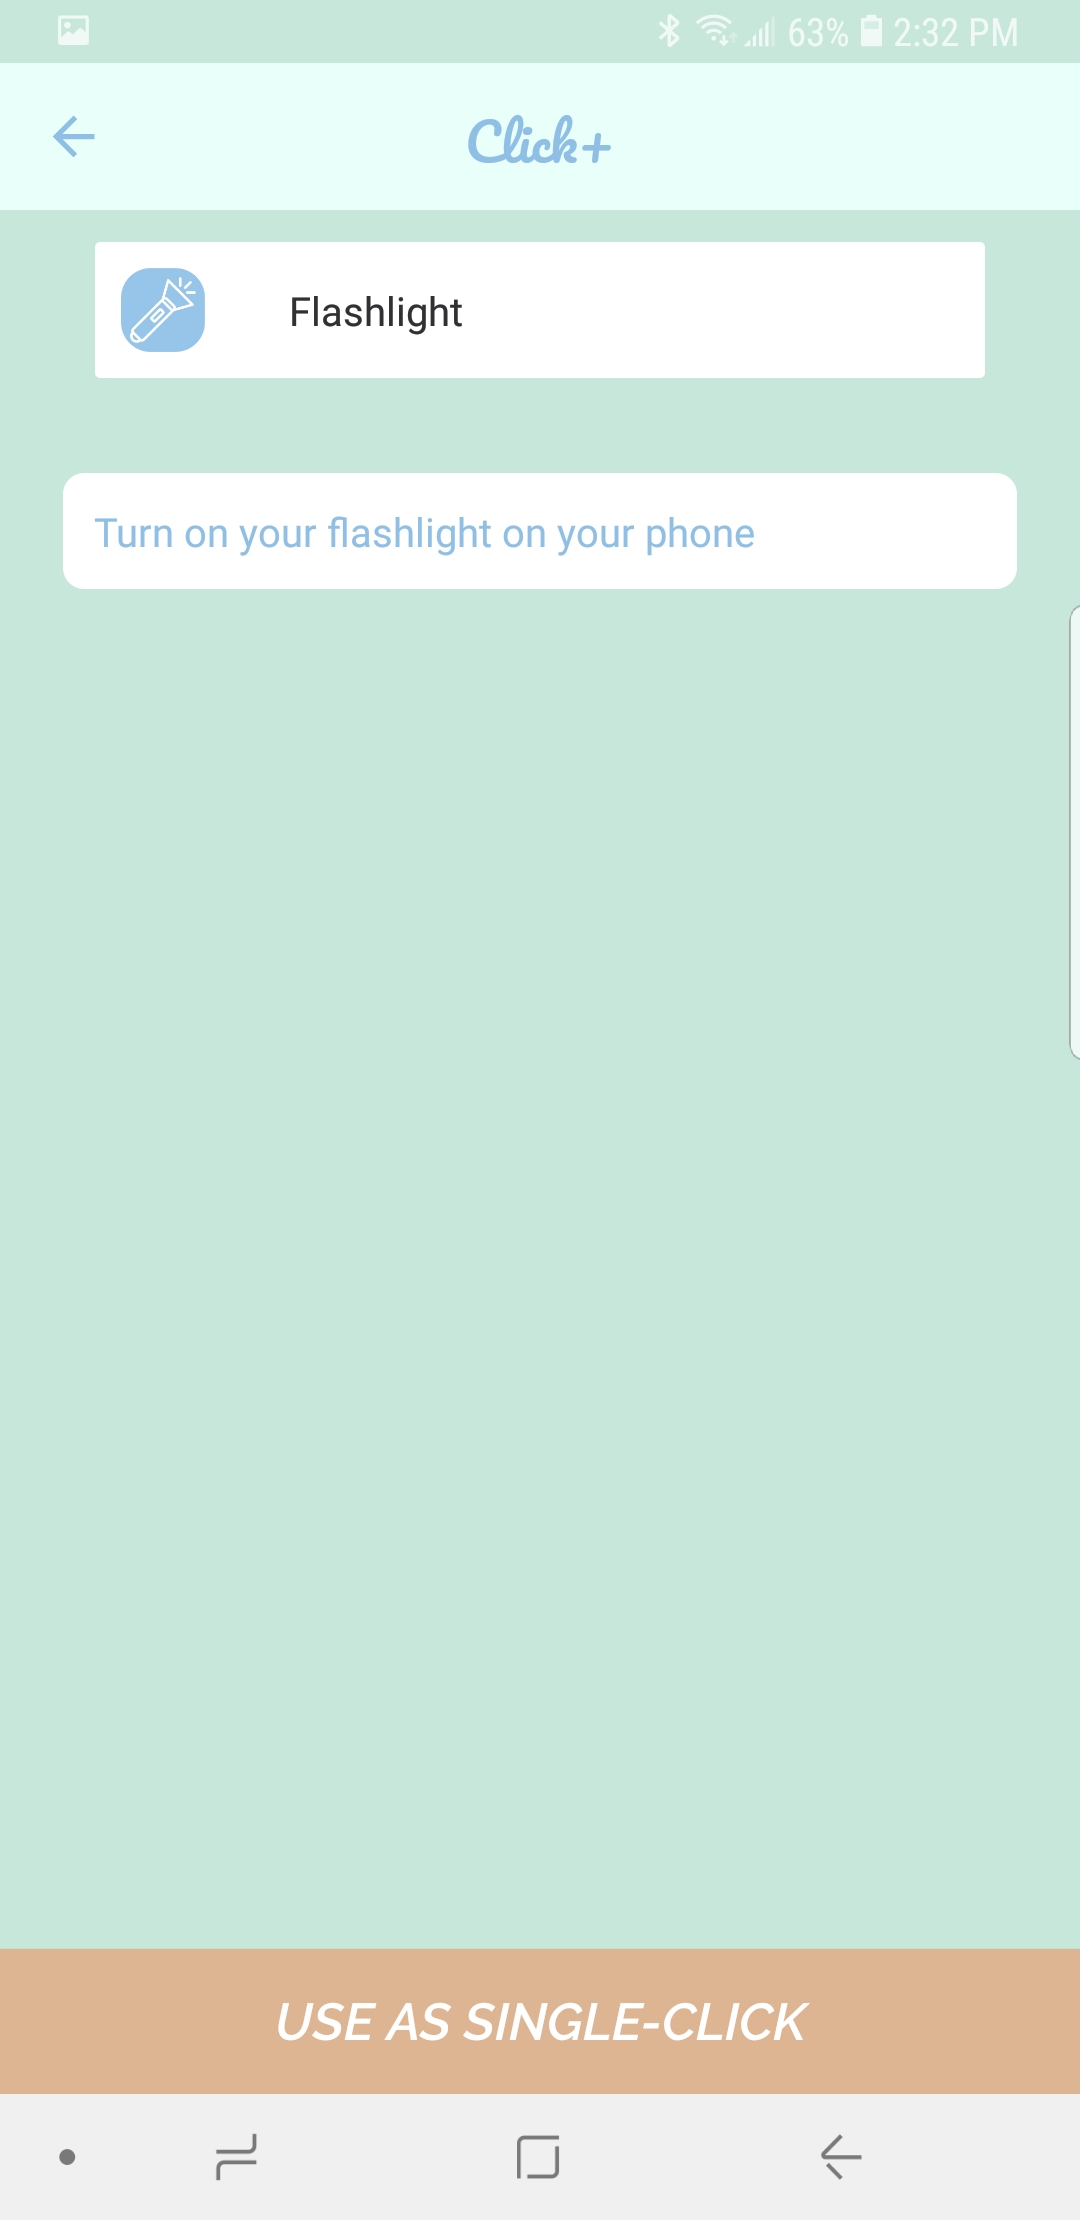
E. This action allows you to press the Click+ smart button to turn the flashlight on your phone on and off. Tip: You can use this action as an alternative to the Find My Phone action. If you cannot rely on an audio alarm, you can turn the flashlight on as a visual indication of where your phone is.
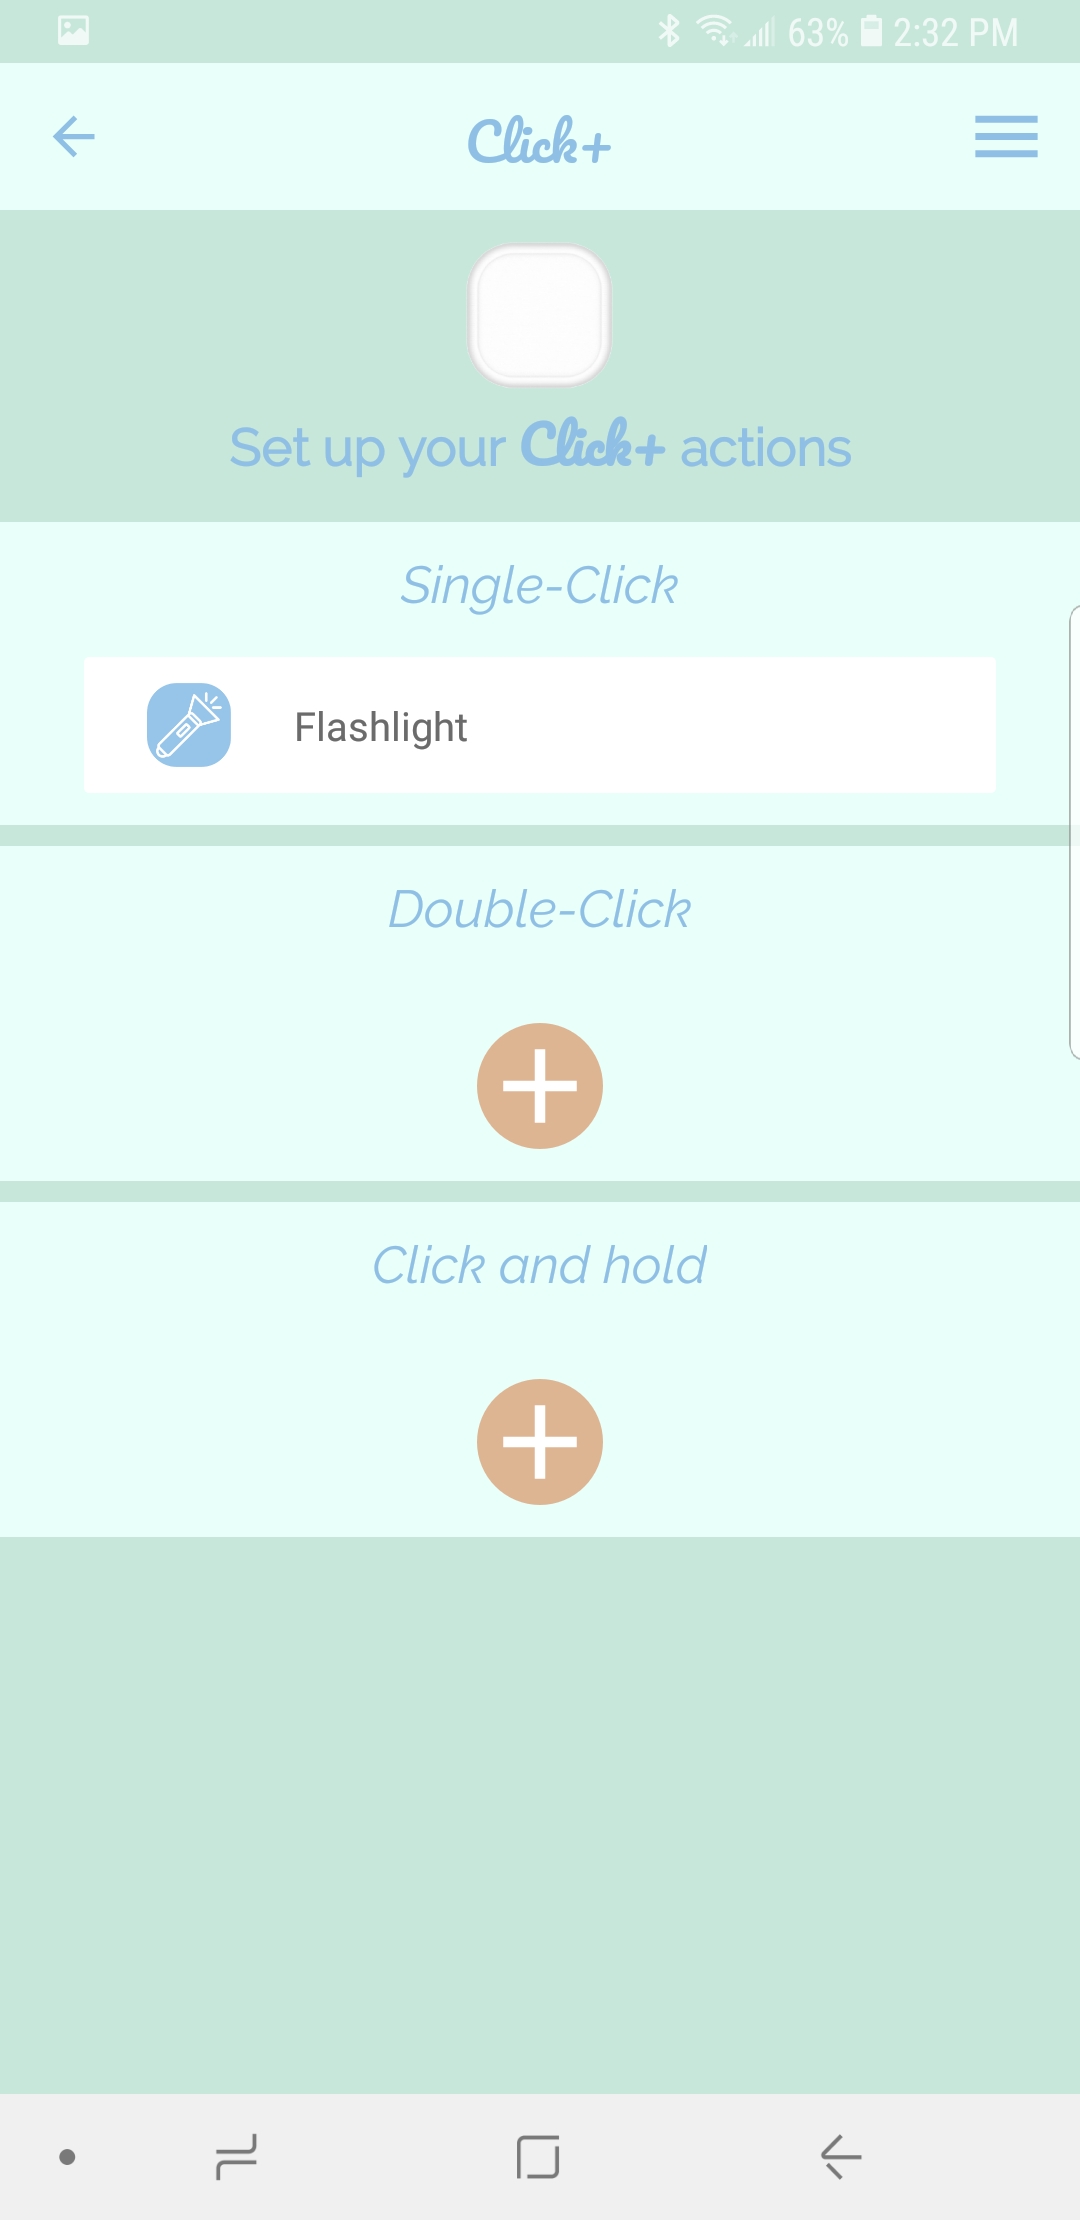
F. Tap SET AS SINGLE-CLICK ACTION and you will be brought back to the action set-up screen.
**Please note that the Click+ App must be running in the background to communicate with your Click+ smart button for the Navigation action.**

A. Open the app and tap the Click+ whose actions you would like to edit.

B. This brings you to the action set-up screen. Tap SINGLE-CLICK, DOUBLE-CLICK or CLICK AND HOLD depending on which one you want to edit.
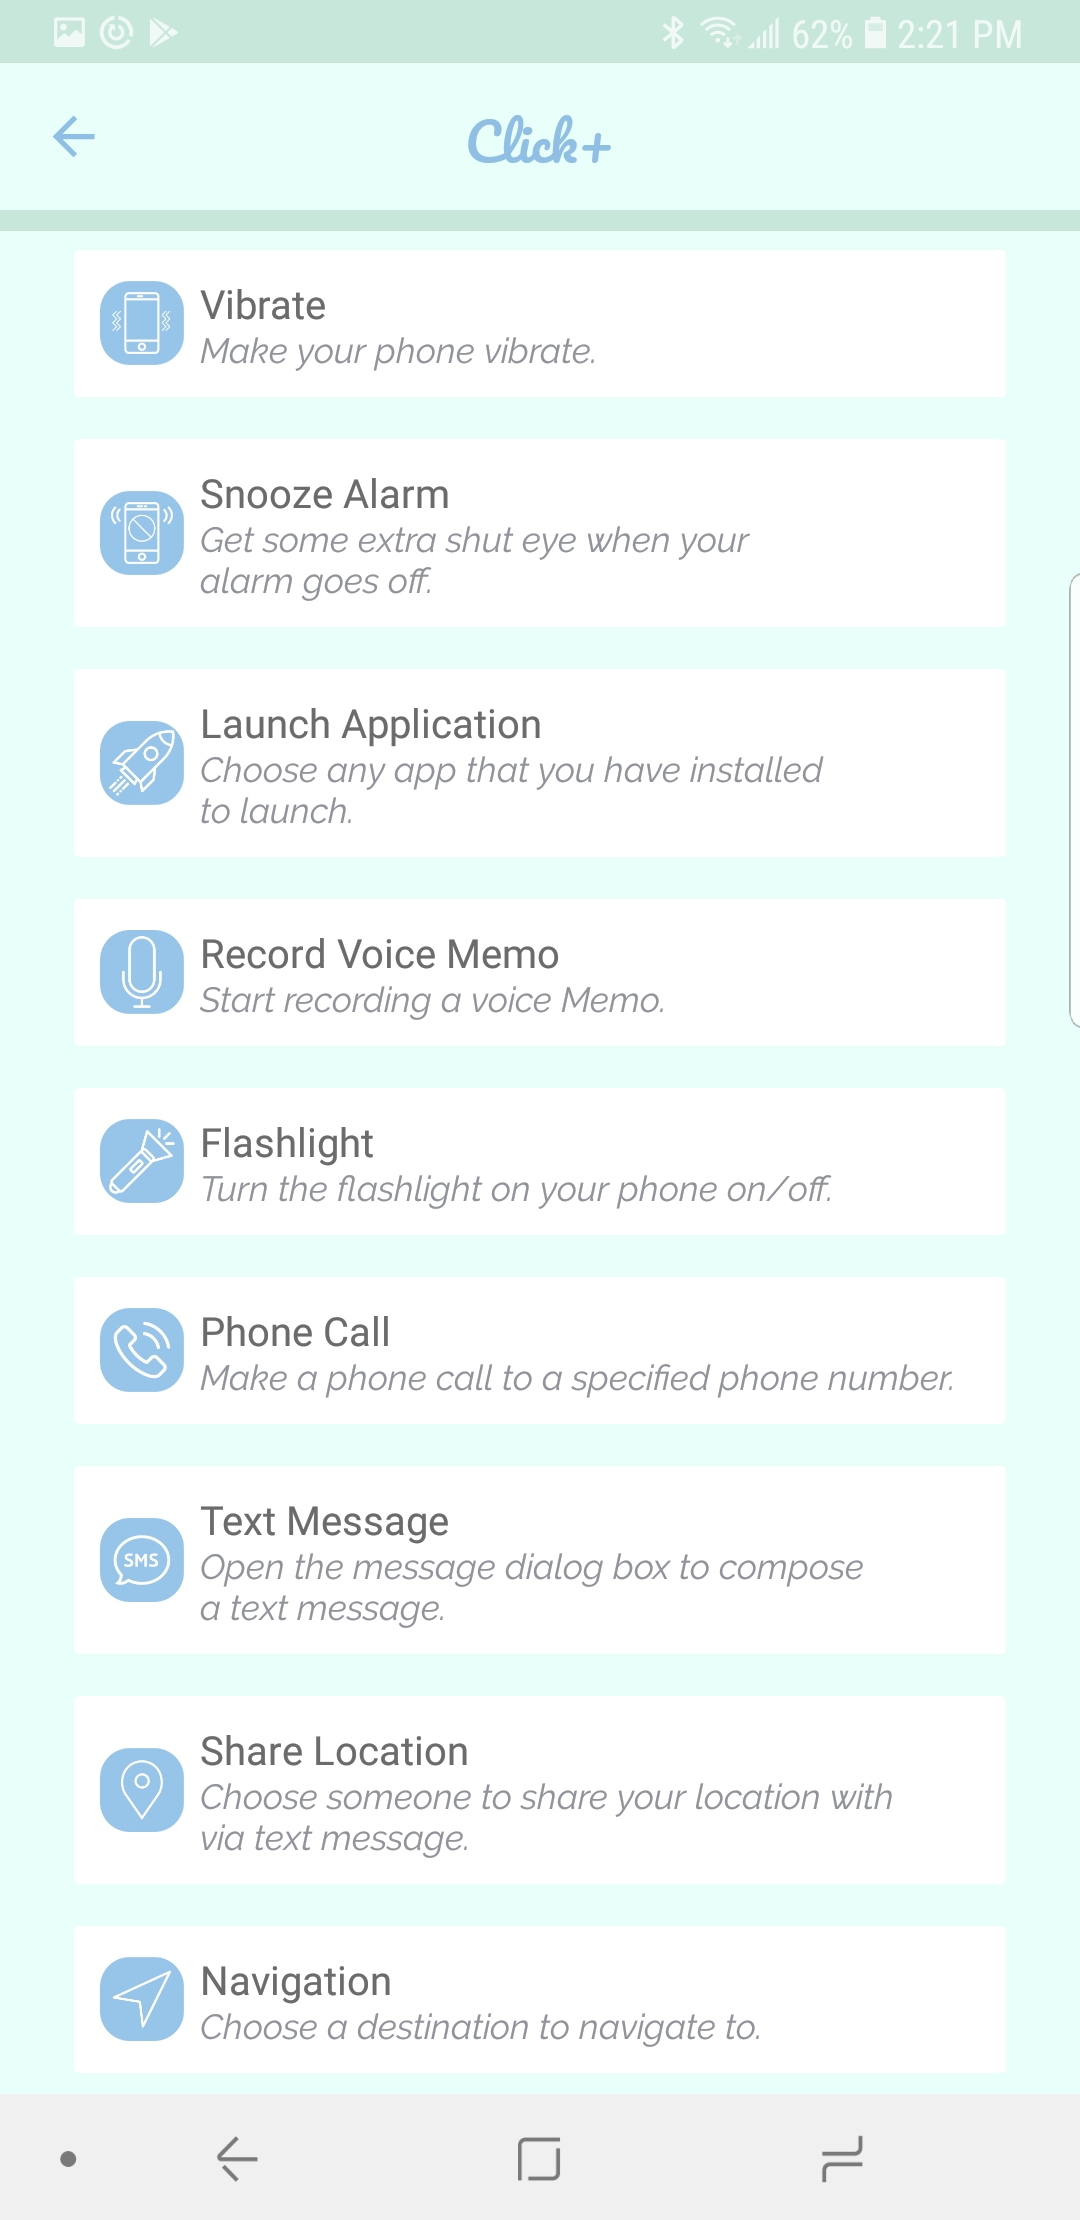
C. This brings you to the list of available actions. Tap NAVIGATE.
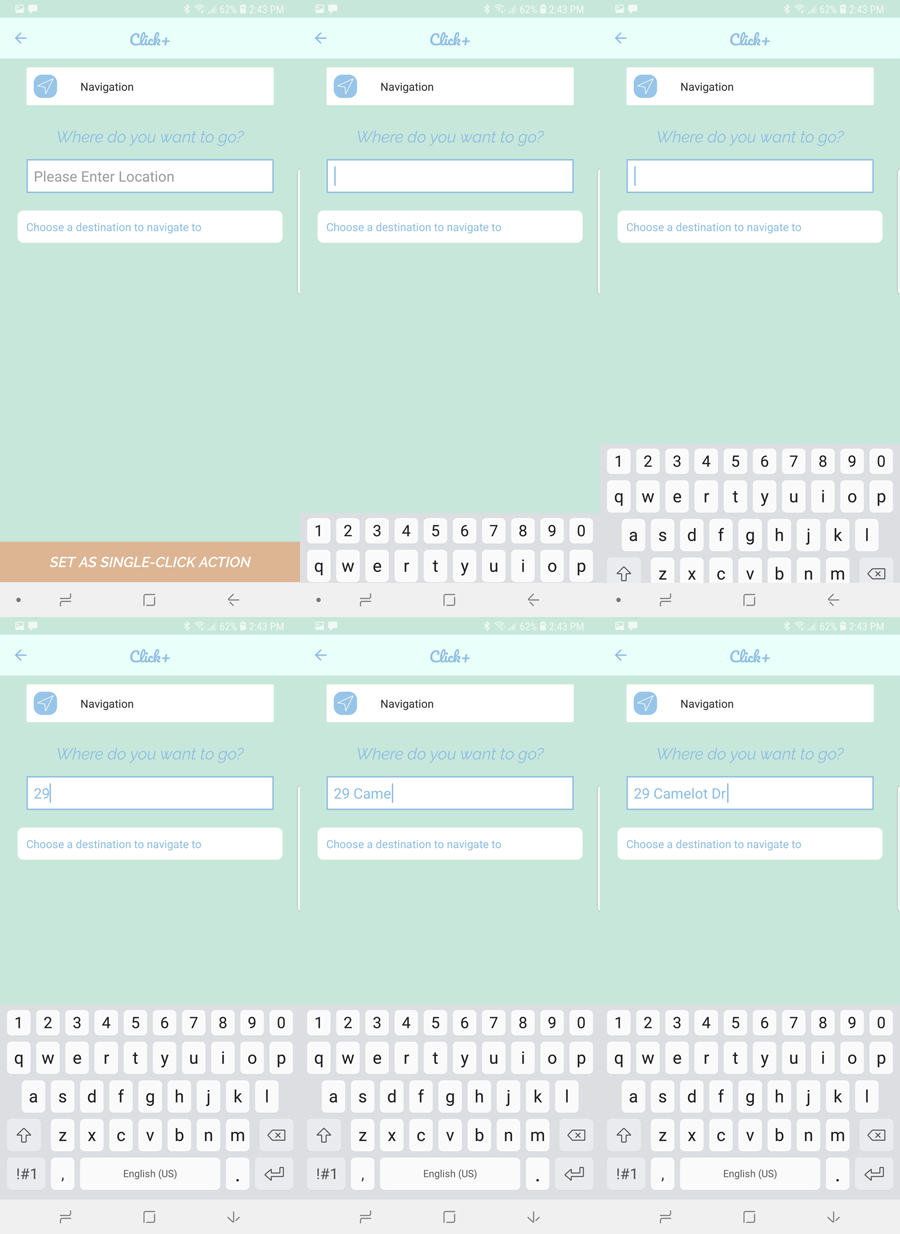
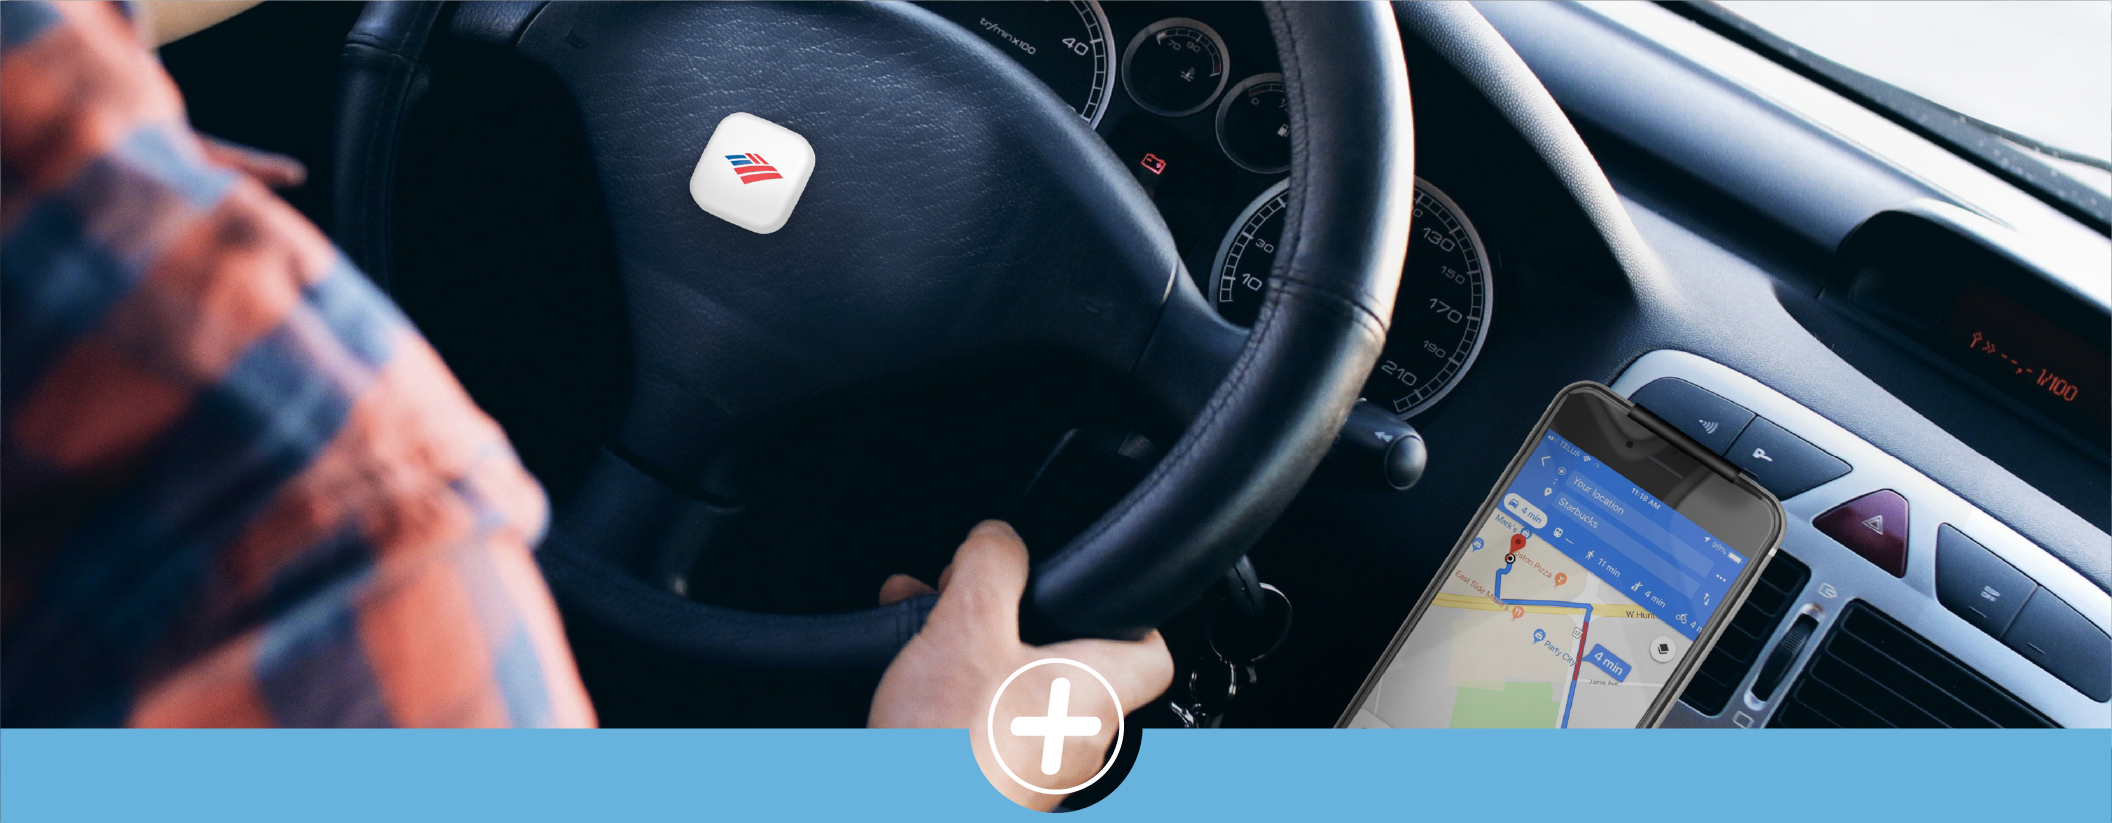
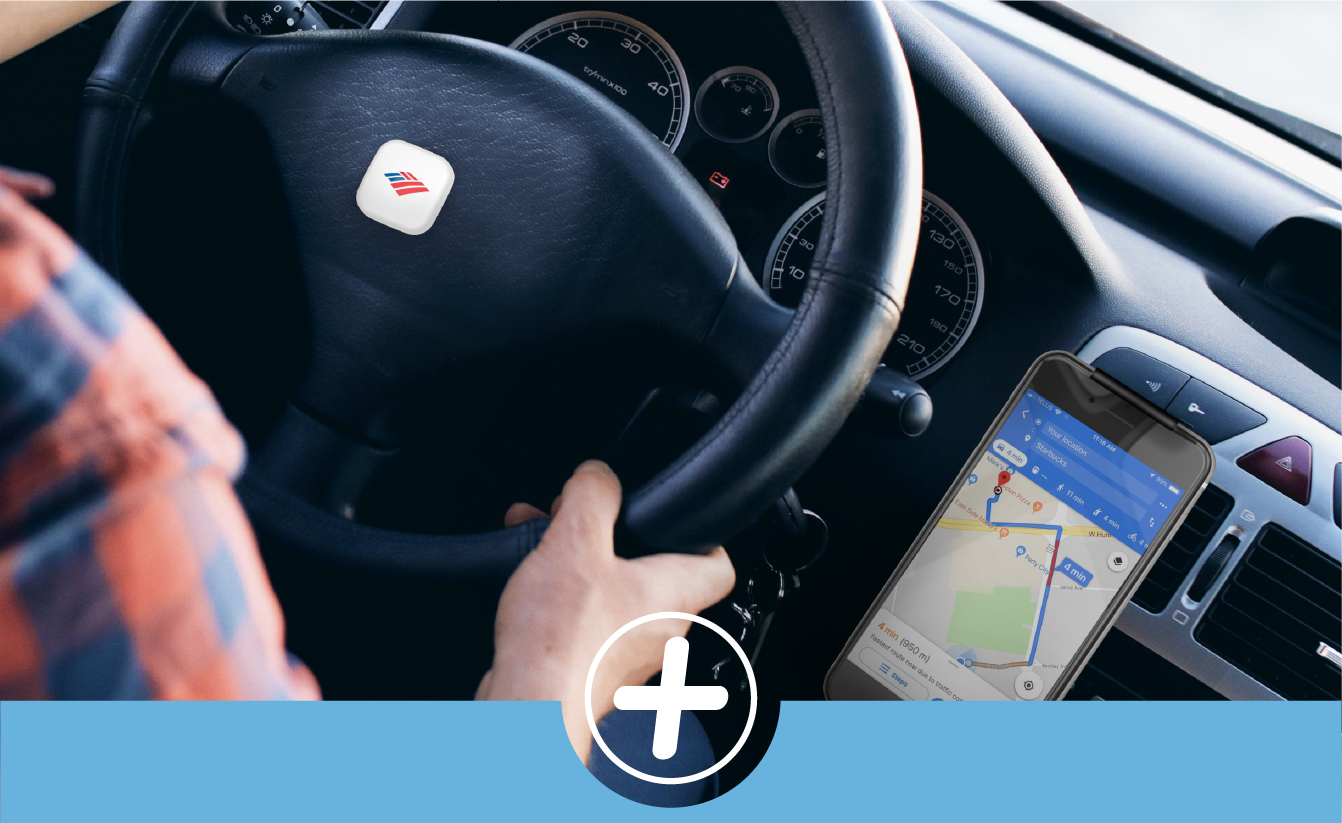
D. Type in the address that you would like to get directions to when you press the Click+ smart button. Tip: This action can be helpful when navigating while you drive. Attach the Click+ to your dashboard and navigate home with the click of a button.
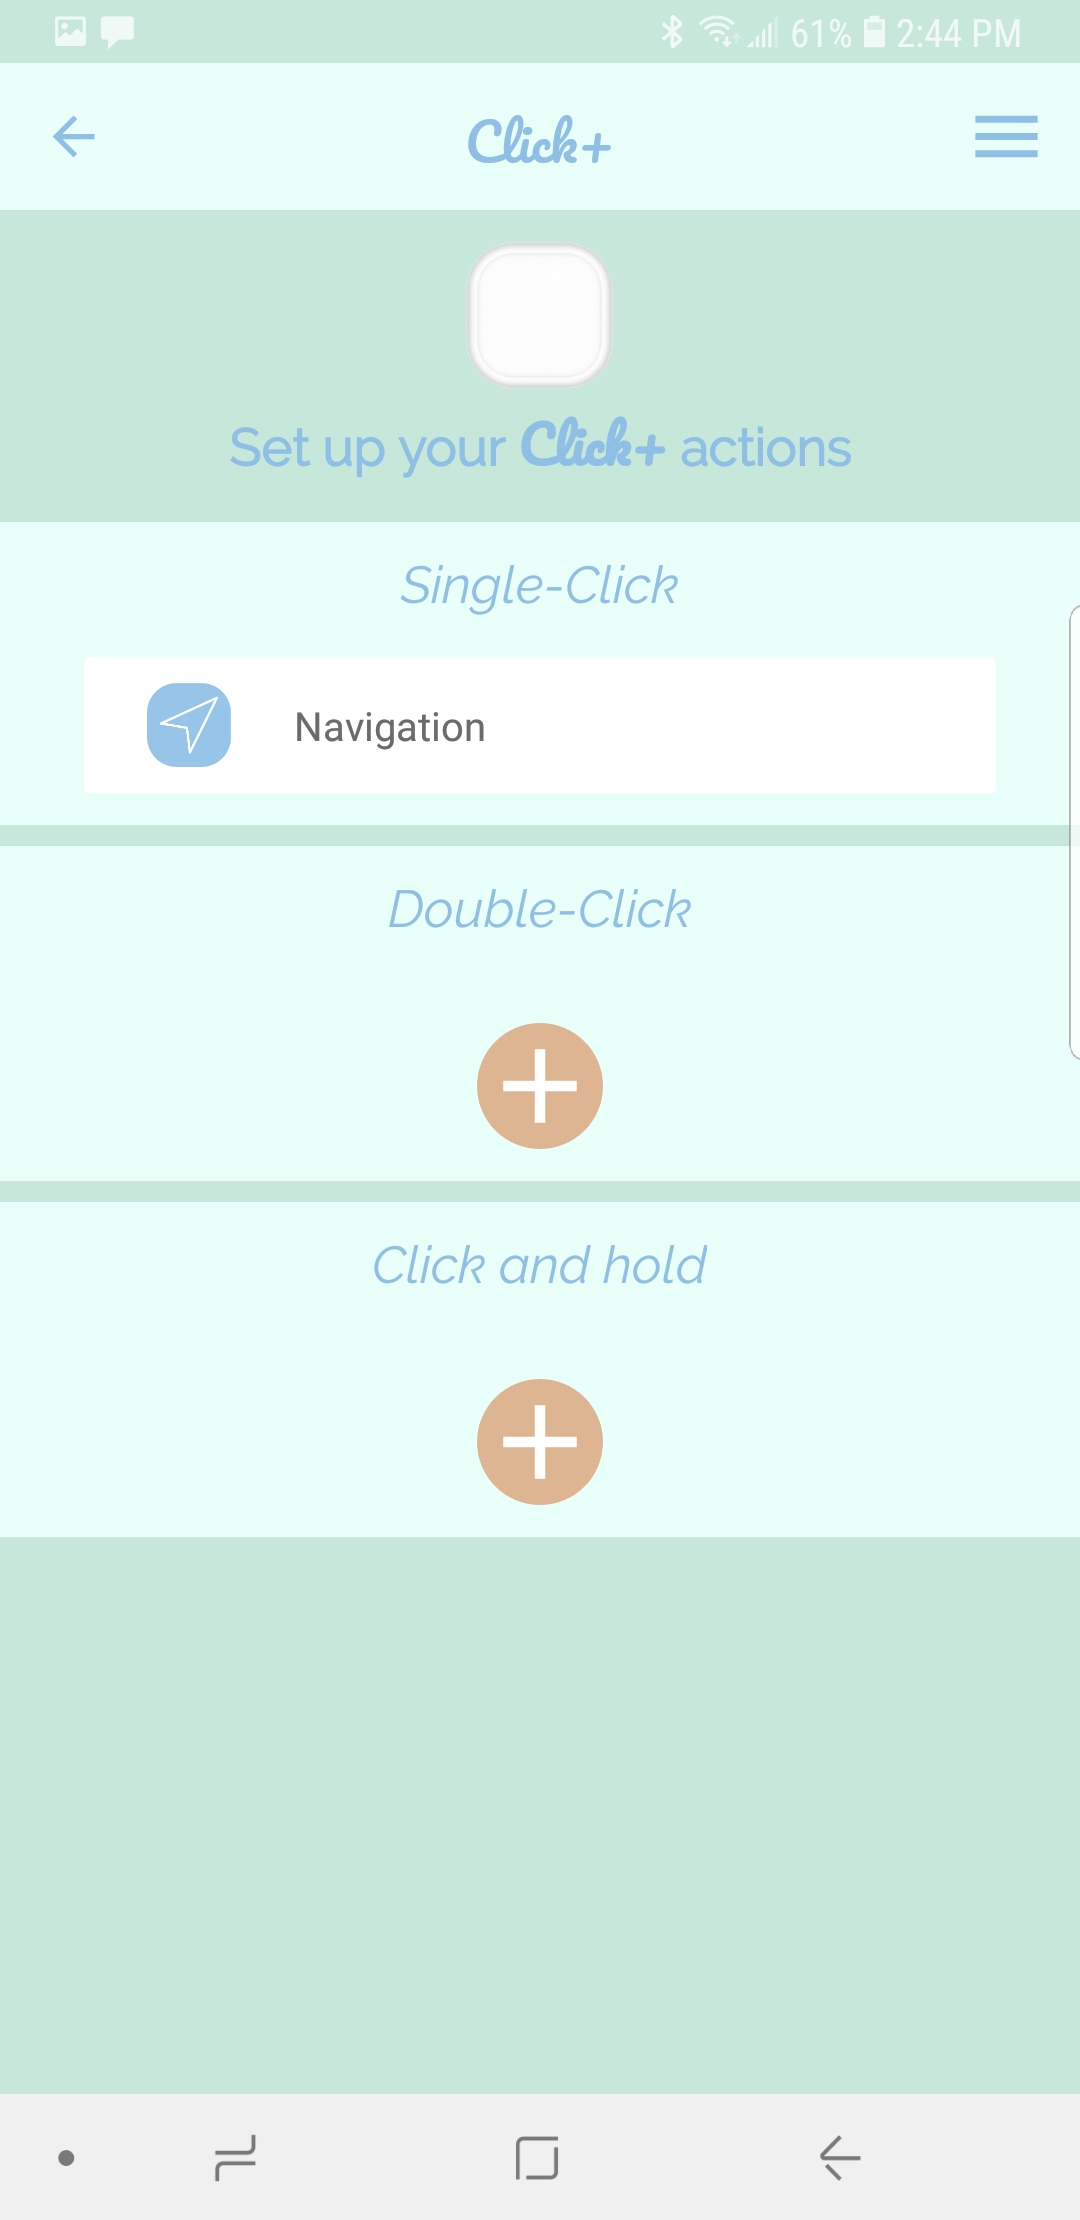
E. Tap SET AS SINGLE-CLICK ACTION and you will be brought back to the action set-up screen.
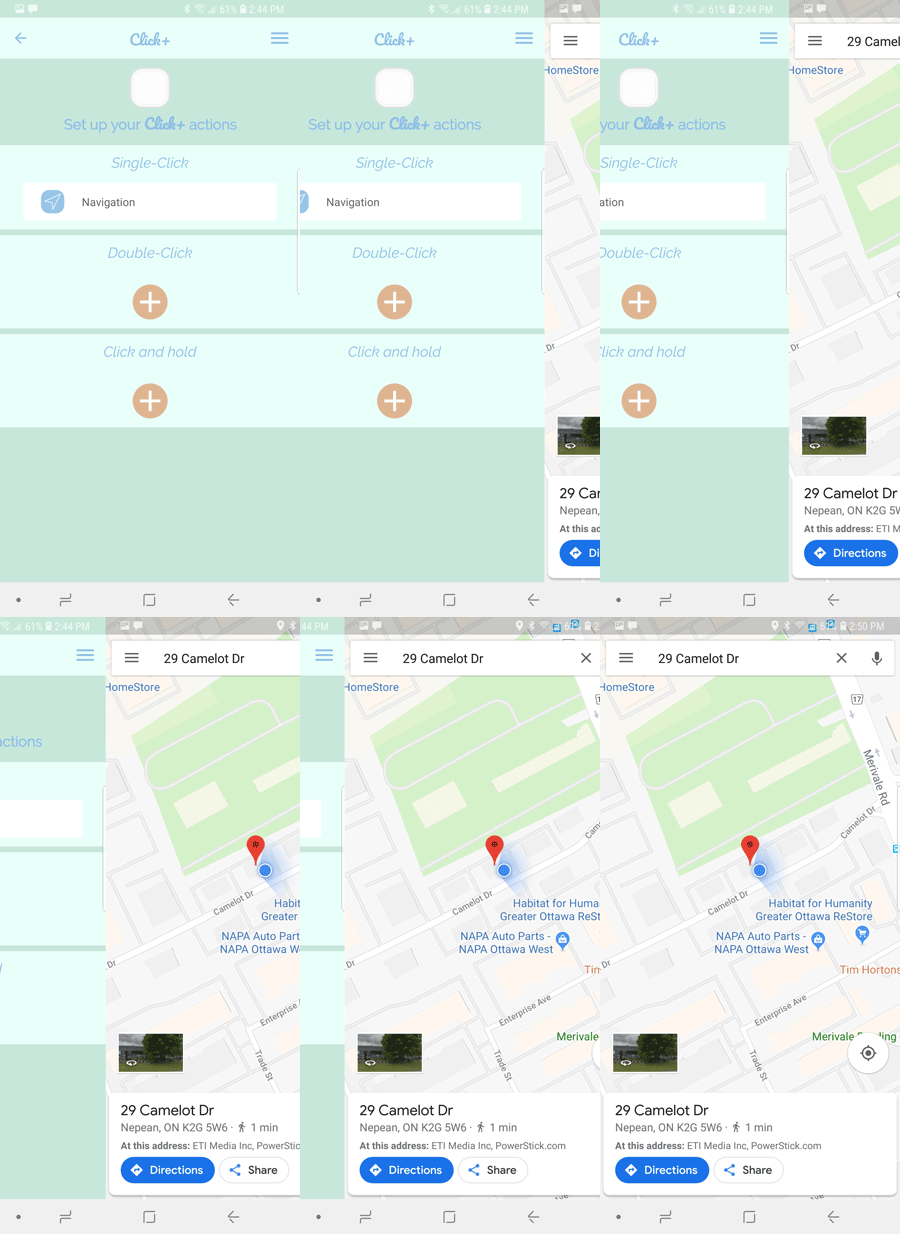
F. Simply press the button on your Click+ and the directions to the chosen location will open in Maps. Note: You must turn on your location services in your phone’s settings to use the Share Location action.

A. Open the app and tap the Click+ whose actions you would like to edit.

B. This brings you to the action set-up screen. Tap on the action you would like to delete.
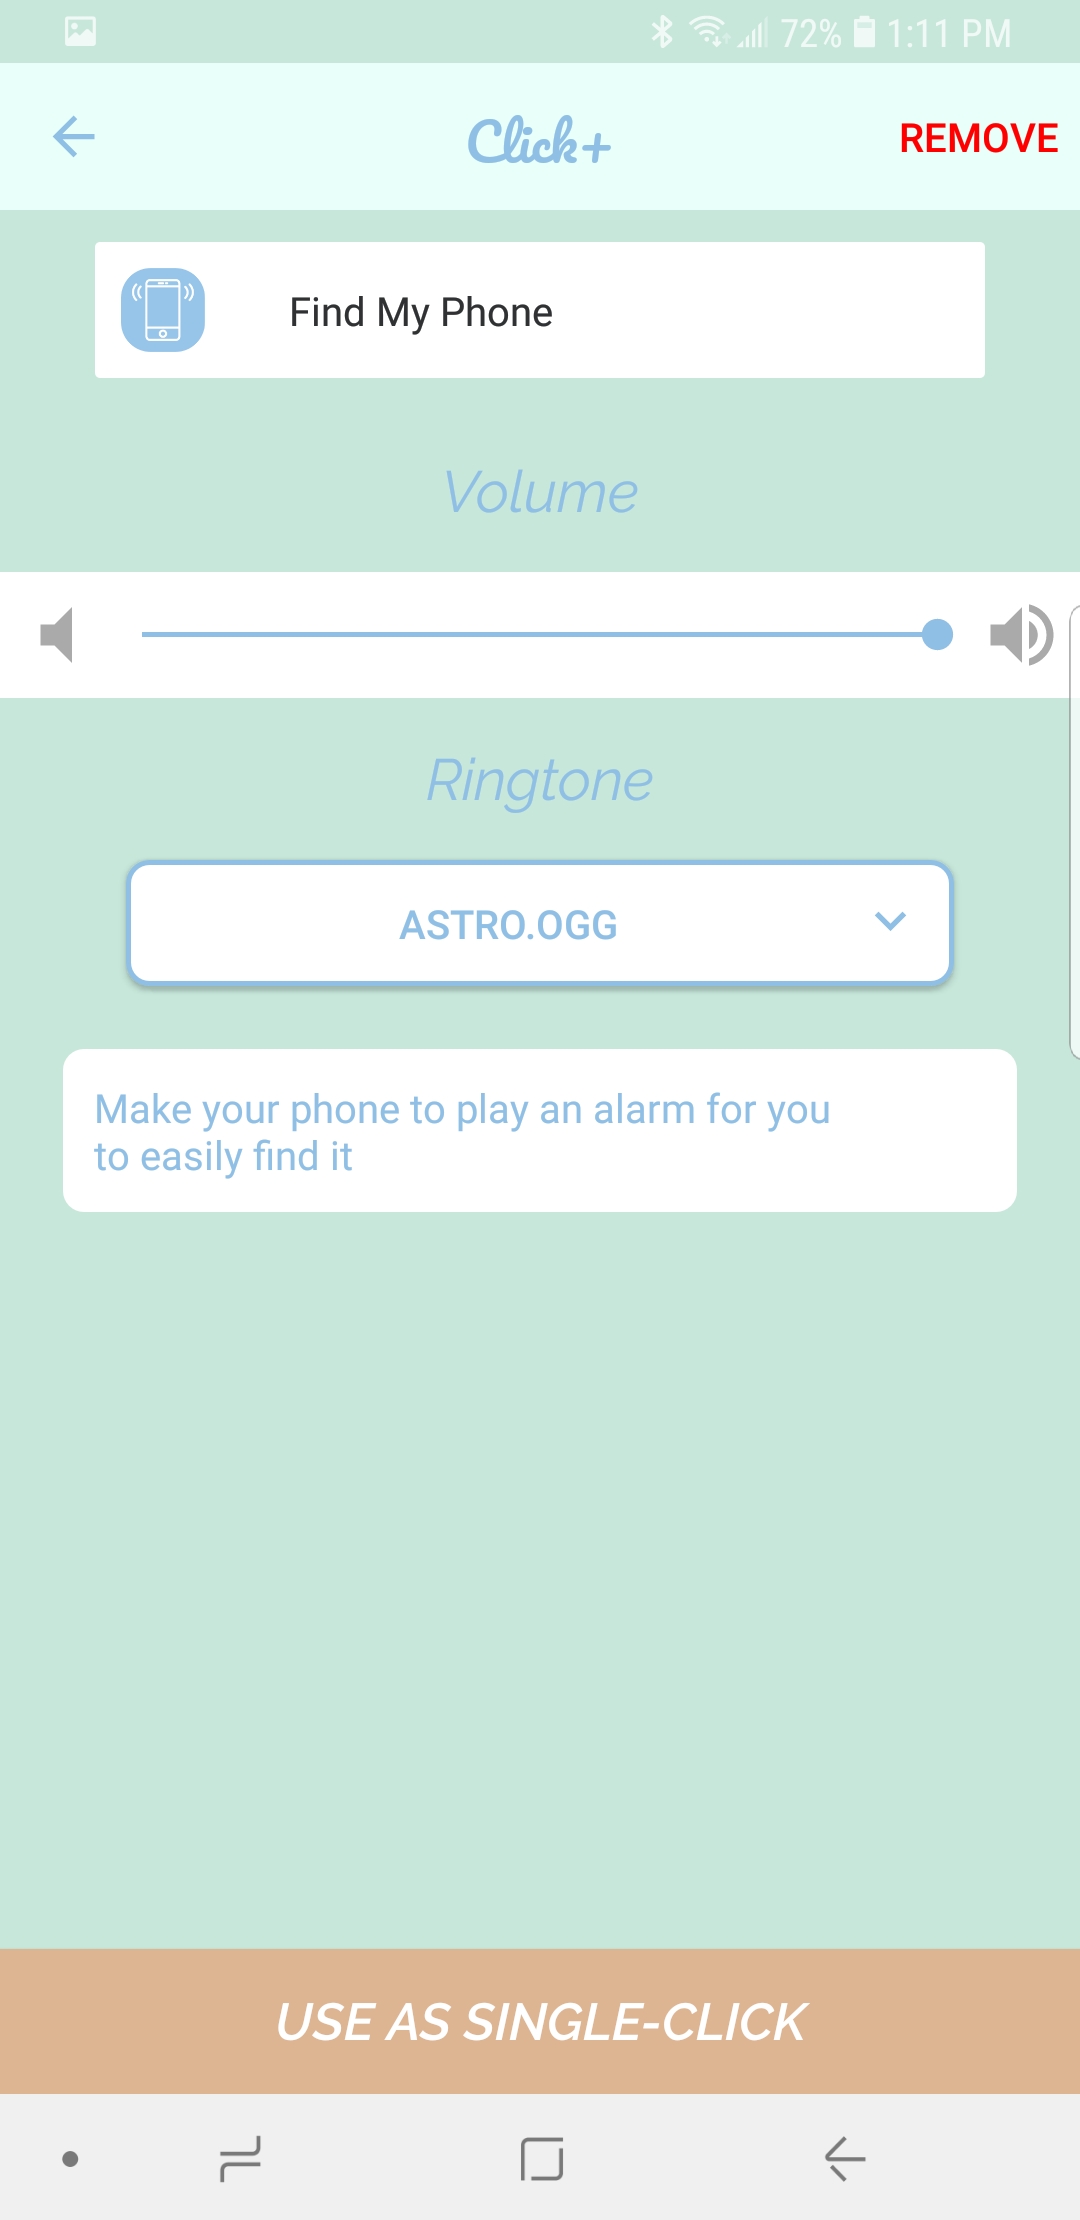
C. This brings you to the settings page for that action. Tap REMOVE in the top right corner.
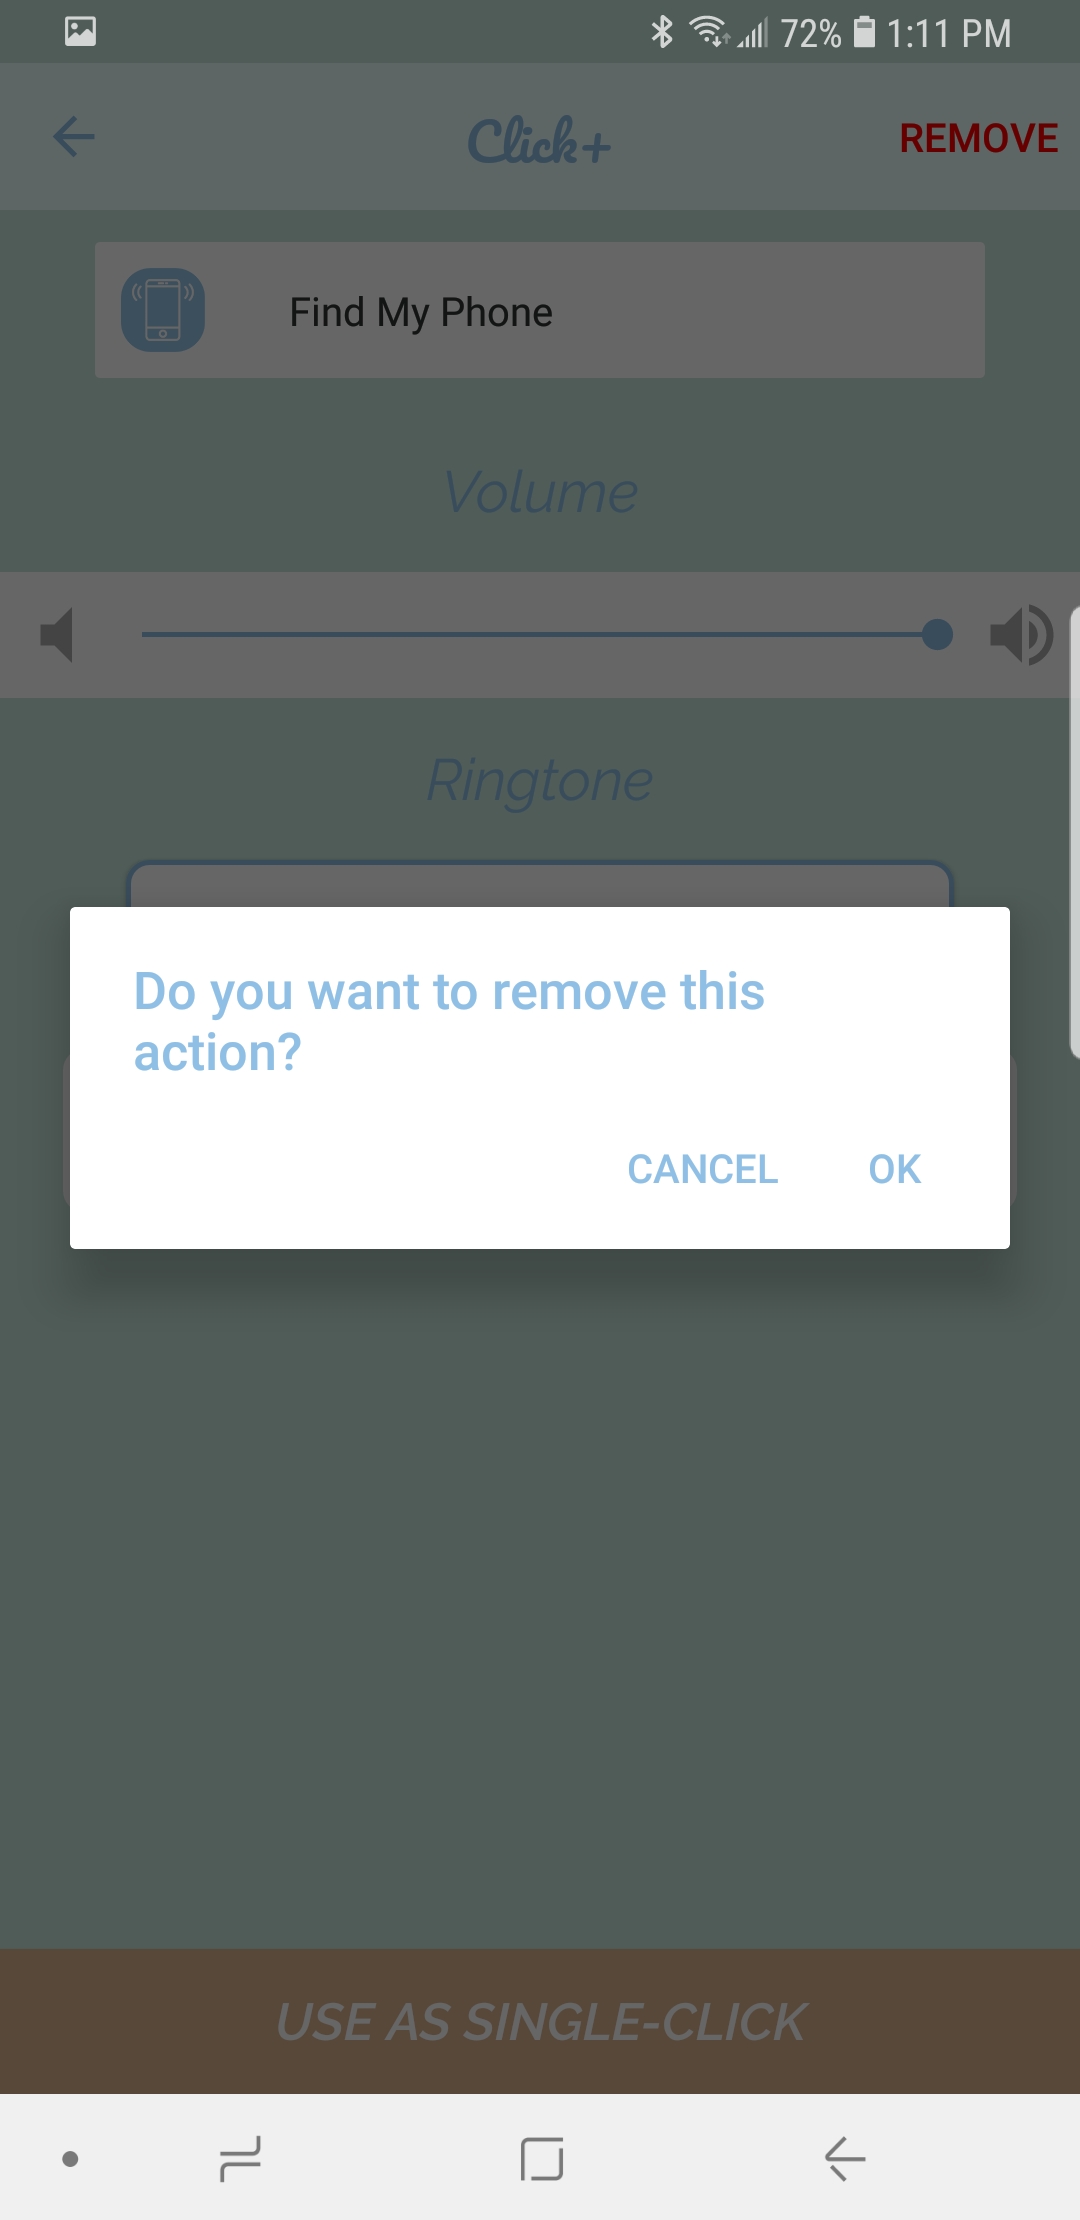
D. A window will pop up asking if you are sure you want to remove this Click+. Tap OK if you are sure.
FAQ
The Click+ is for use up to 30 feet from your phone or tablet.
You can pair a maximum of 4 Click+ smart buttons in total to one device.
Here are a few things to check if your Click+ won’t pair:
- Have you removed the plastic tab blocking the battery?
- Is your operating system up to date?
- Is your Bluetooth on?
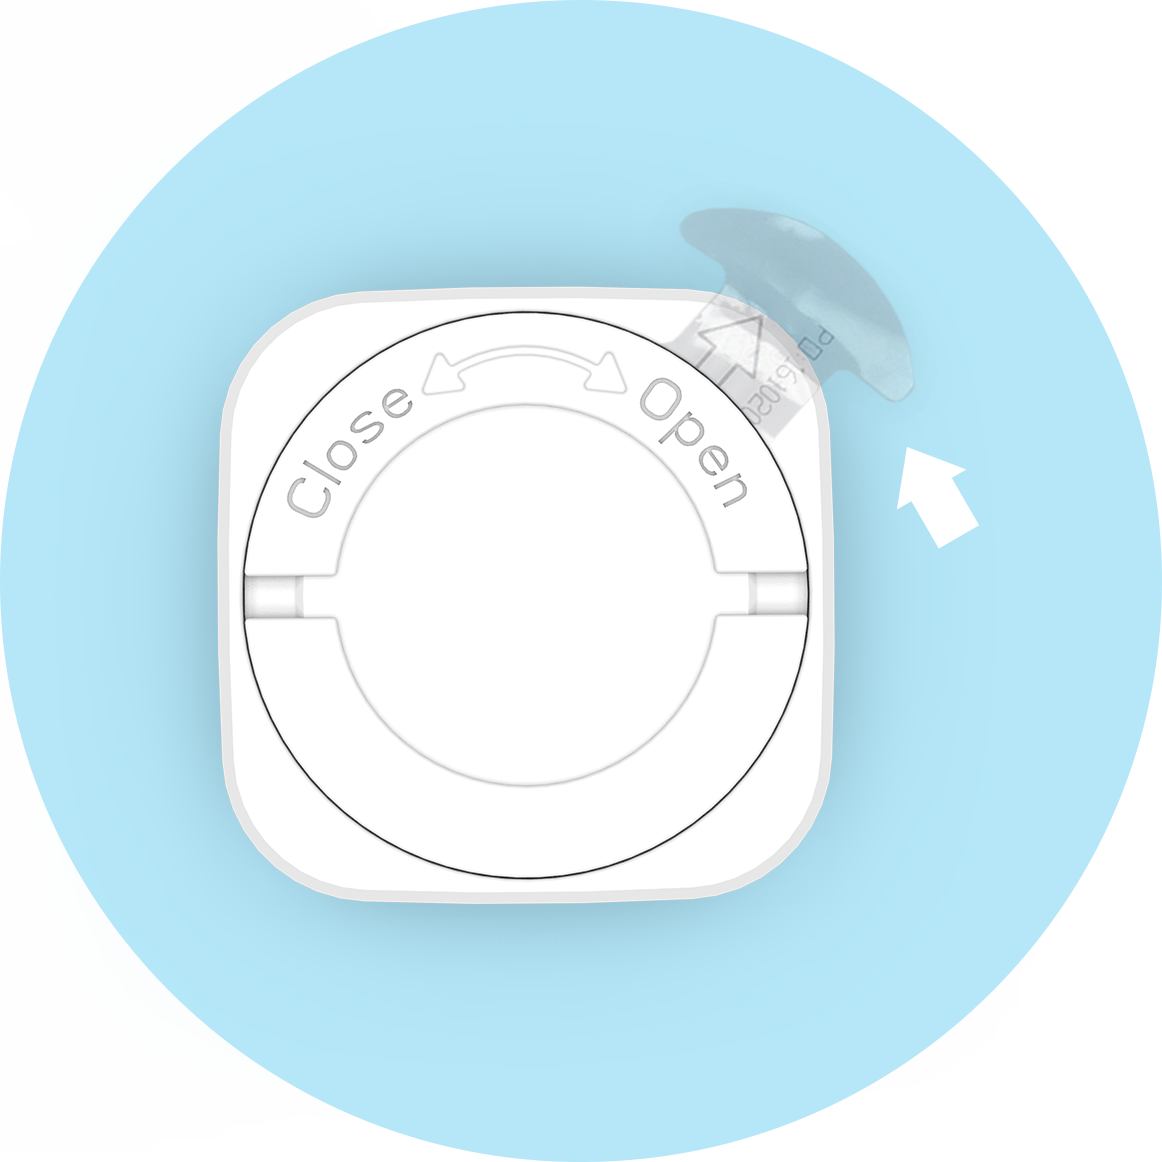
- Flip your Click+ over so you are looking at the bottom side
- You will see a plastic back plate that needs to be removed to place the battery inside
- Put your nail or a small coin in one of the slots beside “close” or “open”
- Turn the plate clockwise to open the Click+
- Replace with CR2032 cell battery
- Place the back plate back on the Click+
- Press and turn counter-clockwise to close the Click+
- Open the Click+
- Remove the battery for 20-30 seconds
- Place the battery back in the unit
- Close the Click+ back up
- Wait for 10 seconds for the battery to connect
To switch your Click+ to a new device:
- Delete your Click+ from the app (Click+ smart buttons can only be paired to one device at a time so you will be unable to pair with the new device if it is still paired with another)
- Download the Click+ app on the new device that you would like your Click+ to be paired with
- Pair your Click+ as usual
If you are experiencing connection issues with your Click+, there are a few things you can do:
Delete the Click+ from the app
• Open the Click+ app
• Tap the Click+ you are having connection issues with
• This will bring you to the action set-up screen for that Beagle, tap the menu button in the top right corner
• Tap REMOVE THIS CLICK+
Rest your Bluetooth connection
• Open your phone or tablet’s Bluetooth settings
• Forget the Click+ device from the list of available devices
• Turn your Bluetooth off for about 30 seconds
• Turn your Bluetooth on again
Reset your Click+
• Open the Click+
• Remove the battery for 20-30 seconds
• Place the battery back in the unit
• Close the Click+ back up
• Wait for 10 seconds for the battery to connect


